
I have been sewing and embroidering for 30 years now and always loved to make beautiful, one-of-a-kind things but I never did any quilting. Strange, right? I admired gorgeous quilts others made though and planned to start quilting.
But for a while, it wasn’t clear to me where to begin until I saw online Fold’NStitch wreaths. I didn’t want to spend weeks on my first-time quilting project and this wreath (or a round table topper) with easy quilt blocks that look difficult actually seemed to be quite a fast and easy quilting project for beginners. So I decided to make it and here is the tutorial.


If you’re open to DIY decorating and have some basic sewing skills you’re sure to enjoy this easy sewing project that’s both fun and stylish. It can’t be done in 30 minutes, I spent 3 hours making the wreath with fabric but the finished product is definitely worth the effort.
This design is easy to tailor for various preferences. You can use it as a round table topper (and a show-stopper) to give your dining table a vivid focal point. Or you can use it as a Christmas wreath – an easy way to add visual interest to a room.
It’s also a good project for developing your sewing skills: lots of stitching, even more cutting (using a rotary cutter or shears), using different fabrics, using fusible stabilizers, lots of pressing, using simple applique techniques, and more. But it’s really fun and it’s coming together quickly for a quilting project – nobody wants another hassle, right? It will teach you also to pay attention to details which are really important in sewing.
What you will need for making Fold and Stitch Wreath
Note: Some of the links on this page are affiliate links. This means I will receive a commission if you order a product through one of my links. I only recommend products I believe in and use myself.
You will need a few supplies (that you may already have on hand if you sew). If you check online you may see a lot of these wreaths made from squares but I decided to use hexagons instead of squares. There is a special pattern for this project. You can buy it here from the original designer Kristine Poor. It’s good to use the pattern because it gives you exact measurements for the wreath and provides exact fabric requirements.
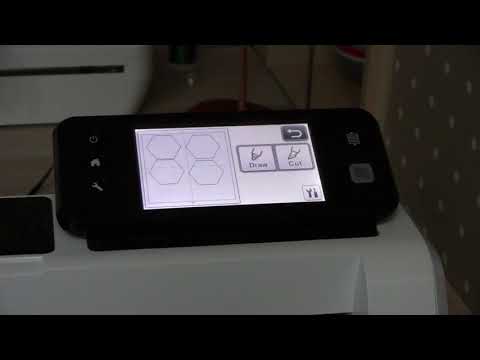
But I didn’t buy the pattern – it’s just 2 hexagons after all and I have this shape in my Brother Scan&cut cutting machine. So I made the pattern myself using my cutting machine: I chose the hexagon shape in the size I liked and cut it from a piece of carton.
Don’t have a home cutting machine? Ask your husband to give you one as a Christmas gift – it’s so useful! You will like it – Cricut, Brother Scan’NCut, or Silhouette. Below is a handy link to Amazon where you can see a large selection of cutting machines. The selection changes often, and new models are frequently appearing in the market.
So, you can buy the pattern or just find 2 hexagon shapes – one bigger and another one ⅝ inch smaller. The main problem is the sewing line – where you can sew 12 hexagon pieces together to make the round shape of the wreath. You can find the line in the pattern they sell on Amazon. But I calculated it myself ( it’s simple).
You will need also double-sided fusible fleece. Bosal has a product that’s made specifically for this project. These pre-cut pieces of double-sided fusible fleece speed up the sewing time a little bit.
But if you are not in a hurry you can cut them yourself (as I did). I bought a few yards of double-sided fusible fleece in Joann when it was on sale (50% off) so I just traced the hexagon template onto fusible fleece and cut 12 pieces with my rotary cutter. For convenience below are the items sold on Amazon:
 Fusible Webbing for Fabric Applique DIY Crafts Supplies")

You will need also 3 different fabrics – one for the top, one for the bottom, and one for the applique. I didn’t use quilting cotton because I didn’t find any cotton in my collection suitable for this project, so I used just garment fabrics in a variety of bright colors. One of them is spandex (sparkling red), left from my daughter’s dancing costume. Another one (rich gold and turquoise) is silk brocade – a very nice textured fabric. Of course, you can change the colors to suit your taste.
Just be sure your colors are coordinated to maintain a sense of balance in your arrangement.


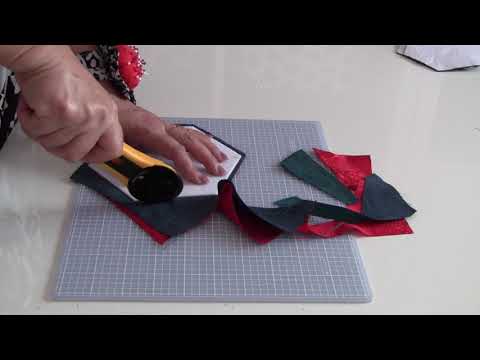
I also used my cutting machine, but if you don’t have one you can cut everything manually with a rotary cutter or shears.
I used also another fusible material for my applique pieces –
Step-by-step tutorial
Step 1.
Cut 12 squares from the fabric you are going to use for the back of the wreath (mine was green). They don’t need to be exact squares, just make sure they are a little bit bigger than your hexagon pattern.
Step 2.
Cut 12 hexagon pieces of double-sided fusible fleece if you didn’t buy them pre-cut.
Step 3.
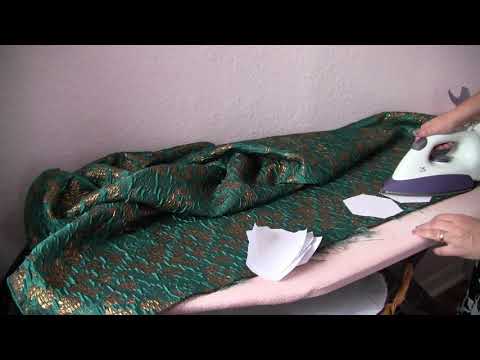
Fuse fusible fleece pieces (hexagons) onto fabric squares by pressing them into place on the wrong side of the fabric. We are using double-sided material and you don’t want your shapes to fuse to your ironing board, right? So use parchment paper to protect your ironing board.
Step 4.
Cut 12 squares from the fabric you are going to use for the top of the wreath (mine was red).


Step 5.
Put these pieces right sides together and pin them for stitching. Sew them together all the way around right along the edge of the fusible fleece. Don’t leave any openings. Trim seam allowances to a quarter of an inch all the way around and then clip the corners diagonally to reduce bulk when turning over.

Step 6.
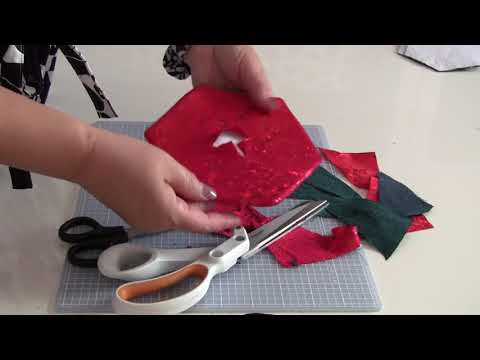
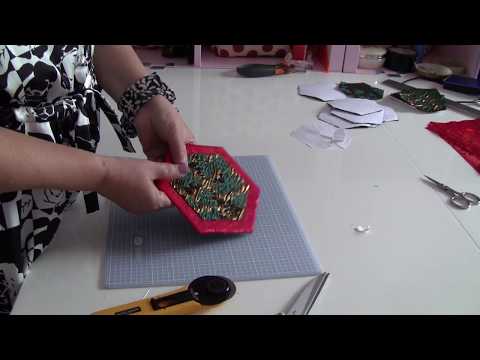
Cut the front pieces in the center (see the video below) to make a hole for turning them over to the right side.
Turn them to the right side and make sure that all your corners look beautiful. The big hole in the center of each piece will be covered by an applique.
Step 7.
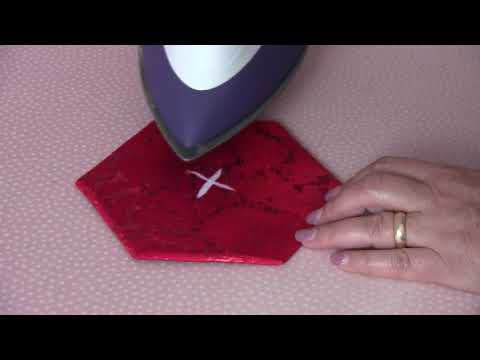
Press cut edges of the fabric. We used double-sided fusible fleece, so as you press these cut edges are getting fused down.
Press all prepared pieces on both sides.
Step 8.
Cut 12 smaller hexagon pieces from Two-Sided Sticky Back Fusible Web – they will be used for our appliques. I used my Brother Scan’NCut cutting machine.
Step 9.
Fuse these hexagon pieces onto the applique fabric and cut 12 pieces for appliques. I used a rotary cutter to do this.
Step 10.
Take out paper from the appliques (so the glued side is now open) and attach them to big hexagons prepared in step 7 closing the turning holes.
Step 11.
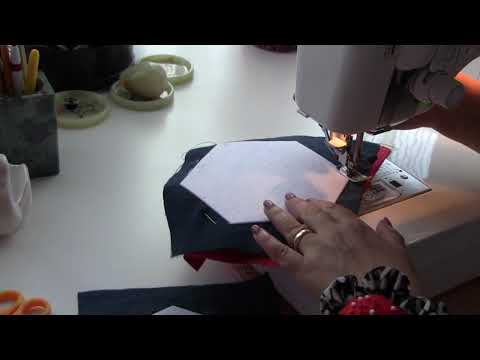
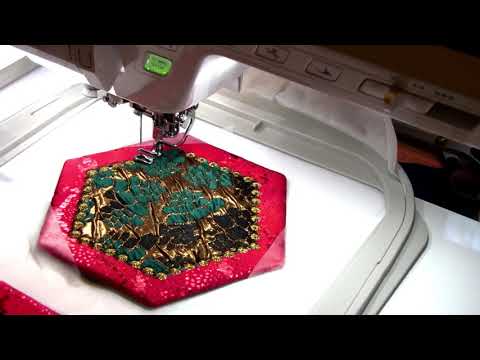
Stitch all the way around the appliques’ edges securing all those loose edges and threads that are poking out of the fabric. I used my Destiny sewing machine to do that.
I didn’t use satin stitch – I used another one with stars. Also, I used gold metallic thread. You can see how quickly and easily the machine has finished the stitching.
Step 12.
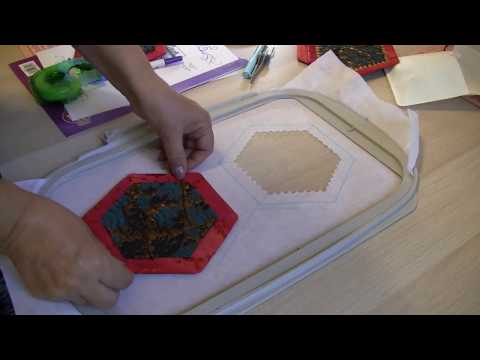
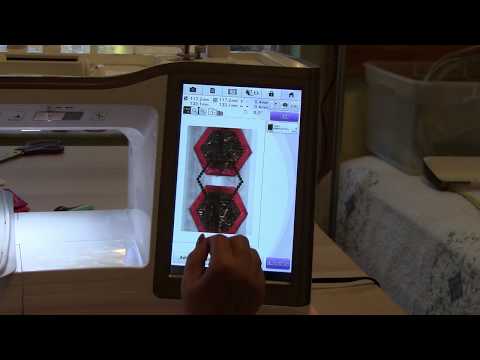
Now we need to sew all the prepared pieces together.
For this first mark the stitching line on every piece. If you bought the kit with the pattern you can use it now.
Pair up the hexagons back to back and stitch along the marked line, repeat 5 more times for the remaining sections. Lengthen the stitch length of your sewing machine because these pieces are bulky now.


Step 13.
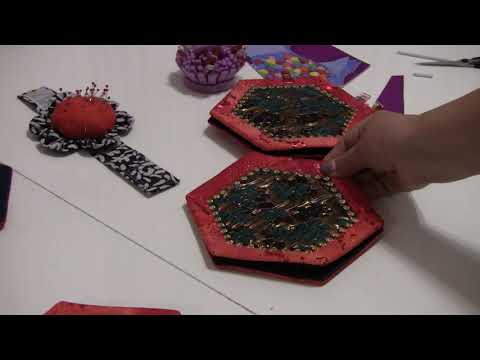
The next step after all the sections are sewn together is using your iron to press open really well the seams we just made.
Step 14.
Sew together (by hand) some corners. Do that all the way around the wreath.


Did you like this tutorial? If you want to save it for future reference and to use it later when you are ready to sew the Fold and Stitch Wreath, pin the image below (or the first image of this guide) to your sewing board on Pinterest and follow me on Pinterest for more tips, tutorials, and inspiration.


Your turn: Share your Fold and Stitch wreath project with us! We’d love to see your image on the Ageberry Facebook page.
latest posts
- Think You Know Zippers? This Installation Guide Might Surprise You
- Why Does Your Seam Ripper Have a Red Ball? Discover Its Purpose!
- Topstitching Troubles? This Simple Trick Will Turn It Around Instantly!
- How to Sew Shirring: A Step-by-Step Guide to Elastic Thread Gathering
- Are Self-Threading Needles Really Useful?
- Amazon Spring Sale: Best Choices
- Elevate Your Prom Look: A Guide to 10 Neckline Choices (2024)
- No Pattern, No Problem: Turn Scraps into a Quilting Masterpiece
- Prom Perfection: A Guide to Choosing the Perfect Dress Color (2024)