
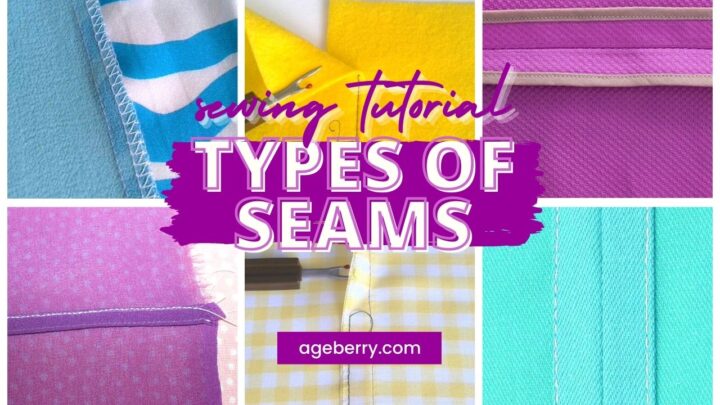
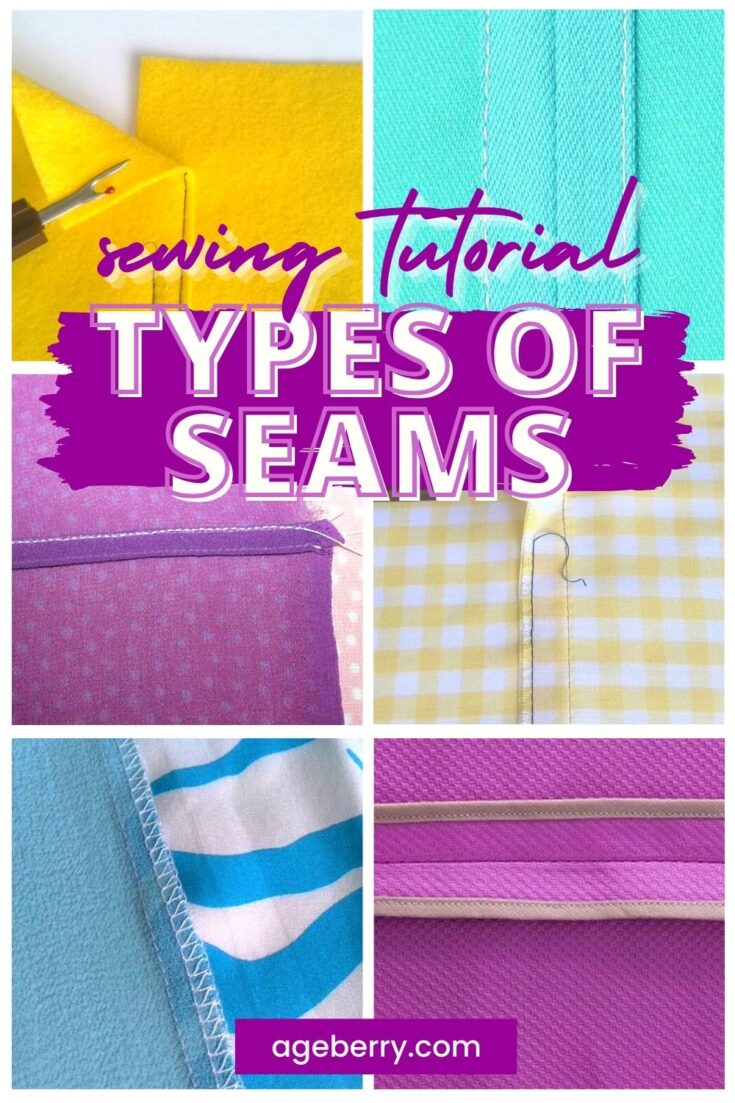
In this sewing tutorial, I want to talk about different types of seams. A simple online search brings us so many types of sewing seams that sometimes it’s confusing to choose seams for a particular project, right? I don’t know about you but as for me I really need to know what is welt seam, lapped seam, princess seam, etc. and how to use them.
A printable version of this article is available in my Etsy shop
So I did some research and here is my tutorial on types of seams. Have in mind, that it’s not an article for a textbook for students, it’s more like a practical guide for a hobby sewist.

Note: Some of the links on this page are affiliate links. This means I will receive a commission if you order a product through one of my links. I only recommend products I believe in and use myself.
First of all, I tried to categorize all the types of seams I use regularly and came up with 5 groups. With the addition of computerized machines, there are so many more options available to seamstresses these days. While I can’t say this list is exhaustive, it is certainly thorough.
- The first group – how the seam is made, the appearance of the seam
Open seam
- Plain seam (Basic seam)
- Welt seam
- Lapped seam, Double Lapped seam
Enclosed seam
- French seam
- Flat felled seam (or Run and Fell seam)
- Slot seam
2. The second group – what is the purpose of the seam?
- Princess seam
- Corner seam
- Decorative seams (Topstitched seam, Double Topstitched seam, Piped seam)
3. The third group – how the seam is finished
- Bound seam (Bias Bound seam)
- Pinked seam
- Clean Finish seam
4. The fourth group – what is the shape of the seam
- Straight seam
- Curved seam
5. The fifth group – position in the garment.
Center back seam, side seam, crotch seam, etc.
As someone who has sewn for most of her adult life (perhaps even longer!), I firmly believe that anyone can sew. Not only is sewing a fun hobby, but it is also a rather practical one too! There are a few foundational things every person who sews will need to learn, and one of the most vital ones is how to sew a seam.
Not only is it crucial to know how to sew seams (after all, you don’t want your creations falling apart) but you also need to be aware of when different types of seams are needed and how to do them. So now I want to explain the different types of stitching seams and why it’s important to know the difference between them.
Seam Definition
Merriam-Webster defines seam as the joining of two pieces (as of cloth or leather) by sewing usually near the edge.
That definition is adequate, sure, but it doesn’t capture the full extent of what the seam is and what it does. At its core, the main (and usual) purpose of a seam is to sew two items together, yes. But it can also do so much more! A seam can ensure the perfect fit, provide a bit of extra material for alterations later on, or even create a decorative pattern that you want others to see.
Why do we need to know the different types of seams?
Those who are just beginning their sewing adventures may make the mistake of thinking seams are just a matter of appearance or personal preference. That’s not the case at all!
It can help to think of seams in terms of clothing. For example, you have the go-to comfy jeans that you wear often. They feel great and they look great. Now imagine you wore that same pair of jeans to an upscale wedding or a fancy fundraising event. Yes, your jeans may still be comfortable, but they are now wildly inappropriate.
The same goes for seams. Although you may feel more comfortable or more familiar with one kind of seam, you can’t always reach for that exact one. So, when you decide what seam to use for your project, always make sure that it’s appropriate for the fabric you have chosen, consider also the function of the item you are going to sew and the sewing tools and notions you have to use to professionally finish your project.
The Problem with Puckered Seams
Have you ever had your machine humming along when all of a sudden your fabric starts bunching and gathering together as it sews? This is called a puckered seam and it is a dead giveaway that the fabric was not sewn together properly.
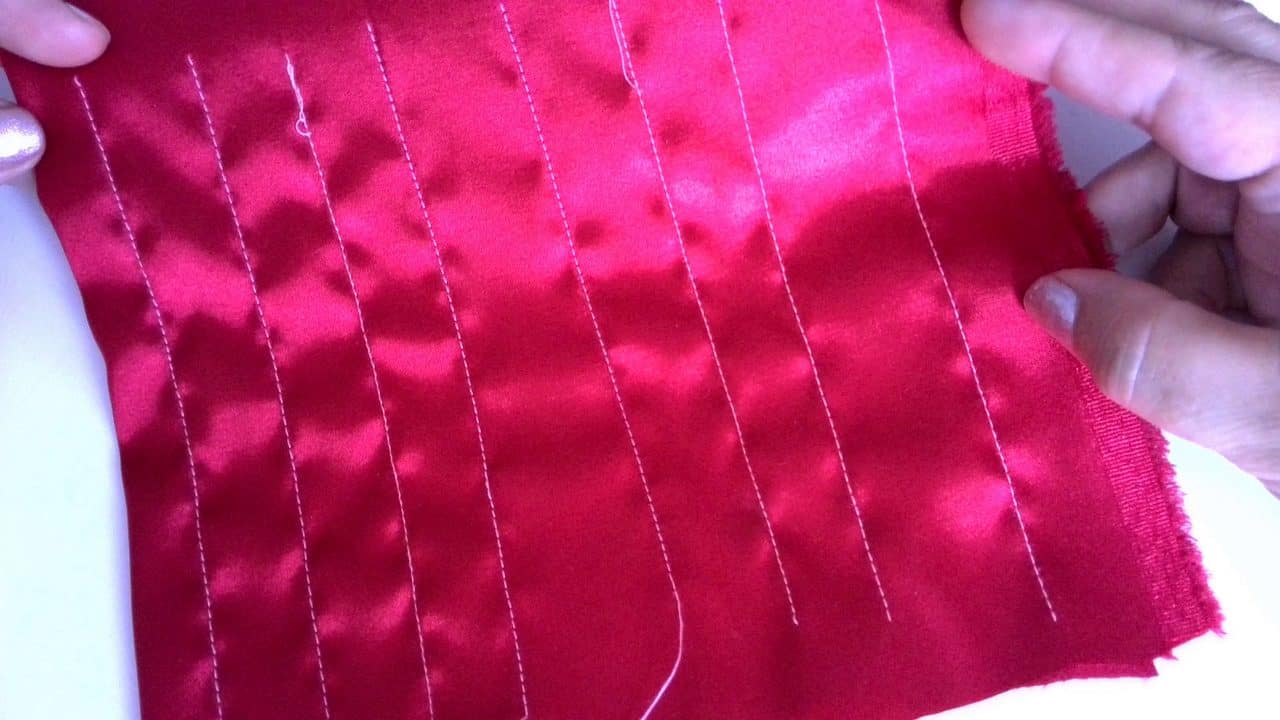

Of course, we want to avoid this at all costs. Another reason why it’s important for sewing enthusiasts to be familiar with various types of seams is using the incorrect one can produce a puckered seam. There are many other reasons why this unsightly seam may occur, including the type of fabric, the wrong thread, or not enough tension being created as you sew to name a few, but ensuring you are using the correct type of stitch can certainly only help.
In short, a puckered seam is a clear indication of something not going quite right, and taking a look at the type of seam (and its length) is an excellent place to start when rectifying the situation.
If you are serious about avoiding puckered seams (and you should be), I’ve put together a course helping you identify and fix the reasons for seam puckering.
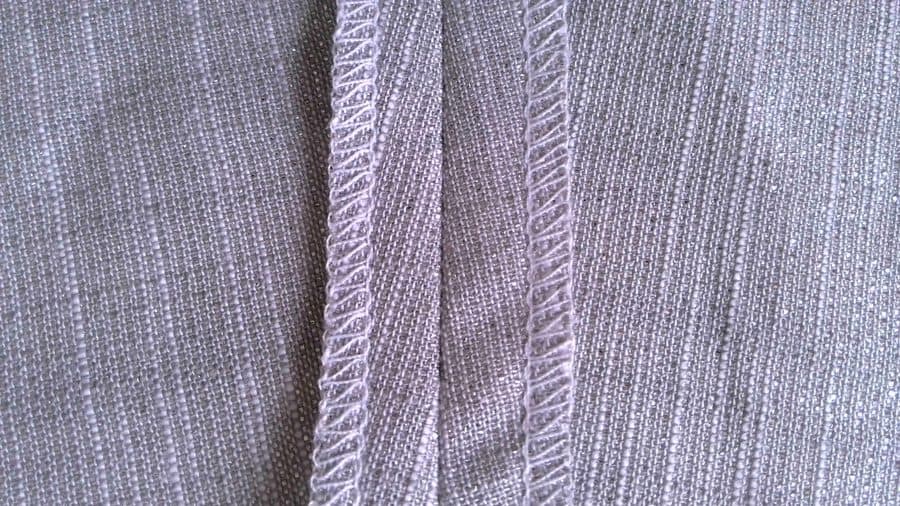
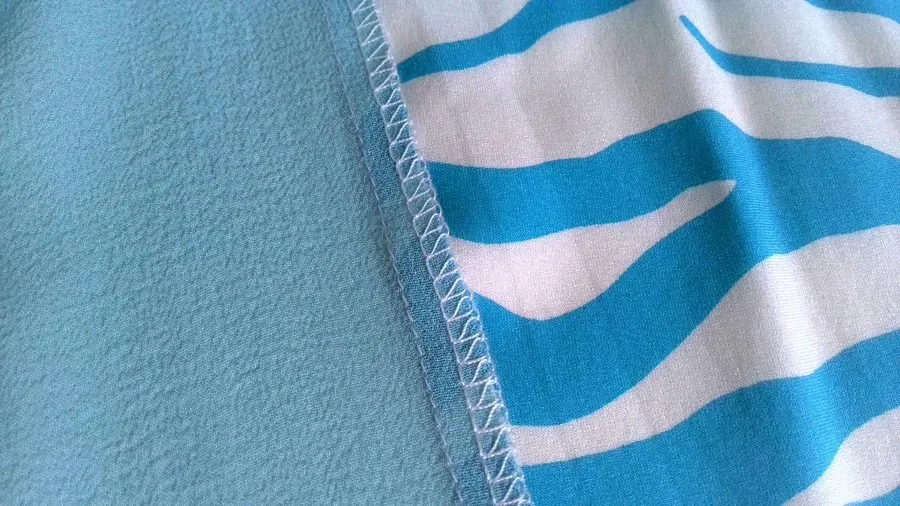
Open Seam
Open seams are one of the most common types of sewing seams. With open seams, the two pieces of fabric are joined together in a way that leaves a bit of the allowance visible.
The real advantage of open seams is that they give you a tiny bit of extra fabric in case an alternation is needed for the project.
It’s important to make sure the edges of the fabric are serged or finished with an open seam or the fabric may fray and unravel.
The most used open seams are PLAIN SEAM, WELT SEAM, AND LAPPED SEAM.
Plain Seam (AKA Basic Seam or Superimposed Seam?)
To make this type of seam, simply place the two pieces of fabric together with the right sides facing each other. The seam allowances of the plain seams vary from ¼ “ to ⅝” most of the time. The plain seam can be pressed open flat or closed.

I am always wondering about the term “superimposed seam”. I couldn’t find a clear definition of it. To me, all seams are superimposed because, in seams, one piece of fabric is placed over another, and then stitching is done. So I don’t see the necessity to use this term – let’s leave it to textile engineers.
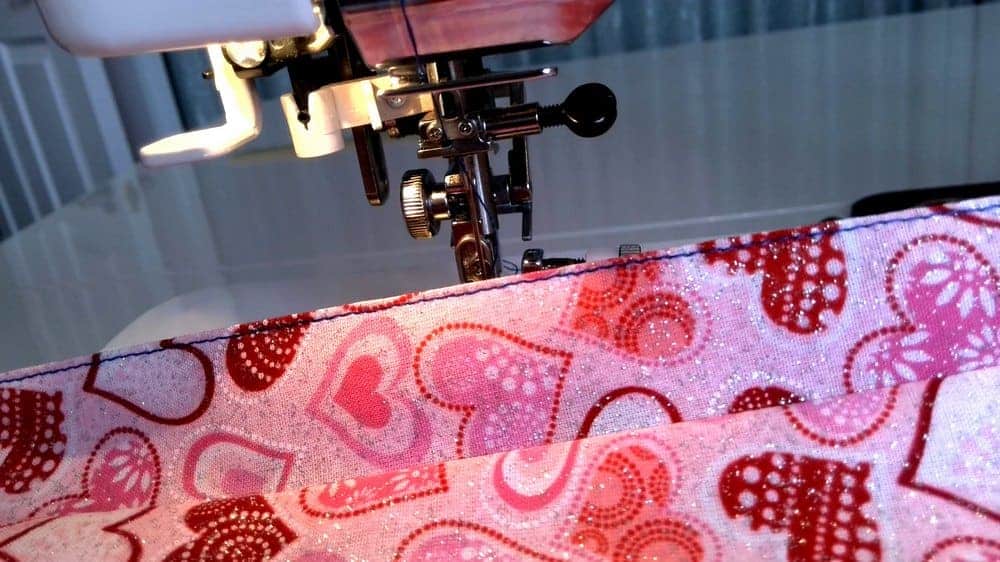
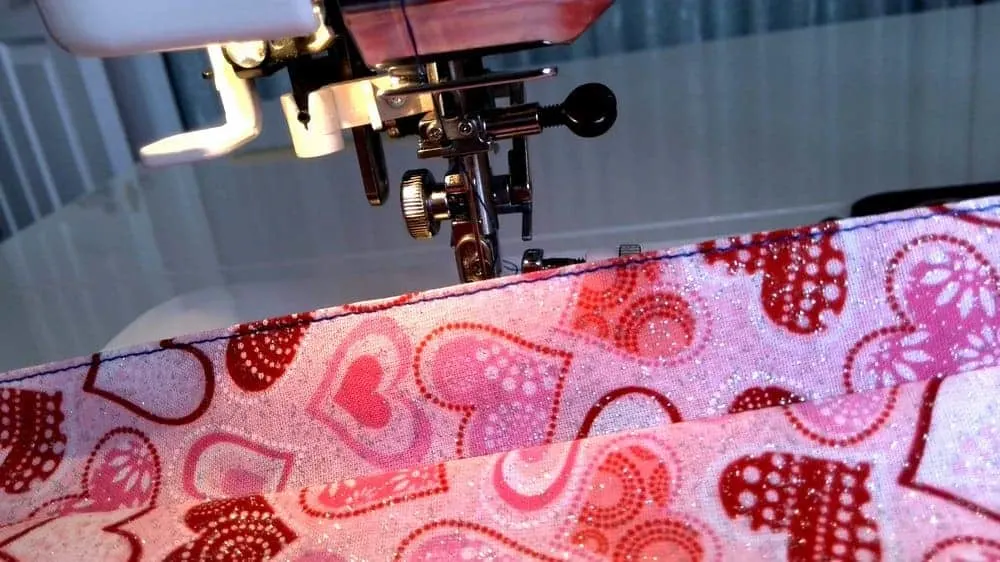
Welt Seam
A welt seam starts out with the basic seam from above. Rather than press the seam allowances open, however, you will press both of them to the same side. Then, flip the fabric over and make a stitch down the length so that all three layers of fabric are stitched together.
This type of seam can be decorative. It’s also great for heavier fabrics or fabrics that may fray easily. I don’t use the welt seam often. But if you are making lots of outdoor stuff you may need to use it often.

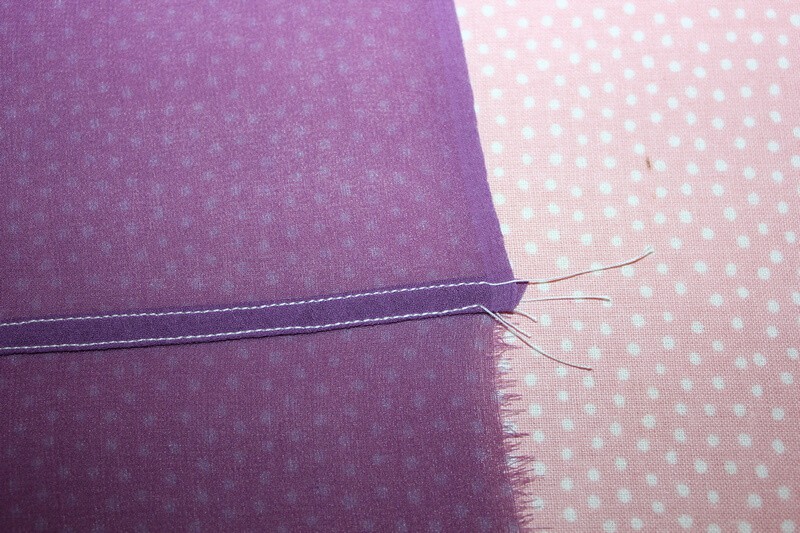
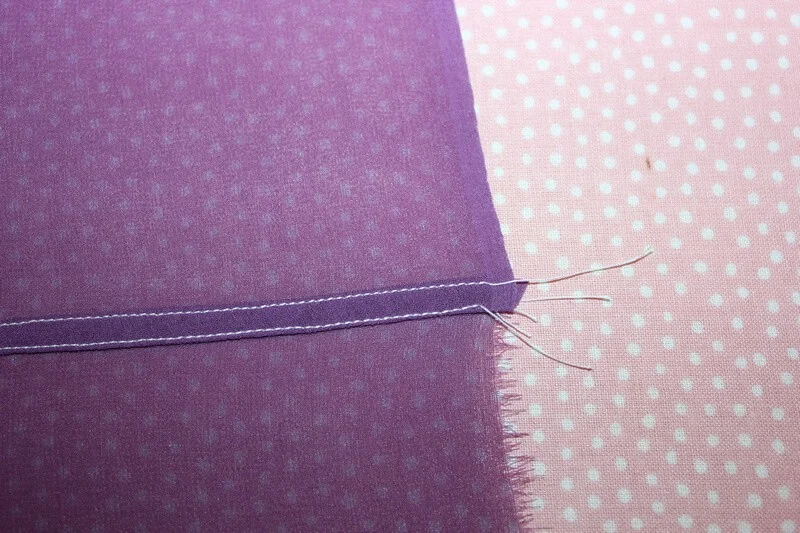
Lapped Seam
A lapped seam is a seam often used on leather, vinyl, suede, fleece, and felt – bulky fabrics that DON’T FRAY. To make a lapped seam place one piece of fabric over the other with overlap and topstitch in place. The main feature of the lapped seam is that the two pieces of fabric or leather are placed in opposite directions. It’s used to reduce bulk in seams on heavyweight fabrics (that don’t fray).

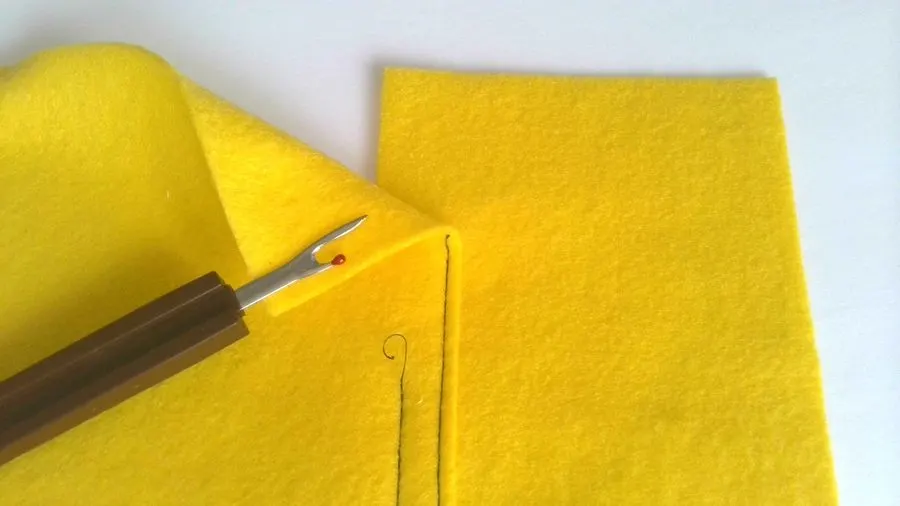
You can also make this into a double-lapped seam by making another stitch between the lapped seam and the fabric edge.
You can read more about it in this tutorial Perfect Lapped Seam Sewing Tutorial on The creative curator blog. https://www.thecreativecurator.com/lapped-seam-tutorial/
Enclosed Seam
The next group of common types of seams is enclosed seams. An enclosed seam, true to its name, keeps the fabric allowance enclosed rather than open. There are a variety of techniques to do this, which you’ll see below.
The important thing to know about the enclosed seams is that they take longer to finish than open seams. However, this type of seams is excellent for those who have sensitive skin (like children), or for clothing that will be in sensitive areas such as lingerie. The enclosed type of seams also works well for light, delicate materials like silk and organza.
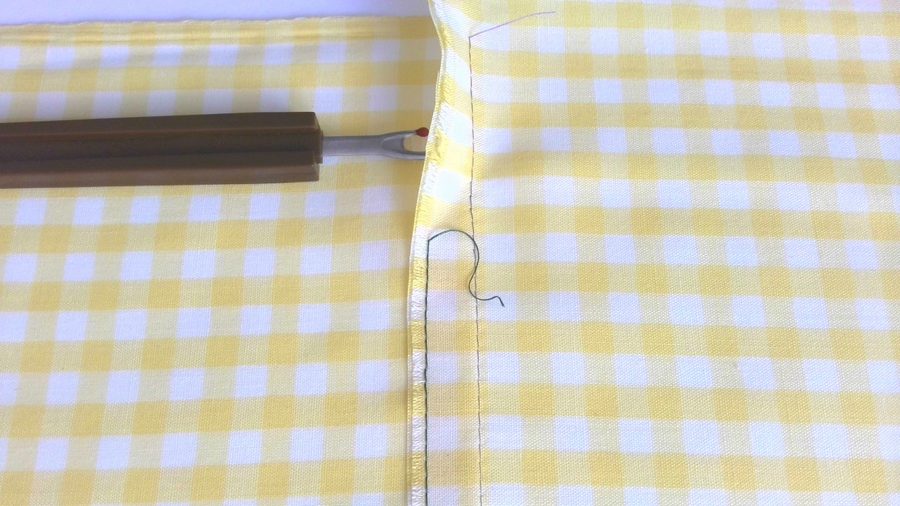
French Seam
A French seam will give your delicate fabrics a nice, neat finish. I always use French seams for my silk chiffon and organza garments. Actually, I like them on any lightweight and medium-weight silk. And recently I used French seams to sew 100% silk pillowcases.
You can find many good online tutorials on how to sew French seams. Nevertheless, it seems to me that some small but important details are always missing. So I made my own tutorial showing you how to sew a French seam in five simple steps.
Flat Felled Seam (AKA Run and Fell Seam)
A flat felled seam is commonly used on tough fabrics such as denim because they are very strong and durable. You can use a flat felled seam when sewing bedding, sportswear, and equipment, men’s shirts, special work clothes, jeans, skirts, trousers, clothes that need to be washed very often, etc.
But flat-felled seams can be decorative also. And they can be used on lightweight silk fabric.
A distinctive feature of the flat felled seam is that two lines are visible on one side of the seam, and only one line on the other.
I like to use them even on chiffon and organza (together with French seams).
If you want to know how to sew the flat felled seam look no further! Here’s my detailed tutorial on how to sew a flat felled seam.
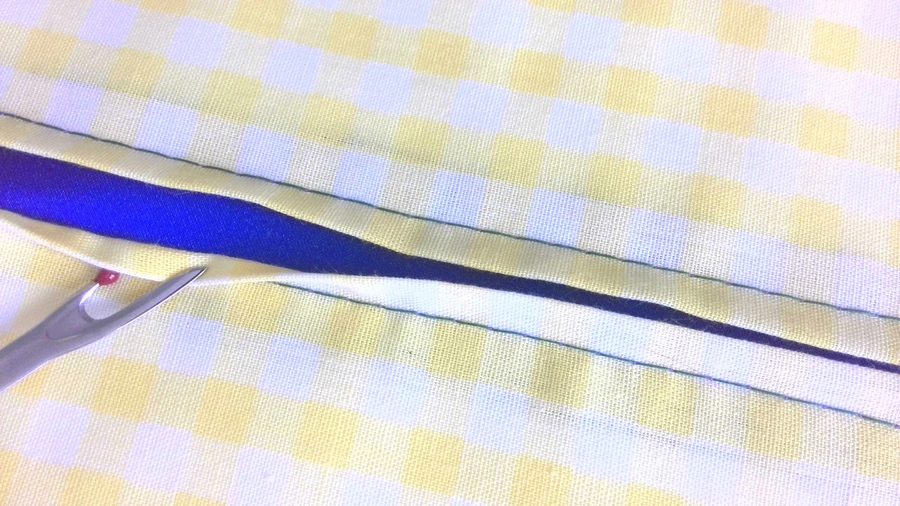
Slot Seam
The slot seam is a decorative type of seam that is popular for garments. It’s a fun and relatively easy way to add a pop of color to your sewing projects. The two pieces of fabric are joined together in a way that a “slot” of a different fabric appears in between them.
To sew a slot seam, place two pieces of finished fabrics on top of each other with the right sides facing in. Then sew with a basting stitch, leaving your seam allowance. Press the seam open.
You’ll need a third piece of fabric for this type of stitch. The length should be the same as the other two pieces, but the width will be less—typically around 2”. Take this strip of fabric and place it so the center of its length lies on top of the center of the pressed open fabric.
Stitch down both sides of the open seam to attach it to the strip of fabric. Then remove your basting stitch so that the strip of the fabric peeks through as the fabric “slot” opens.
Check out this great video on how to sew a slot seam (from Professor Pincushion) at this link https://youtu.be/EgxyvbJ5vDs.

The second group of seams is categorized depending on what’s the purpose of a seam.
Seams often are great multitaskers. These types of seams do more than simply join two pieces of fabric together. They can help shape your garments or provide visual interest. Here are a few examples.
Princess Seam
If you’ve ever sewn a garment with curves, you know it’s quite different than a garment with straight lines. You simply can’t use the same type of seams on a fitted dress as you would with an A-line skirt.
The princess seam is the answer to how to join two pieces of fabric for areas like the bust without that dreaded puckering I talked about earlier. Yes, you can accomplish something similar with darts, but the princess seam may feel smoother and less boxy, depending on the woman’s shape.
Princess seams are created by sewing an open seam, then creating snips in the fabric allowance to give it more flex.
I use Princess seams a lot in my garments. For example, in this coat


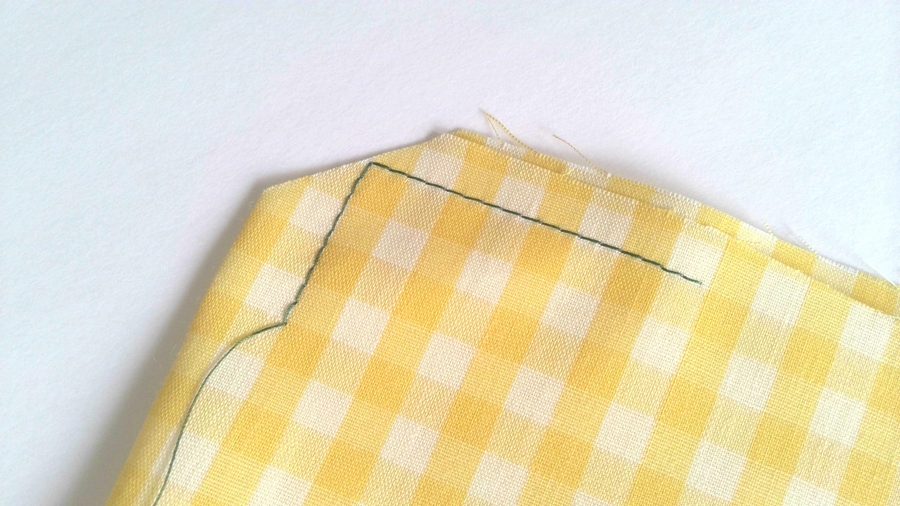
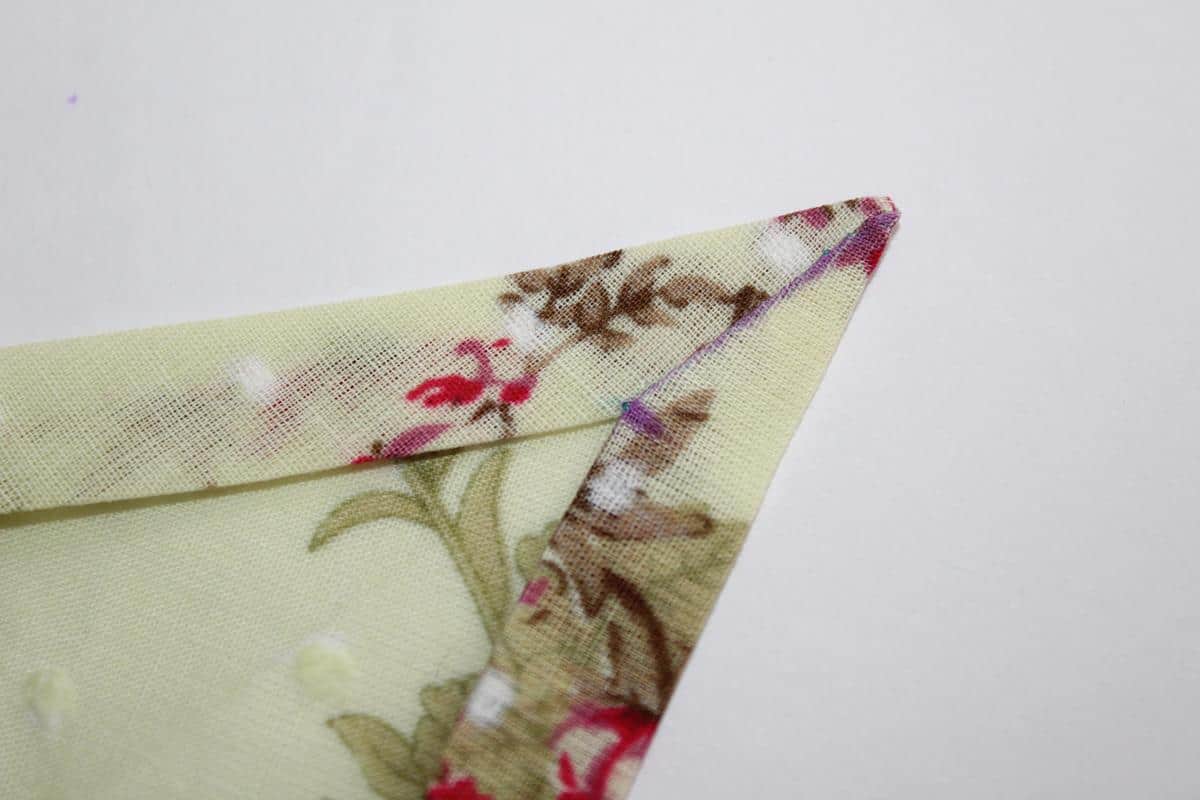
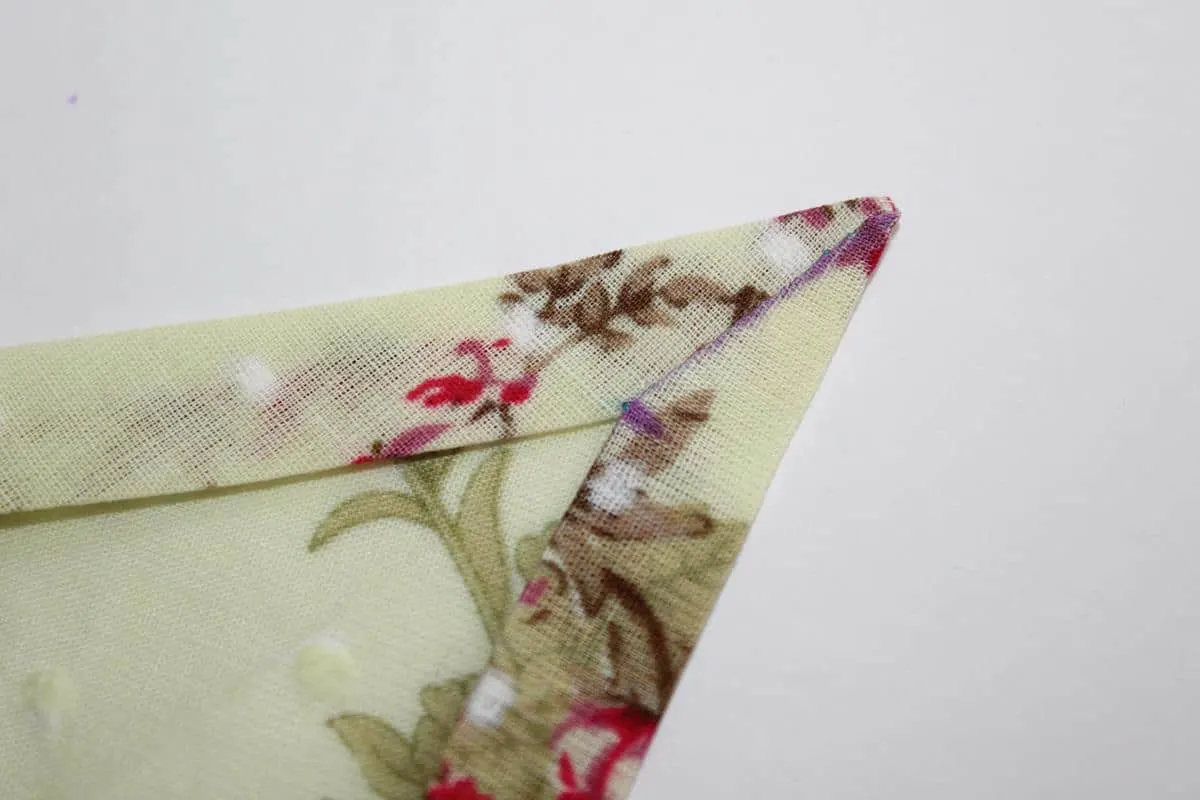
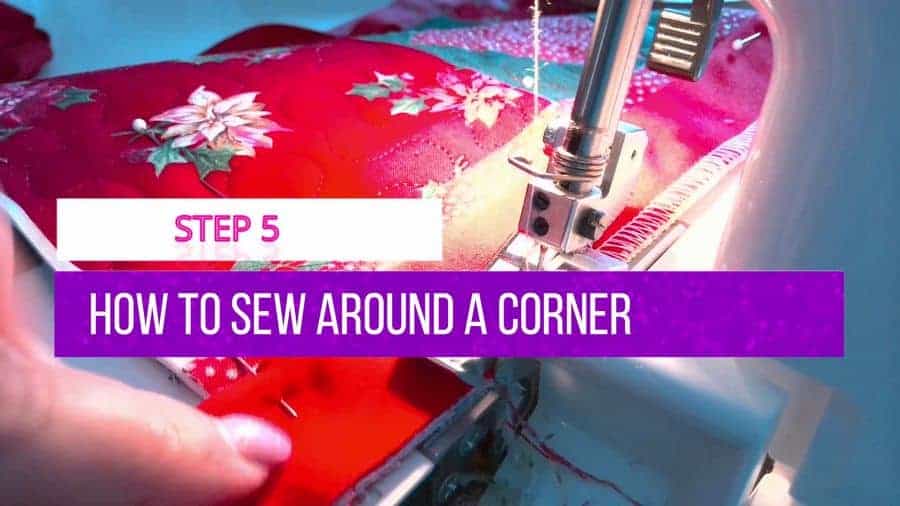
Corner Seam
The corner seams are just that – seams sewn around a corner (straight, acute, or obtuse). When do we use them? When we sew collars, cuffs, front facings, pillows, and pillowcases, etc. You will need to know some small details to sew the perfect corners.
For example, you have to cut seam allowances around the corner correctly to be able to turn the corner to the right side without puckering. You should cut very close to stitches.

I have an interesting tutorial on sewing acute corners at this link https://ageberrycom.bigscoots-staging.com/how-to-easily-finish-outside-corners-especially-acute/
There is also a big problem in sewing a quilt binding around the corners. I have a solution to this problem also – check my video tutorial at this link https://ageberrycom.bigscoots-staging.com/making-quilt-binding/

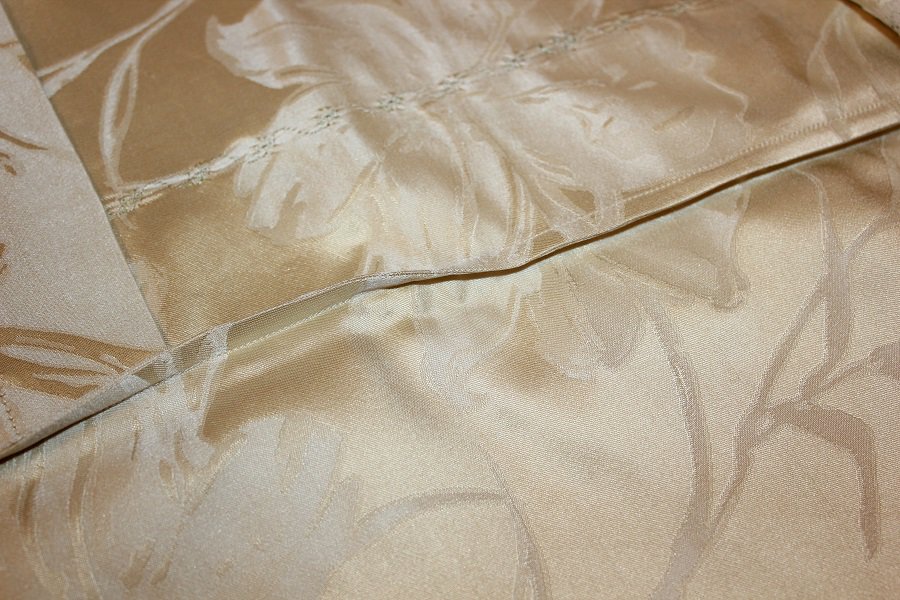
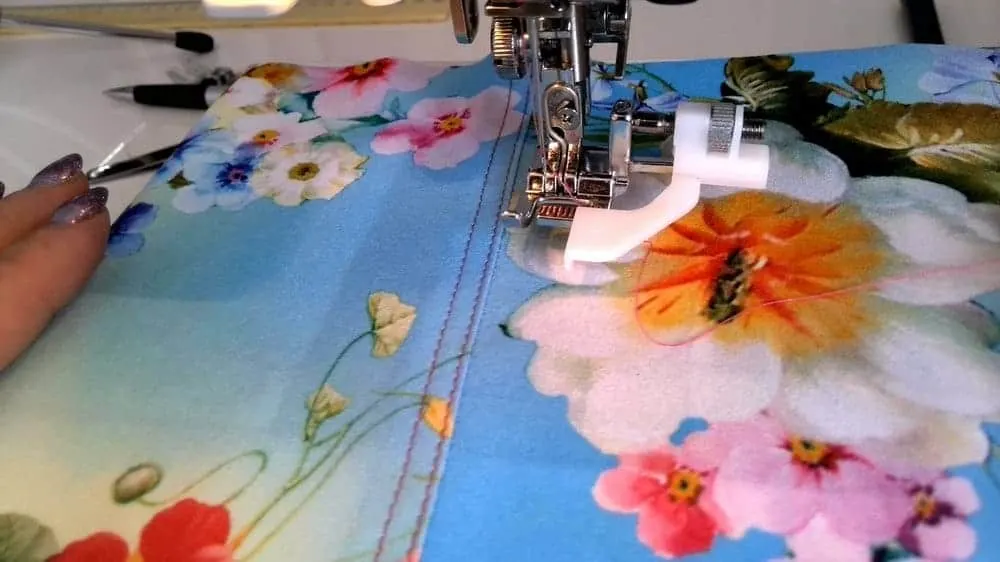
Decorative Seams
Decorative seams are a type of seams that do just what they sound like: add visual interest to your project. There are many kinds of decorative seams, some of which we’ve also discussed above. A few additional decorative seams include:
- Topstitched seam
- Double topstitched seam
- Piped seam
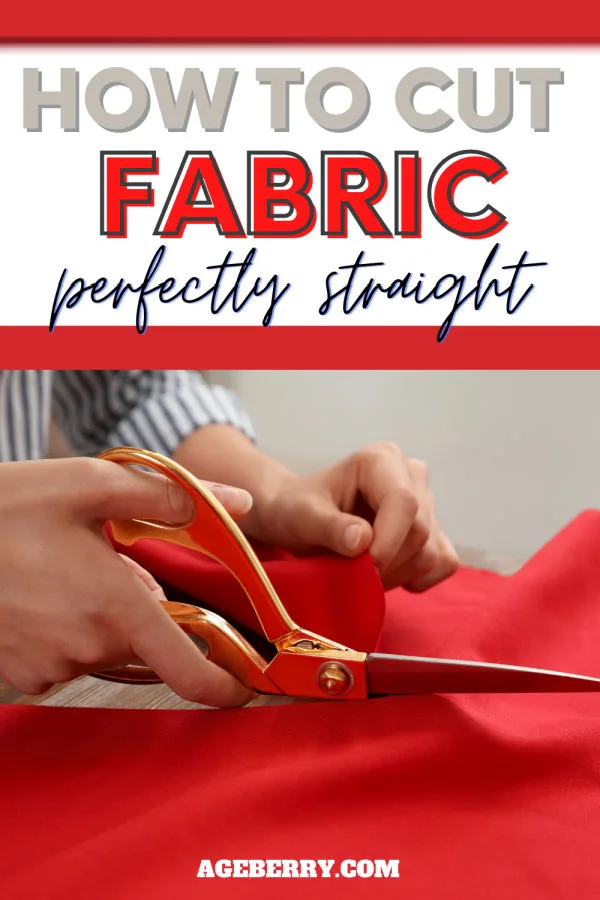
Topstitched seam is a kind of decorative seam used to professionally finish your project, it’s sewn on the right side of an item and meant to be noticeable. The main problem with topstitched seams is sewing them STRAIGHT. I also have a solution to this – check out my tutorial “How to sew straight”.
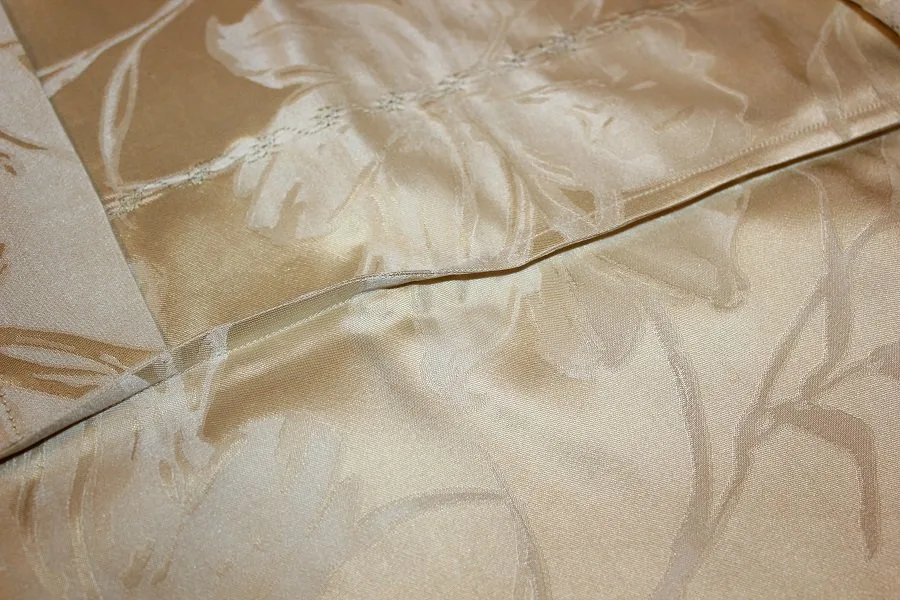
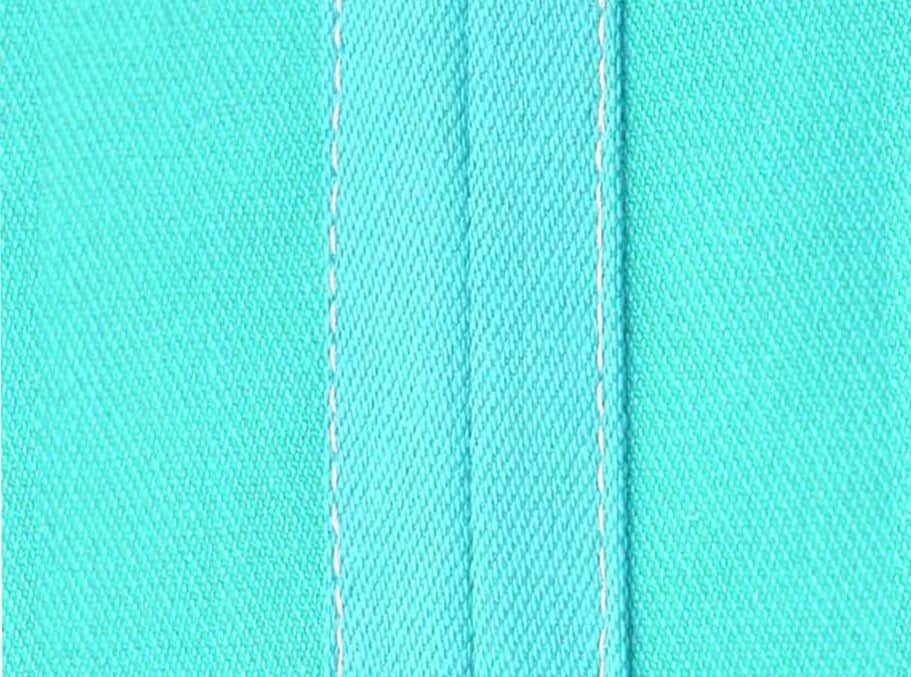
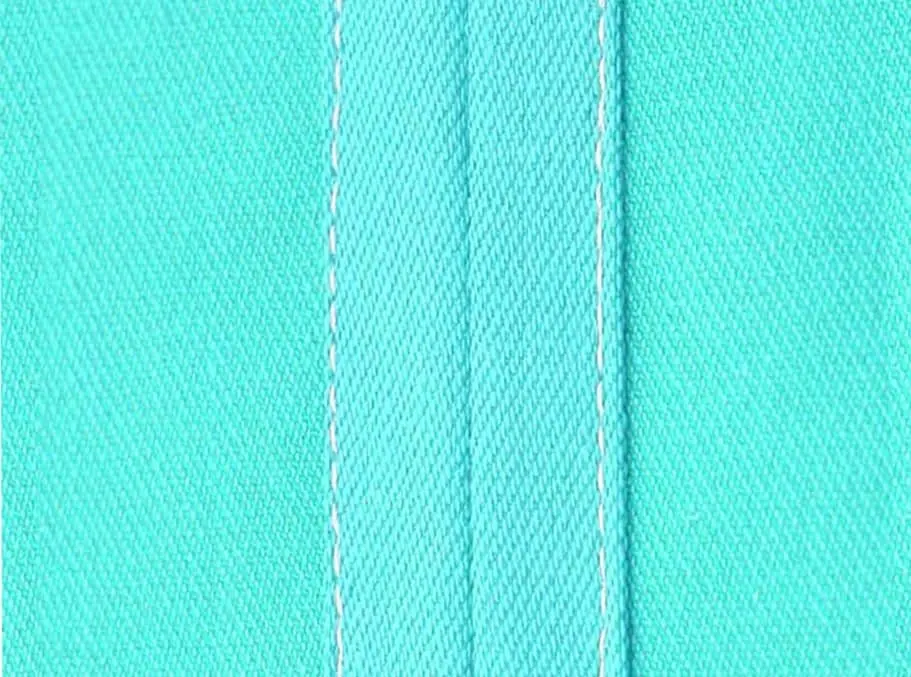
Here is an example of a double topstitched seam.

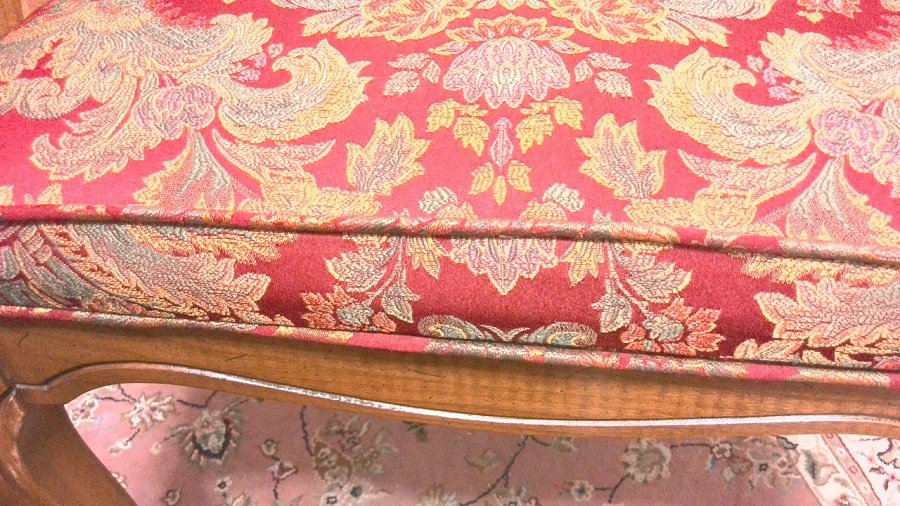
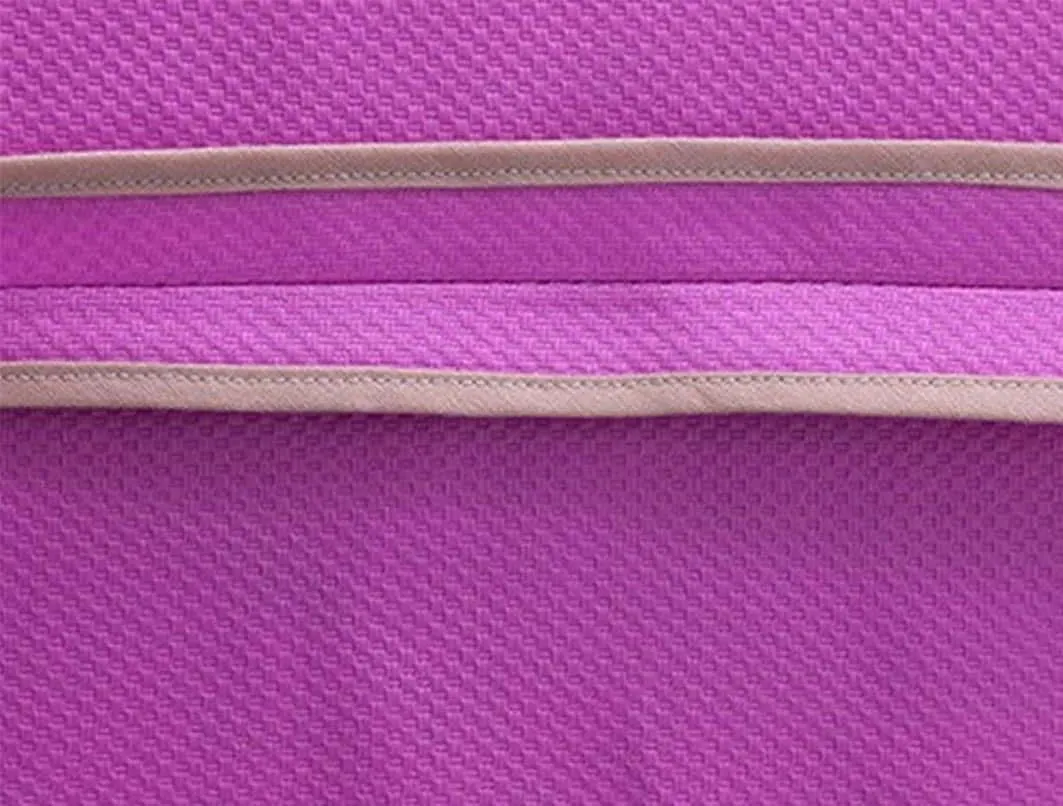
And in the image below you can see a piped seam. I made it when I reupholstered my chairs.

The third group of seams – How the Seam is Finished
Another way we can categorize seams is by how the seam is finished. Choosing between these types of seams will ensure your garment or item looks fully complete and will help prevent the fabric from fraying.
Serged seam –the seam allowances are finished with a serger.
Bound Seam (AKA Bias Bound Seam)
A bound seam is a seam finished with a strip of fabric folded in half lengthwise, lace, or some other kind of binding. There are special tools to make double-fold bias tape – check out my tutorial on how to use a bias tape maker. The bound seams are often used to finish raw fabric edges on unlined coats and jackets for example.

Pinked Seam
To produce a pinked seam, you’ll need a pair of pinking shears. To create this type of stitching seam, sew a plain seam. Before you press the allowance open, use your pinking shears to finish the edges of the fabric so they don’t fray. Then press open.

Clean Finish Seam
Lastly, another way to finish an open seam is the clean finish seam. Sew a plain seam, and press it open. Then take each edge of the allowance and fold it under. Press again and sew a straight stitch down each side.
The fourth group of seams is categorized depending on the shape of the seams
When you’re creating a garment, your seams will either be straight or curved. Here’s what you need to know about each.
Straight Seam
The majority of your seams will be straight seams unless you are exclusively sewing women’s clothes or round toys. I recommend using a seam guide to keep them straight.
Curved Seam
When you are creating a garment with curves (most often for a woman), you will need to join fabric with curved seams. A princess seam as discussed above is the most common way to do this. The seam allowances of the curved seam have to be notched or clipped for the seam to stay without puckering.
And the fifth group of seams is categorized depending on the Seam Positions in the Garment
When you are planning your garment, it’s important to plan ahead with where you will need seams. Common joining places include the center back seam, side seams, shoulder seams, and a crotch seam, to name a few. And what is interesting, the center back seam can be open or enclosed, plain seam or flat felled seam, straight or curved, etc.
But you will need to know exactly how to sew each type of seam correctly. For example, when you sew side seams (on a dress for example) it’s absolutely necessary to sew them in the same direction – you just can’t sew one side from armpit to hem and the other side from hem to armpit.
As for me, I learned to sew each type of seams properly before using them in my projects.
I hope you found this information helpful as you navigate all the different types of seams. I encourage you to grab some scrap fabric and practice—your efforts will serve you well.
Did you find this tutorial helpful? If so, save this pin (see below) on your sewing board so you can come to this tutorial later when you need the information on types of seams, and follow me on Pinterest for more tips, tutorials, and inspiration!

Ready to take the next step in your sewing journey? Check out more step-by-step tutorials from my blog and don’t forget to share!


latest posts
- Think You Know Zippers? This Installation Guide Might Surprise You
- Why Does Your Seam Ripper Have a Red Ball? Discover Its Purpose!
- Topstitching Troubles? This Simple Trick Will Turn It Around Instantly!
- How to Sew Shirring: A Step-by-Step Guide to Elastic Thread Gathering
- Are Self-Threading Needles Really Useful?
- Amazon Spring Sale: Best Choices
- Elevate Your Prom Look: A Guide to 10 Neckline Choices (2024)
- No Pattern, No Problem: Turn Scraps into a Quilting Masterpiece
- Prom Perfection: A Guide to Choosing the Perfect Dress Color (2024)
