
In this sewing tutorial, I want to talk about how to use seam guides for a sewing machine – why you need one (or a few actually), how to use it correctly, what types of seam guides exist, how you can make it yourself, and where to buy the best seam guide for your machine.
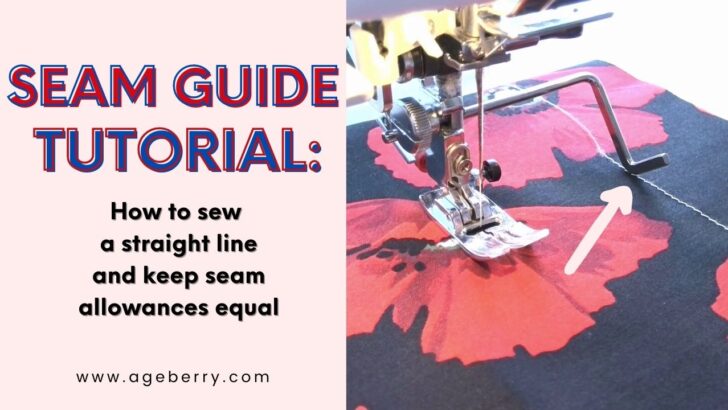

A seam guide can make your sewing easy and effortless.
Let me show you my favorite tools that help to sew straight and save lots of time and frustration.
Table of contents
- Seam guide attachment from the sewing machine accessories
- Magnetic seam guide
- 6-in-1 Stick’nStitch Guide with Nancy Zieman
- Laser seam guide
- Diy seam guides

If you prefer to watch the tutorial, below is the YouTube video on my channel (25 minutes). However I recommend reading first the article, it may give you some ideas and will make the video easier to follow.

Note: Some of the links on this page are affiliate links. This means I will receive a commission if you order a product through one of my links. I only recommend products I believe in and use myself.
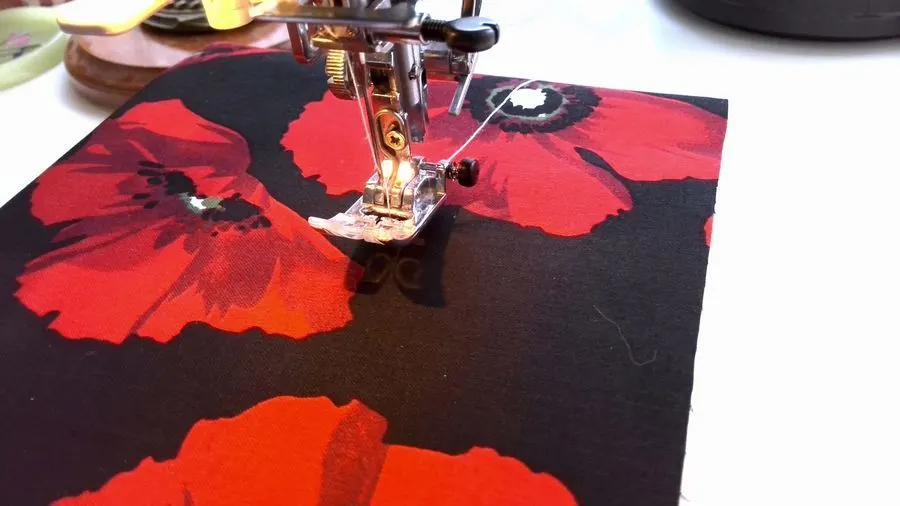
Do you like to sew? What is the thing you struggle with the most? I asked my readers and by far the most common response was this – how to sew a straight line? How to keep a stitching line straight?
Well, I partially answered this question in my previous tutorial “How to sew straight” where I showed you what sewing machine presser feet to use for sewing straight.
And now I would like to show you how to use a seam guide to keep your stitching lines straight.
But seam guides are also useful for keeping seam allowances equal.
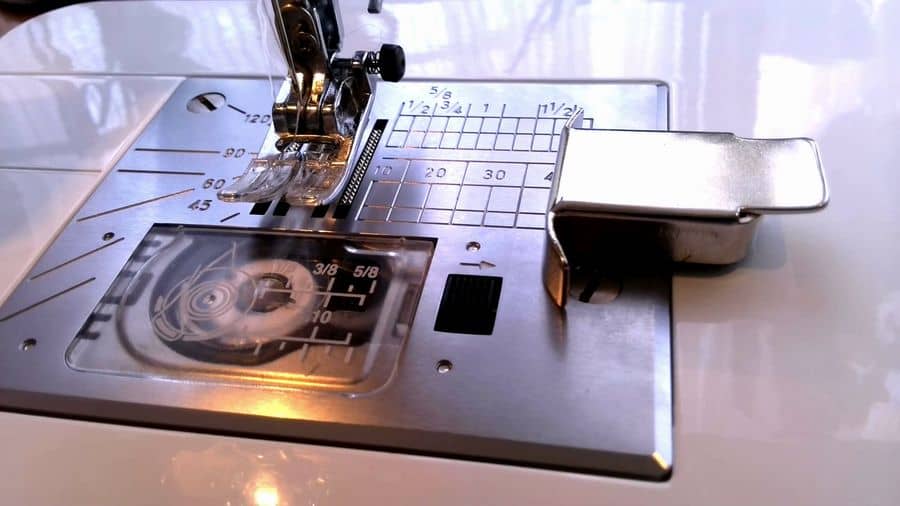
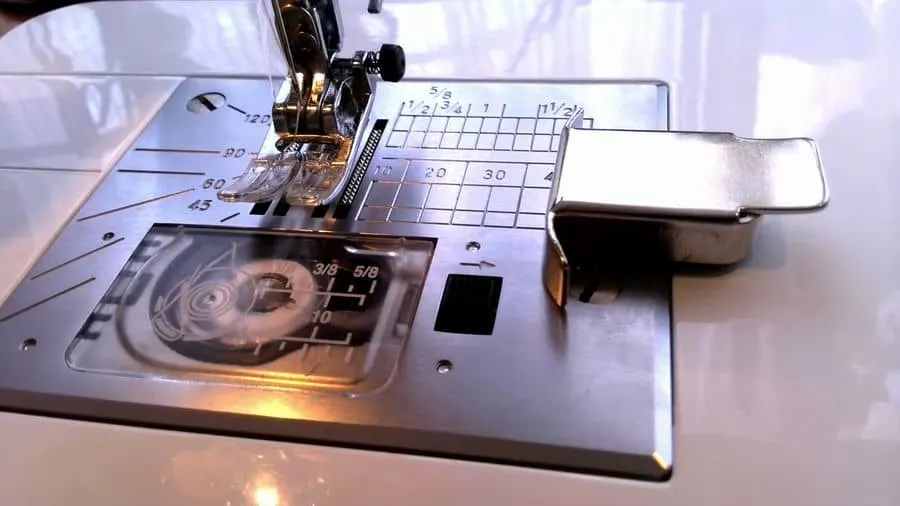
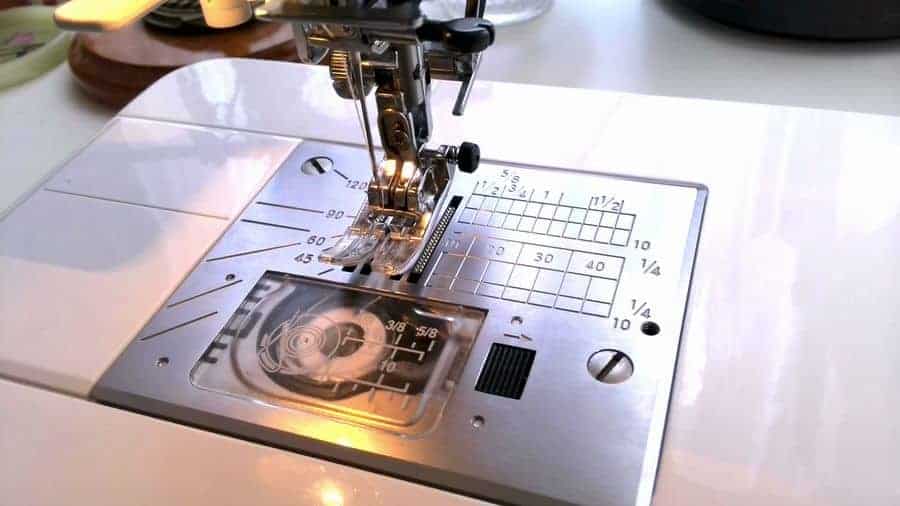
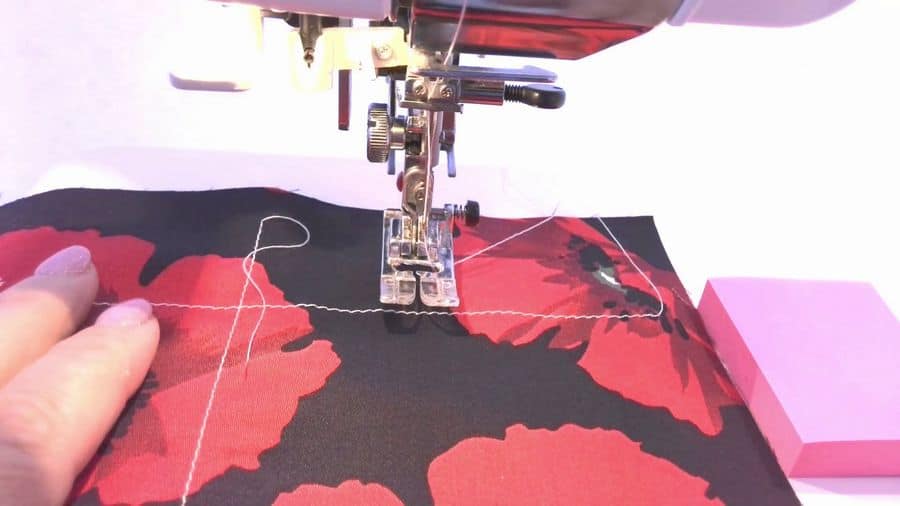
Of course, for these purposes we can use a sewing machine throat plate – it usually has some kind of a seam guide. Why would we need something else? See – there are 5/8″ seam allowances, ⅜” seam allowances, etc. Even the bobbin case cover has some marks on it. My Janome machine has the marking in millimeters also. So all you have to do is to keep the fabric edges aligned with the markings. I guess you used this seam allowance guide on a sewing machine many times.
In fact, it’s not really so easy and you may have a problem doing that, especially if you like to sew fast.

And what happens if you want to make straight lines on something big – like a quilt for example? You put it for stitching – and it covers the throat plate completely, and you don’t see its markings. In this case, you would definitely need a seam guide.

In addition, this convenient device saves you time. You don’t need to mark stitching lines with markers or pins. You don’t need to rip seams that are not straight because they will be straight.
✅ Related tutorial: The Basics of Straight Line Quilting
There are many different types of seam guides. Some of them you even got together with your sewing machine. And others are pretty cheap to buy.
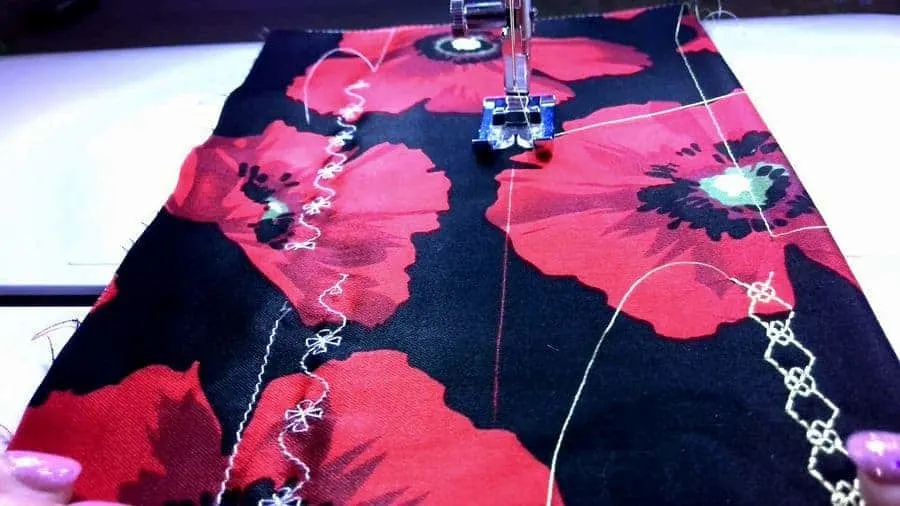
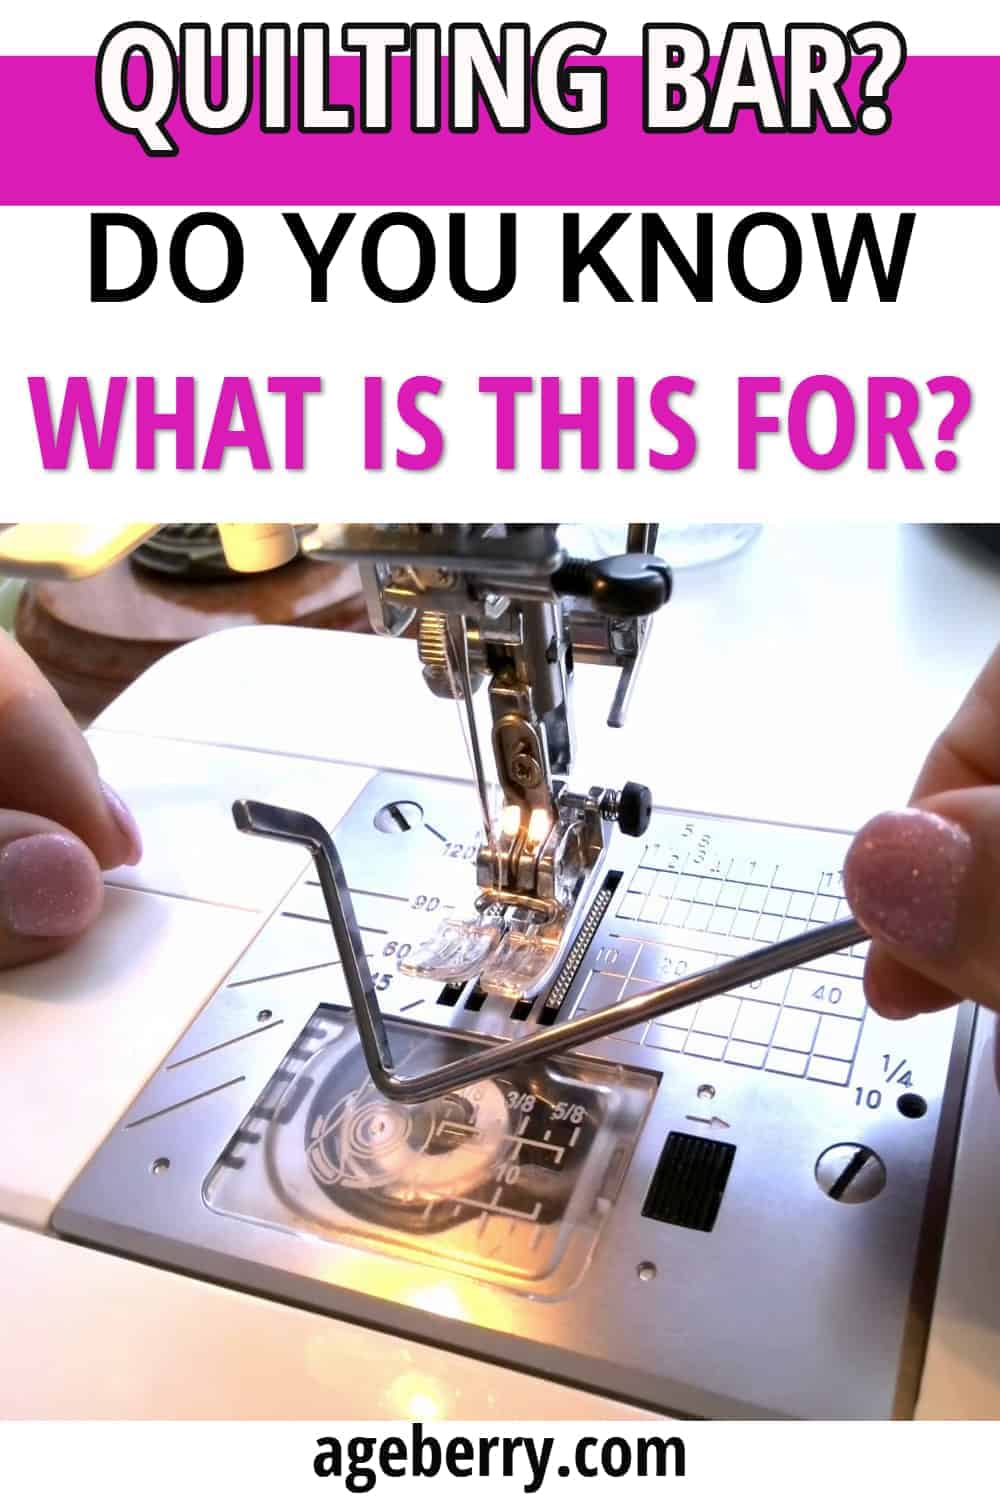
Seam guide attachment from the sewing machine accessories
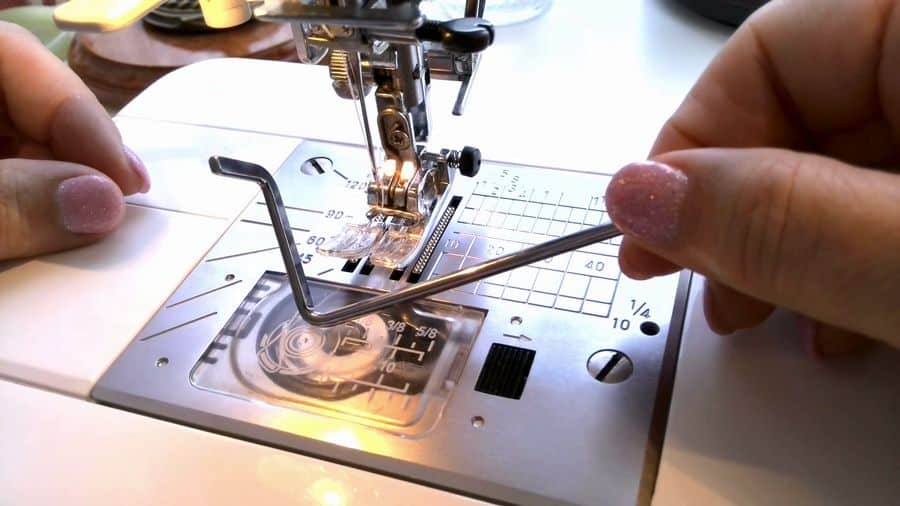

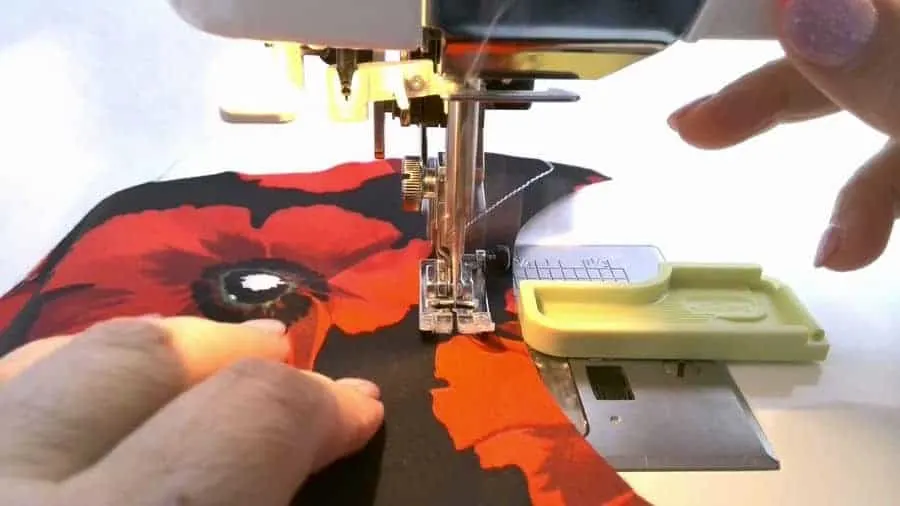
In my sewing machine manual, this seam guide is called Quilting bar but I guess there are other names for this tool. I was surprised to find this small metal bar among my sewing machine accessories and had to read the manual to see how to use this thing. But it was a long time ago and since then I have been using it quite often.
It’s really easy to install.
Find a small opening on the foot holder. Insert the quilting bar into the opening and slide the bar to set the width of the seams you want.
My sewing machine seam guide attachment extends to a maximum width of around 2″. But there are longer seam guides available.
For this seam guide to work, you will need to find some stitching lines that are already on the fabric. Or you can use the edge of the fabric as the first line.
Sew while tracing the previous seam with the quilting bar.
You will see that the stitching lines are perfectly straight and the seam allowances are equal.
This seam guide is really good for sewing decorative stitches that don’t run wavy or crooked.
See how it works in the video below.
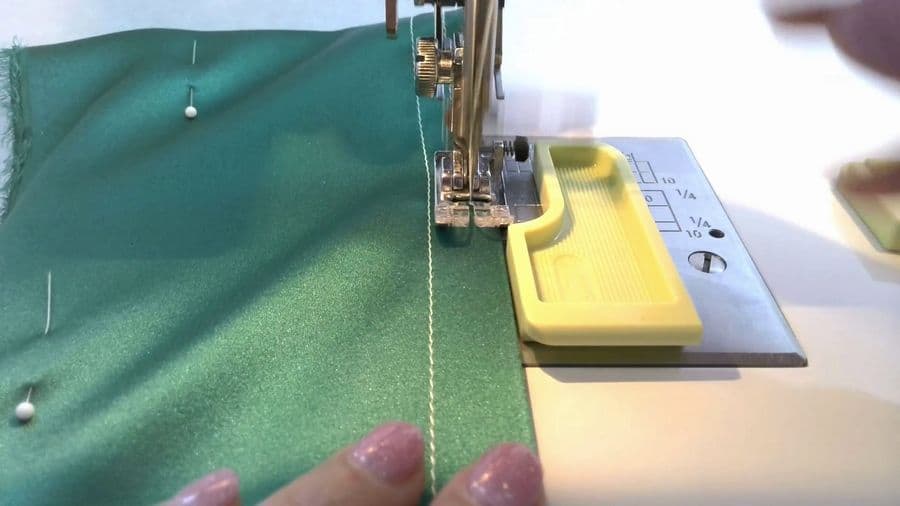
Magnetic seam guide
The magnetic SEAM guide is designed for smooth stitching at different distances from the fabric edge.
With this device, it’s easy to control the width of the allowances when sewing on a sewing machine. This is how it looks, there is a strong magnet under the metal case.
Let me show you how to use a magnetic seam guide.
- Place the magnetic sewing guide directly to the throat plate parallel to the presser foot, at a distance that depends on the desired width of seam allowances. For this, you can use markings on the sewing machine plate.
- Set the fabric so that the edge adjoins the magnetic guide
- During sewing, run the edge of the fabric exactly along the magnetic seam guide and you can sew without fear that your stitching lines are not going to be straight.
- As a result, the seam allowances are perfectly even.
The magnet is very strong, it does not move when sewing even with hard heavyweight fabrics, and adjusts to any position on the metal throat plate of a sewing machine.
The big plus of this seam allowance guide is that it can be used with almost ANY presser foot. For example, I use a walking foot for quilts very often and the seam guide is perfect for sewing straight with the walking foot. I can topstitch leather using special presser feet for leather.
✅ Related tutorial: How to sew thin leather easily with a regular sewing machine
Can you use a magnetic seam guide on a computerized sewing machine?
Some sources say that it’s not recommended for computerized sewing machines because it’s magnetic. But I can assure you it can be used with modern computerized sewing machines ONLY if you place it correctly – you can put it ONLY on the metal throat plate of a sewing machine but don’t put it anywhere else – then the magnet can interfere with the computer components inside the machine. But there is no computer under the throat plate so this place is safe.
Just drop the magnetic edge guide onto your machine cover plate and it will stay in place. It has a strong magnet and does not move easily.
You can also buy it together with a seam allowance ruler.

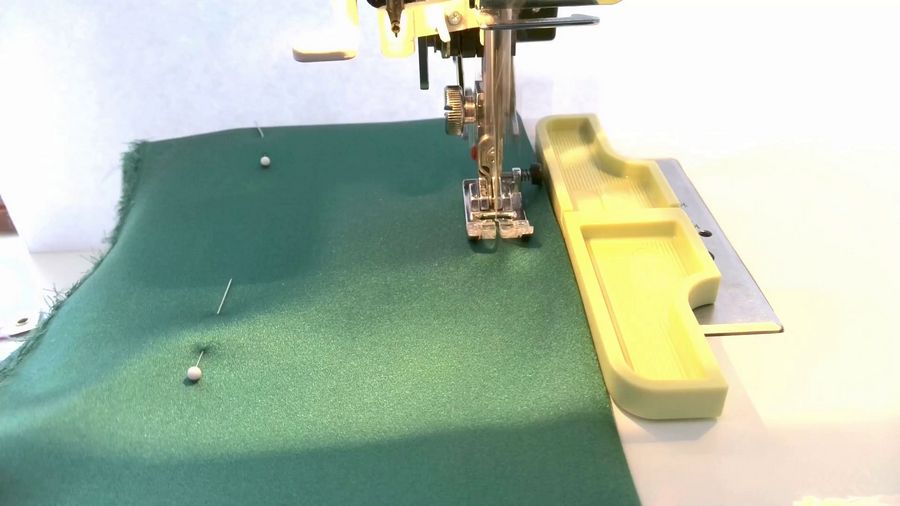
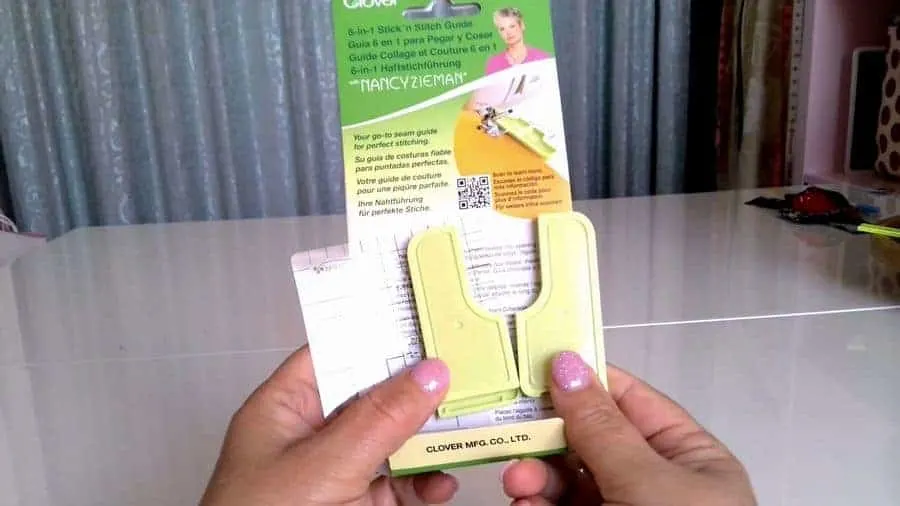
6-in-1 Stick’nStitch Guide with Nancy Zieman
If you don’t want to try the magnetic seam guide then you can buy a plastic one like the 6-in-1 Stick’nStitch Guide.
That’s what it looks like. It has two plastic pieces and a small square ruler with grid lines and small holes for a needle.

Let’s see how to use this seam guide.
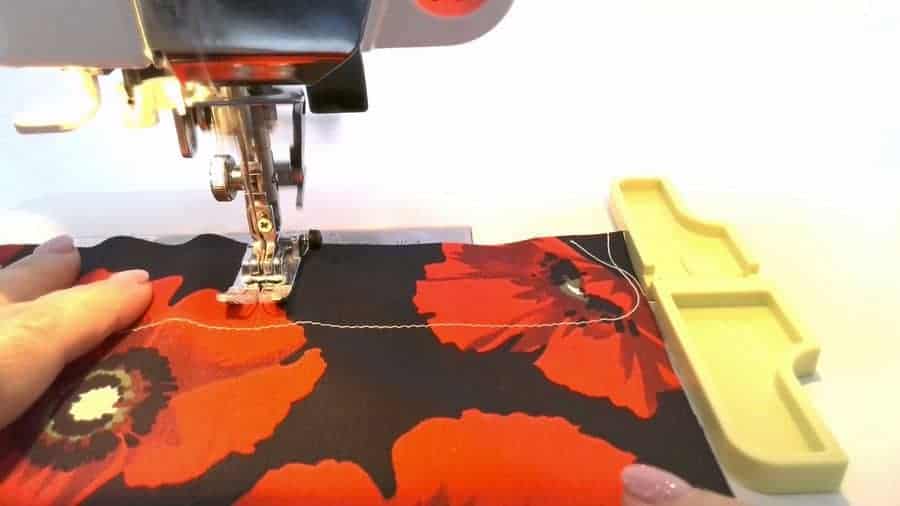
For example, I need to make my seam allowances 5/8 in or 1.5 cm.
- Place the ruler on the throat plate and align the needle with the desired grid line.
- Insert the needle into the hole and stick plastic pieces along the ruler’s edge. For this, you will need to peel the film from the bottom of each guide to uncover the sticky side. Also, before placing the guides wipe away dust from the machine.
- During sewing, run the edge of the fabric exactly along the seam guide and you will get a perfectly straight stitching line.
But I don’t need to use the template always. If I need to make very wide seam allowances I just put the seam guide at the distance I want. But these seam guides have to be placed exactly parallel to the presser foot. So I make some marks on my sewing machine for easy placement.

Why is this guide called 6-in-1?
The first is for straight stitching (you just saw how it’s done).
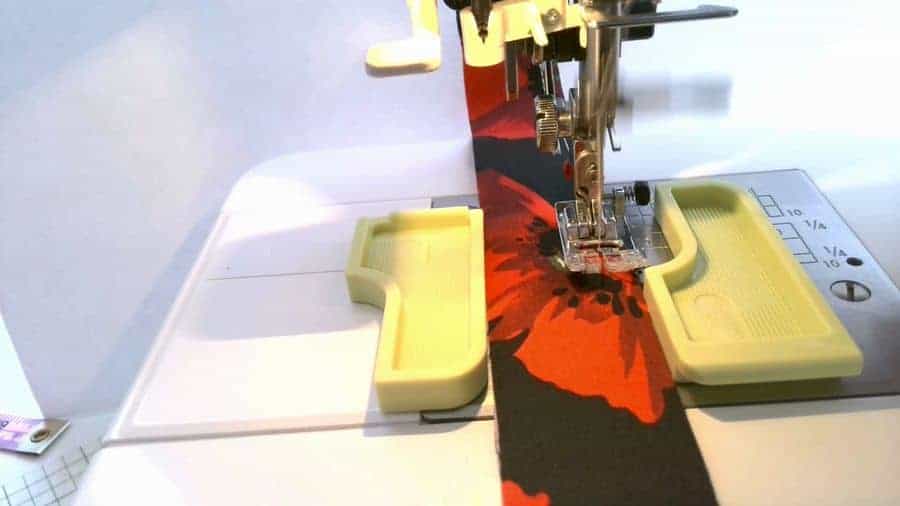
Second – you can easily stitch strips of fabric together. Look, you put the guides like this for example one to the right at ¼ in seam allowances, the other one to the left at the width of the strips. And stitch.

Third – You can stitch outer curves. For this, you will have to place the narrow edge of the guide like this, with a curve up.
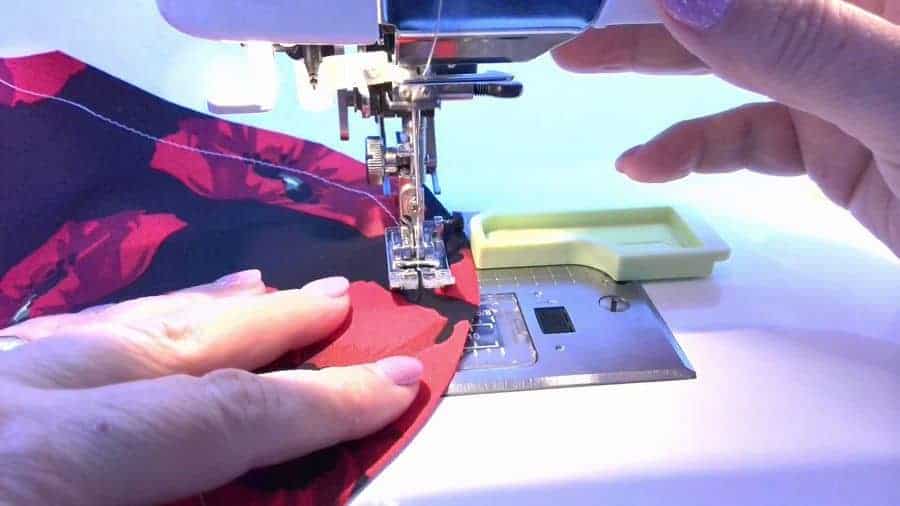

Fourth – You can easily stitch inner curves. For this place the narrow edge of the guide with curve down.

Fifth – you can use the guide for topstitching close to the edges or making ¼ in seam allowances. Place the guide like this: place the shaped edge on the side of the presser foot. The shaped edge accommodates the foot and you can easily stitch quite close to the fabric edge.
✅ Related tutorial: How To Topstitch | 17 Topstitching Tips Every Beginner Should Know
For topstitching, I like to use special presser feet and I wrote about them in my other tutorial “How to sew straight”.

Six – I guess the sixth thing is this plastic ruler with grid lines (see the image above).
As you can see, this simple gadget is pretty cool. The only thing that bothers me is the sticky side of the seam guide. But they say if the sticky side becomes weak it can be restored by soaking in water with dishwashing liquid. Haven’t tried this though.

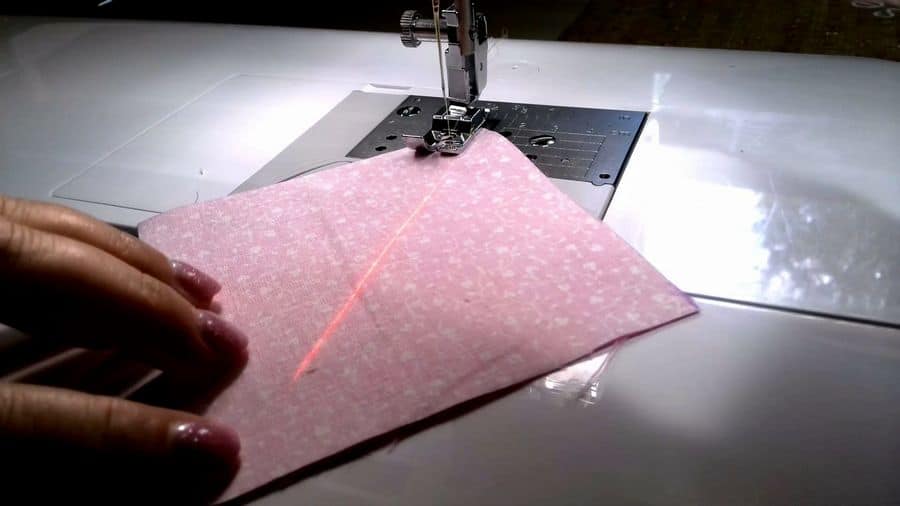
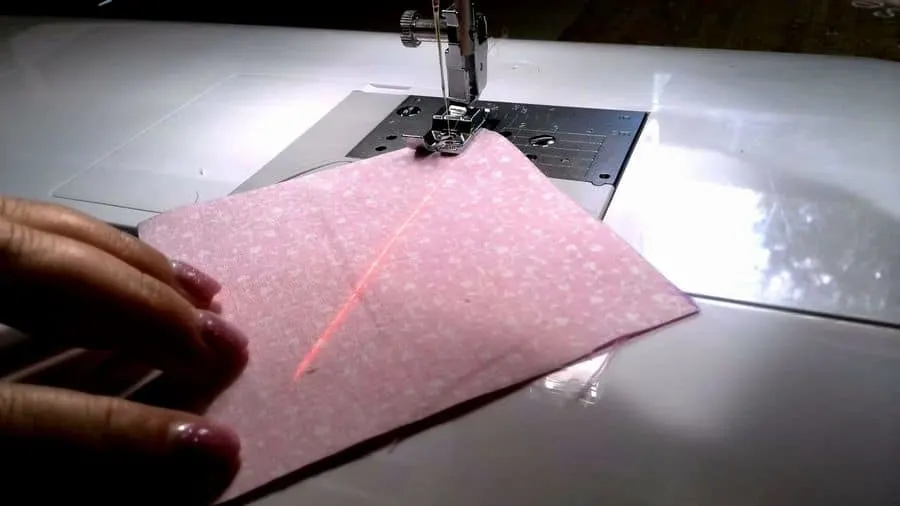
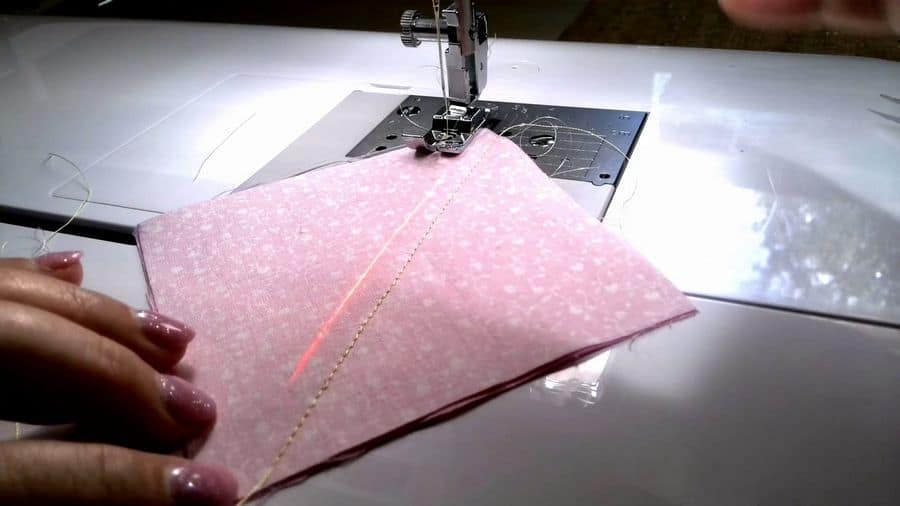
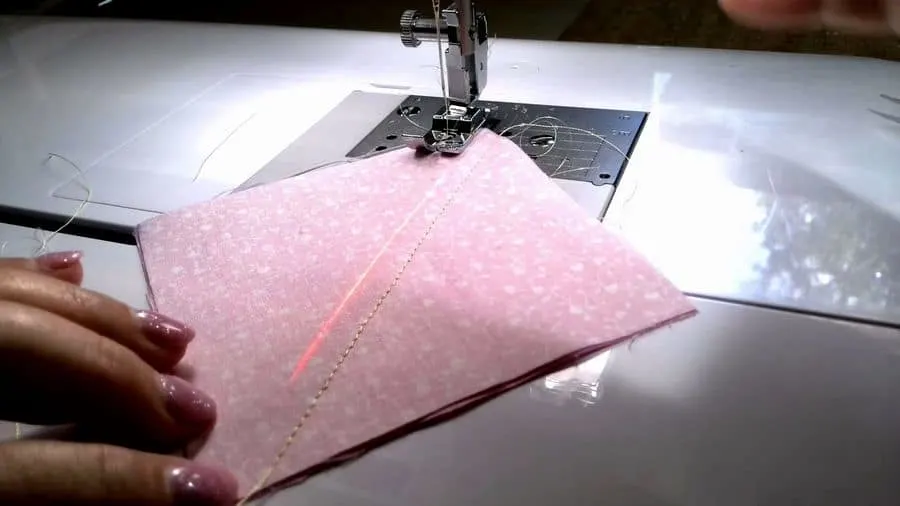
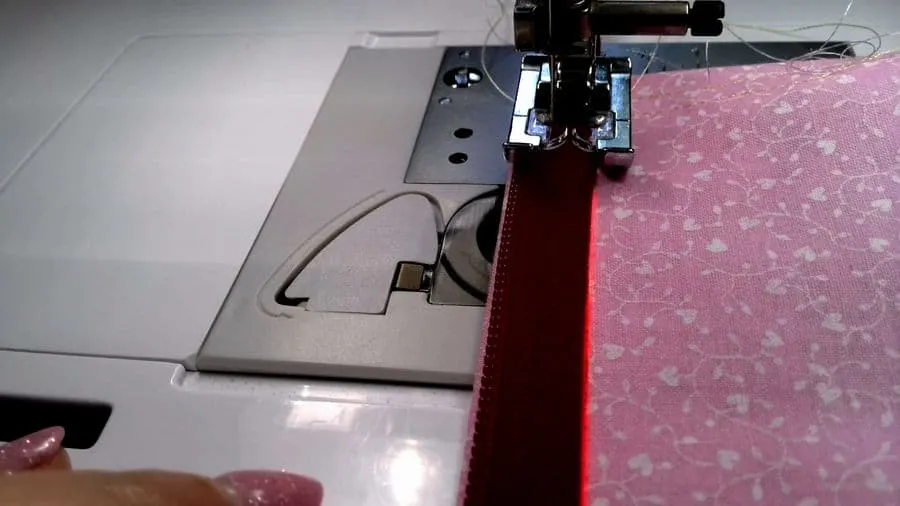
Sewing machine laser guide
Modern high-tech sewing machines can have a laser as a seam guide. I have such a fancy machine.

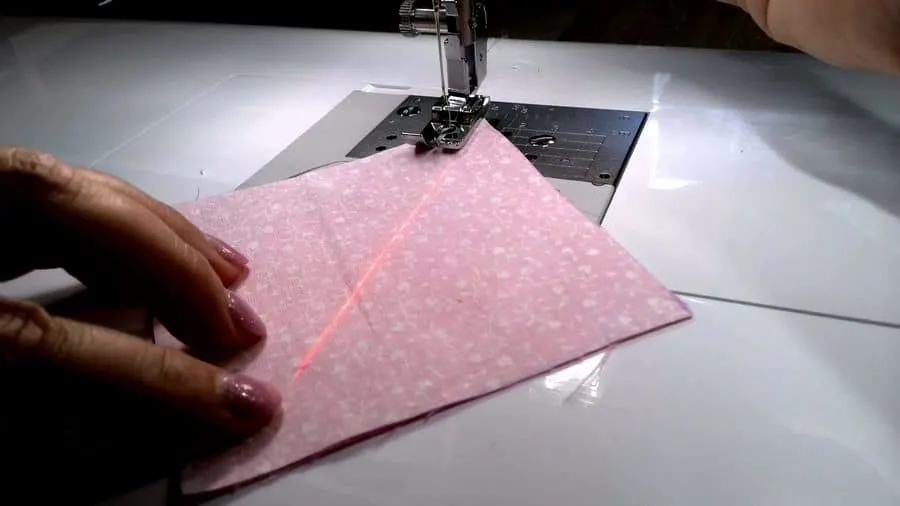
Let me show you how it’s done.
I have a button on the sewing machine – I press it and I have the laser – you can see the red line on top of the fabric. This line always stays in front of the needle while you are sewing and shows where you have to stitch. The light is bright enough that you can see it on any fabric.
I can adjust the sewing position by moving the laser to the left or to the right.
The laser seam guide really helps to sew straight lines without making marks.
Usually, it’s better to align the laser with some previous straight stitched lines.
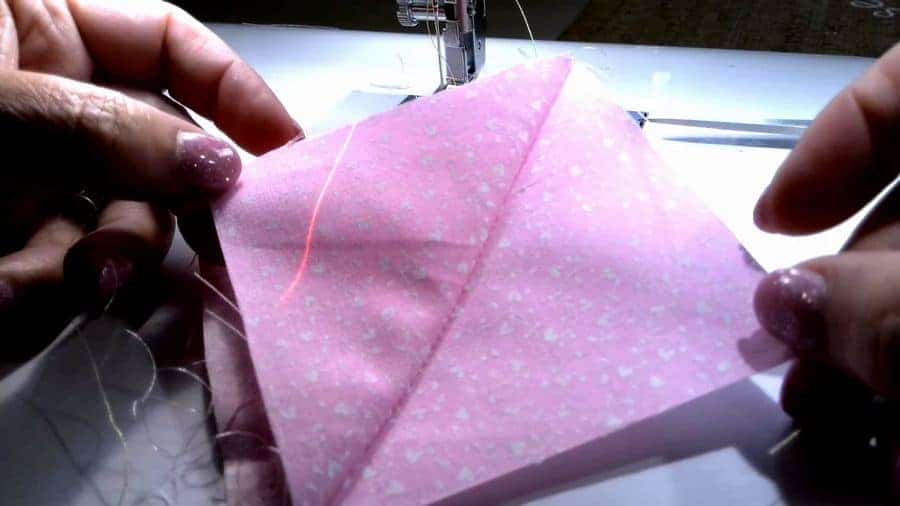
This laser seam guide is very useful for quilting. Let me show you how to stitch half-square triangles very fast using the laser guide. I am going to use my ¼ in seam allowances presser foot.
✅ Related tutorial: 7 Easy Ways To Make Multiple Half Square Triangles
I line up the laser with the opposite corners of my squares, and after that, I align the right side of the presser foot with the laser line. I stitch guiding the fabric so that the corner of the square stays in line with the laser.
After that, I sew the opposite side of the square also using the laser seam guide.
In the end, I just have to cut between the stitching lines using my rotary cutter and I have two pieces like this.

The laser can help to sew zippers. Just align the laser with the zipper tape and stitch.

DIY seam guides
And finally, I want to show you seam guides you can easily make yourself if for some reason you don’t have any seam guides. They are not as good as store-bought seam guides but they can be used occasionally with acceptable results.
I have used sticky notes, not one by one but while they are still all together. Each note has a strip of glue on its back and can be temporarily attached to the machine. This small pad of notes is thick enough so the fabric edge can move along without slipping. But still, it can slip sometimes with heavier fabrics so you have to watch out for that.


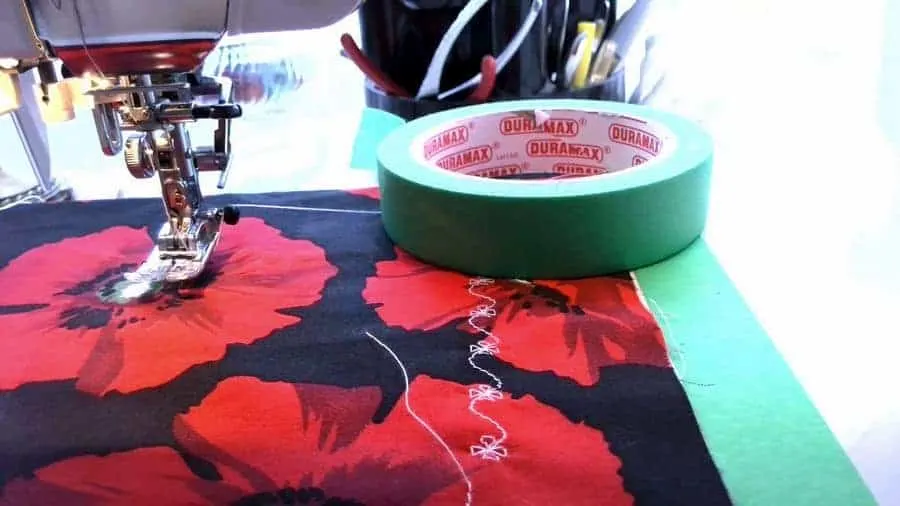
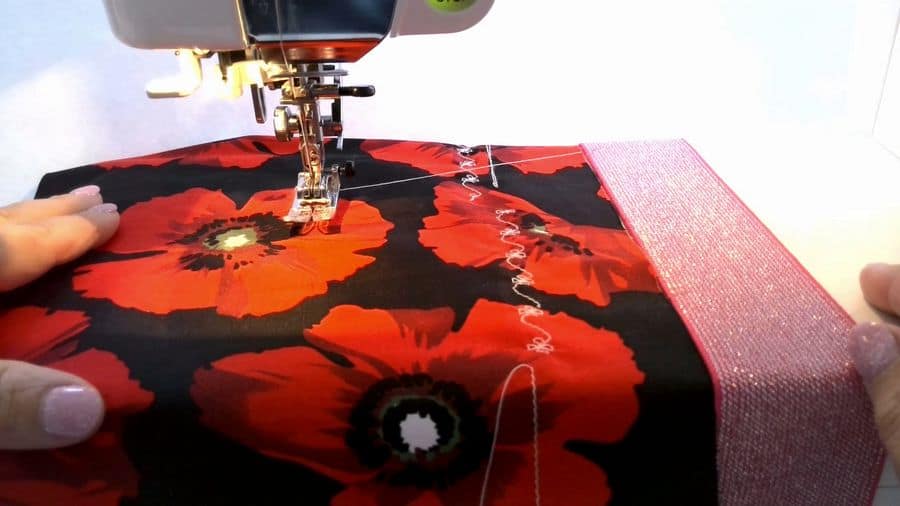
I heard – and I tested – that you can use painter’s tape – just stick a piece on your machine parallel to the throat plate. It might be called masking tape, or perhaps frog tape. But the tape is thin, so you have to be very careful not to go off the stitching line. The tape doesn’t leave any residue on the machine.


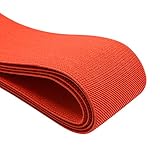
Some people advise using a piece of elastic with sewn-together edges. It works about the same as the painter’s tape. And of course elastic is something you will use in other projects anyway, so you might as well buy it in bulk.


These inexpensive little gadgets will change your sewing and will really help keep stitching lines perfectly straight. They are essential items in your sewing room.
And from the large number of tools used to help sew straight, dedicated, or improvised, we can deduce how important this task is for someone who sews. Someone has said somewhere that nobody will notice if you are a genius, but everyone will notice if one of your buttons is missing; I guess it is equally true that everyone will notice if one of the seams of your garment is crooked!
Hopefully, you can use some of these seam guides for your sewing projects.
Most modern machines come with guidelines on the Throat plate that indicate different seam allowances ranging from as low as 1/4″ up to 2″. Some machines might also have seam allowances labeled on the bobbin case cover. To get the desired seam allowance measurement, simply line your fabric edge up with the guideline on your throat plate or bobbin case cover and sew along. For example, if you want a 3/8” seam allowance, all you need to do is line up the fabric edge with the corresponding guideline labeled “3/8”. Modern machines also have markings in millimeters.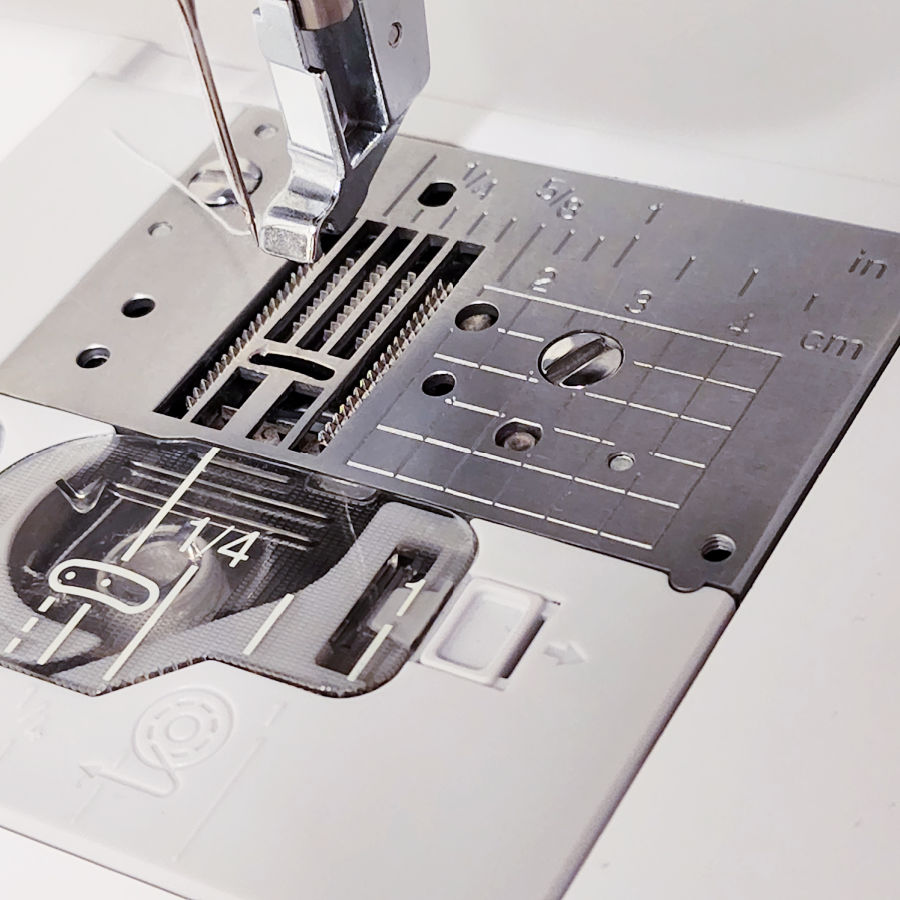

A seam guide is a commonly used attachment that sits on the bed of a sewing machine and can be adjusted to set the distance between the needle and the edge of the fabric. It comes in many shapes and sizes that fit different machines, and it can be adjusted for different widths of seam allowances. It helps users to accurately align, measure and sew straight seams in their projects and to keep seam allowances equal.
A seam guide is an invaluable tool for any sewer. It is a device that is fitted onto the bed of the sewing machine, designed to provide more accuracy when stitching. The guide ensures each stitch is done with consistent seam allowances.
The first step is to attach the magnetic sewing guide directly to the throat plate parallel to the presser foot at a distance that corresponds with the width of seam allowances needed for your project. You can use the guidelines already available on the sewing machine’s throat plate for this. Once attached, lay the fabric so that it fits snugly against the edge of the magnetic guide and start sewing.
A magnetic seam guide is a helpful sewing tool that adds accuracy and precision when sewing.The guide consists of a magnetized strip, usually mounted onto the throat plate of the machine, which keeps fabric aligned to its edge and ensures straight stitching lines as well as equal seam allowances.
To use this guide, simply attach it parallel to your presser foot at a distance that corresponds with the width of seam allowance desired for your project. Then, lay your fabric against the magnetic edge of the guide so that it fits snugly along its length before beginning to sew. It acts as an additional reference point for your fabric so that you can maintain consistent and accurate seam allowance widths.
To attach a seam guide to a walking presser foot, first find the guide hole on the walking foot. Insert the seam guide into the hole and make sure it is positioned parallel to the presser foot. Secure it with a screw or other attachment method if necessary, depending on your walking foot model. Set the desired seam allowance width.
Did you find this tutorial helpful? If so, save this pin (see below) on your sewing board so you can come to this tutorial later when you need to use seam guides, and follow me on Pinterest for more tips, tutorials, and inspiration!


latest posts
- Think You Know Zippers? This Installation Guide Might Surprise You
- Why Does Your Seam Ripper Have a Red Ball? Discover Its Purpose!
- Topstitching Troubles? This Simple Trick Will Turn It Around Instantly!
- How to Sew Shirring: A Step-by-Step Guide to Elastic Thread Gathering
- Are Self-Threading Needles Really Useful?
- Amazon Spring Sale: Best Choices
- Elevate Your Prom Look: A Guide to 10 Neckline Choices (2024)
- No Pattern, No Problem: Turn Scraps into a Quilting Masterpiece
- Prom Perfection: A Guide to Choosing the Perfect Dress Color (2024)
