
In this video sewing tutorial, I will show you how to sew a face mask (actually, two of them) and if you subscribe to my newsletter, you can download a free printable face mask template PDF to make your own DIY mask. This project is easy even for a beginner but you still need to have some sewing skills. If you need to have instructions handy while sewing, a printable copy of this article can be found in my Etsy shop and also in my site shop. a pattern is included also in this printable version, for convenience.
Remember that subscribers to my newsletter can download the pattern for free from my resource library page.


What you’ll need
Sewing machine
A fabric of your choice (I used 100% cotton woven fabric)
Lightweight fusible interfacing
Elastic
Regular sewing notions
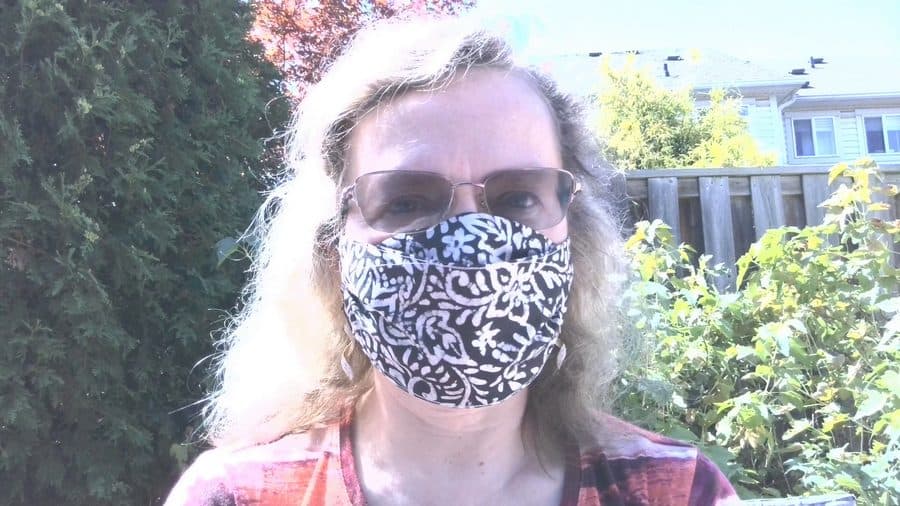
As for me, I prefer homemade cloth face masks because so-called surgical masks don’t fit well, they have gaps large enough to fit your finger around the nose and cheeks and I feel safer wearing a well-fitted fabric face mask that has a good filter and probably protects against viruses better.
I already have two mask patterns that proved to be popular with my readers and you can find my other mask templates PDF in the following tutorials:
How to sew a fabric face mask plus a free face mask pattern
Sewing tutorial on a face mask from fabric plus a free pattern PDF
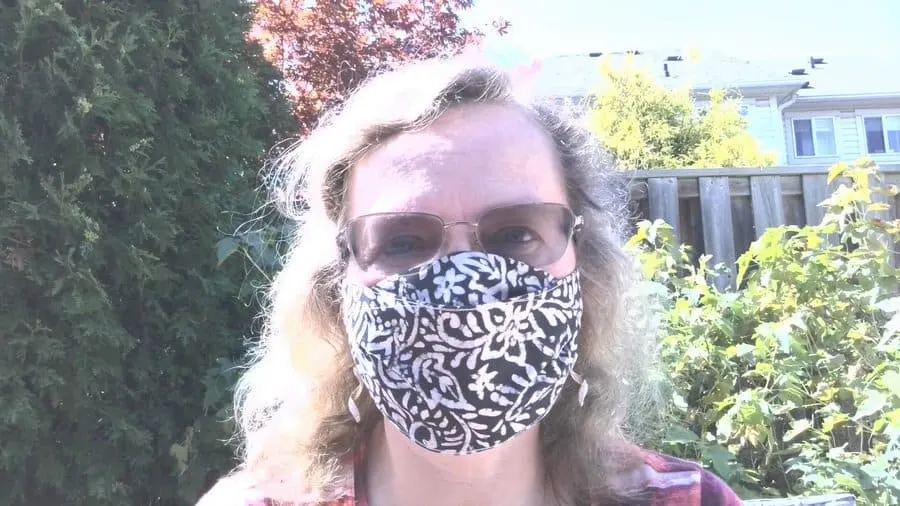
And now I have decided to sew other well-fitted DIY masks which are even simpler to make, go higher on the nose and allow enough space around the mouth to not muffle the sounds when you talk. You can find a free printable face mask template below. One of these models can also be fitted with a transparent window to allow lip reading for someone who is interested in this.
I made two different models using only one mask template PDF.
I have chosen 100% cotton fabric for my masks. I don’t use polyester fabric for my projects. In my family, there were people with allergies to polyester and that made me wary of using it for something that touches sensitive skin.
I prefer woven fabric and not knits. Stretchy knit fabric is not easy to sew with a home sewing machine and is not good for masks anyway. I successfully used fusible interfacing for my previous masks, so for these new masks, I am also going to use Pellon lightweight fusible interfacing.
Mask template pdf
If you are a subscriber to my newsletter, you can find a free printable face mask template PDF in my RESOURCE LIBRARY for which you already have the password. If you are not a subscriber fill out the form below. If you need to have instructions handy while sewing, a printable copy of this article can be found in my Etsy shop and also in my site shop. A pattern is included also in this printable version, for convenience.
How to sew a face mask step-by-step
Step 1
Prewash your face mask fabric. If it’s cotton you can prewash it in hot water. Iron the fabric after it’s dry. You can use a dryer for drying.
Step 2
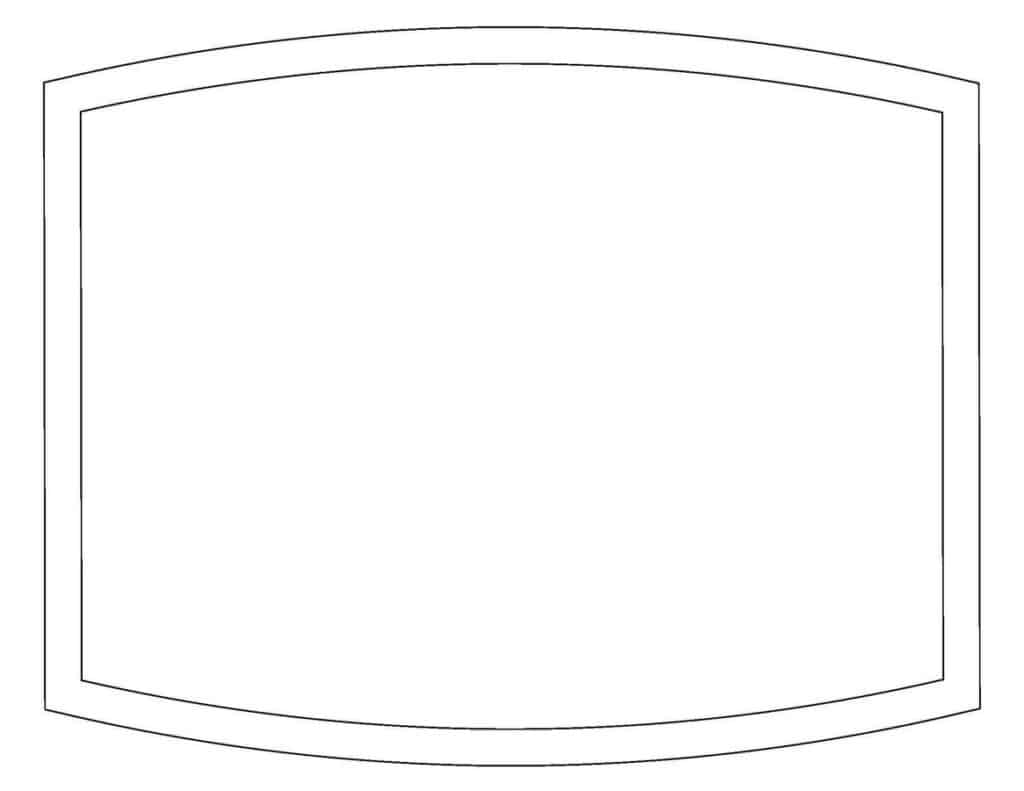
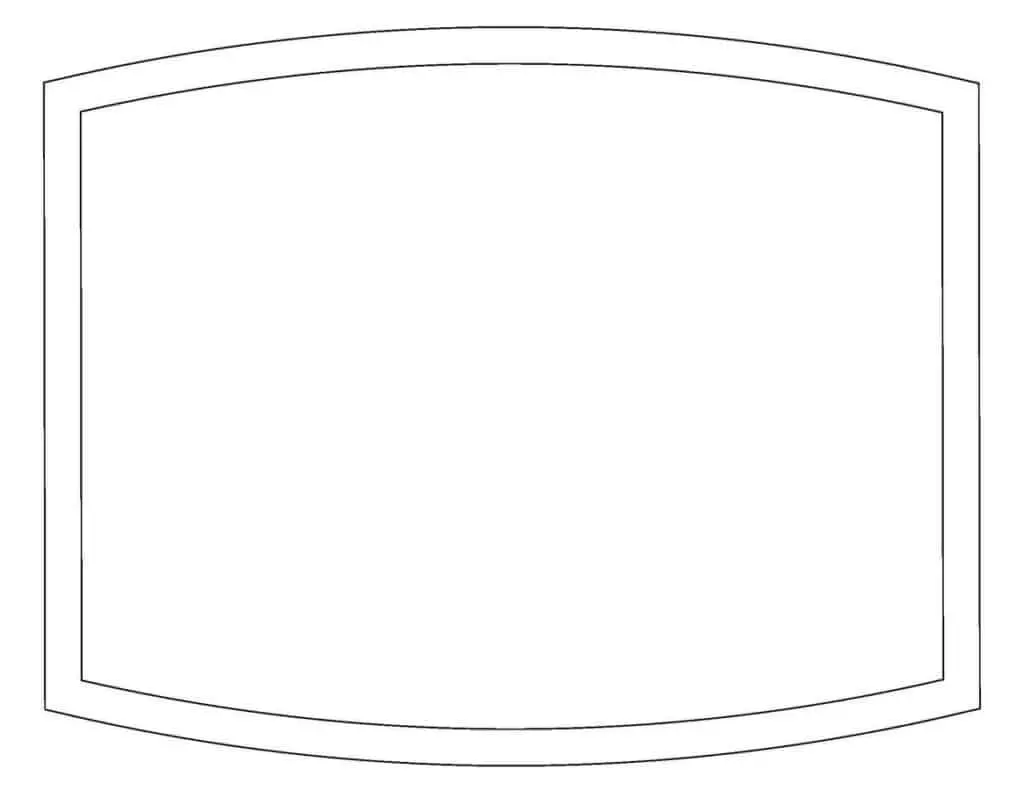
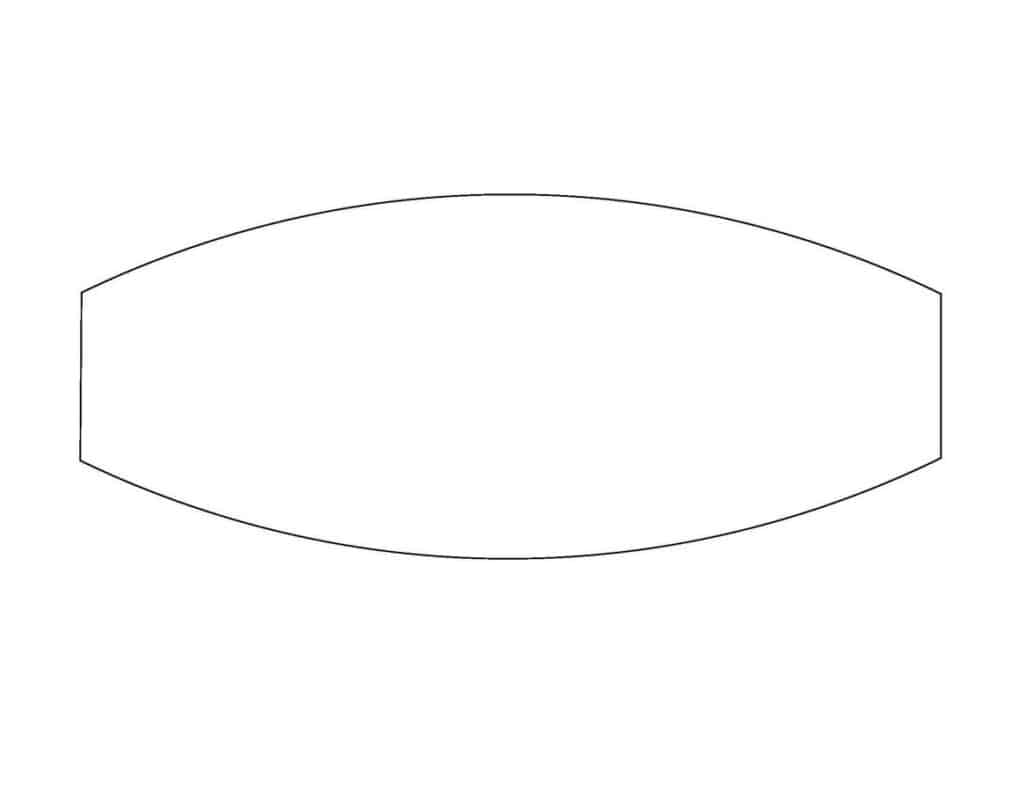
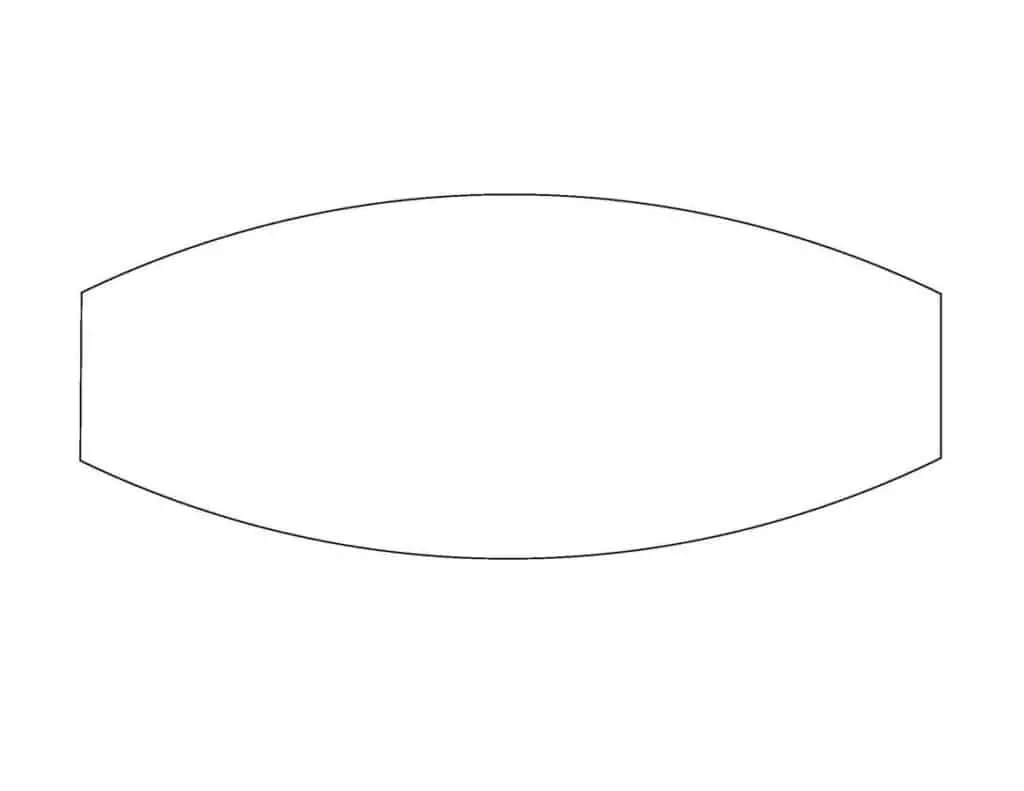
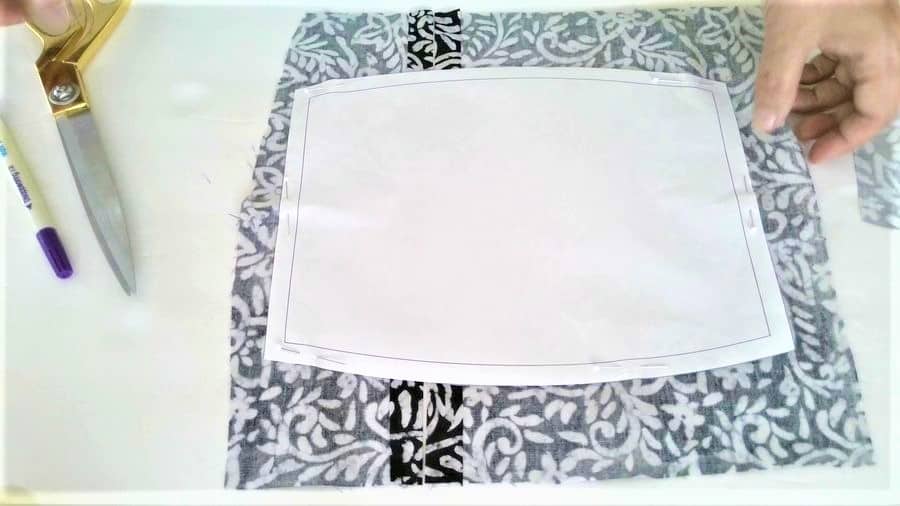
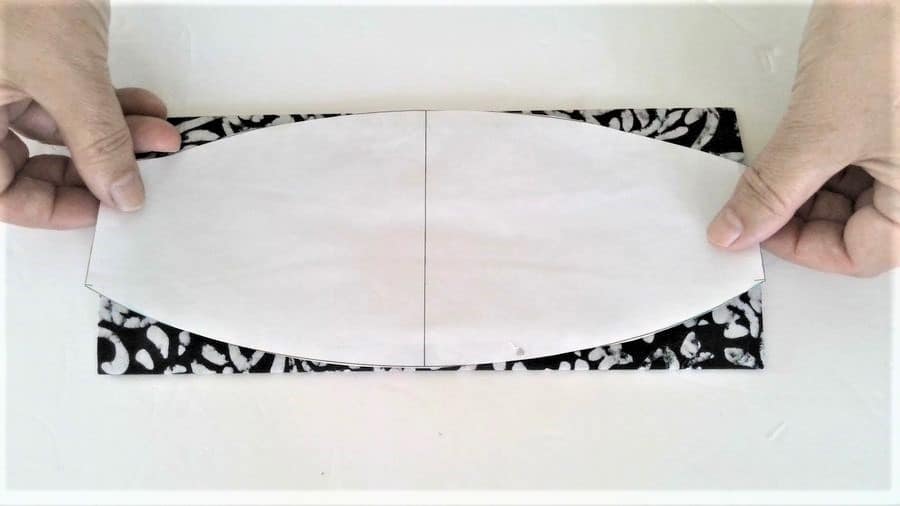
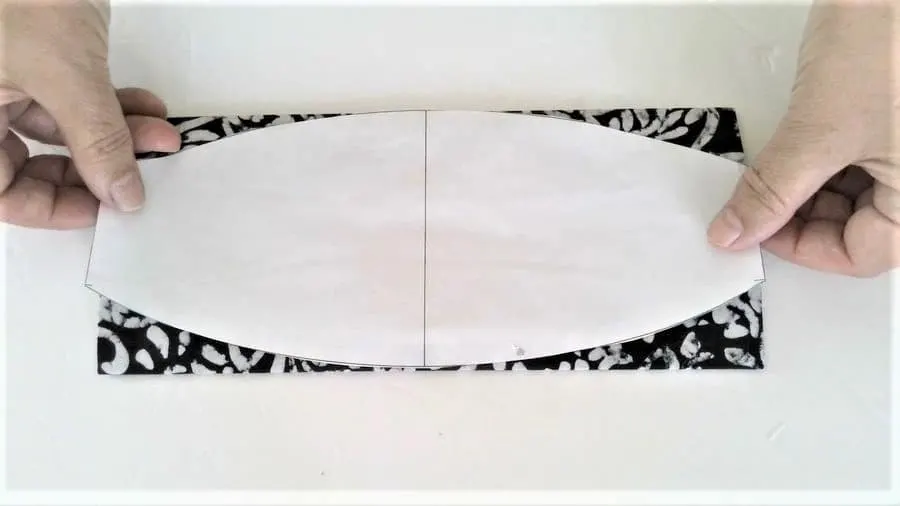
Print and cut the pattern. There are only 2 pieces. One pattern piece looks like a rectangle, and the other one has a curved shape. The pattern must be printed at 100% size (actual size), beware that some printing systems try to “best fit” the pattern on the page and in the process resize the pattern.
On the pattern there is a 2” (5cm) line with the dimension marked on it, if that line is not exactly 2” (5cm) then the pattern has been resized.
If you prefer to watch this step-by-step sewing tutorial on YouTube here is the link to my YouTube video with the instructions.

Step 3
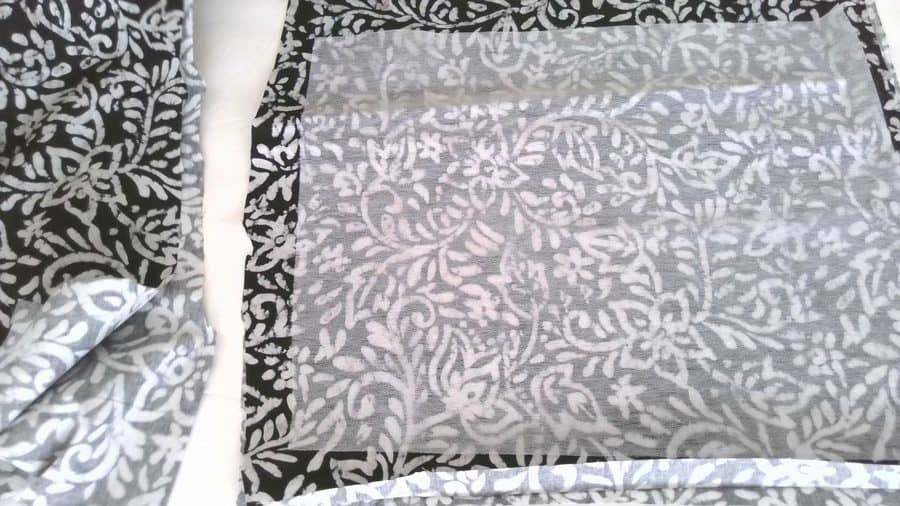
Cut a piece of interfacing a little bigger than the pattern. Cut two pieces of fabric – also a little bigger than the pattern. The pieces have to be large enough to accommodate the pattern and this step is here only because it is not easy to work with the whole large piece of material when you only need enough to fit the small pattern.
Step 4
Fuse that piece of interfacing into the fabric with a hot iron. If you are not sure how to do it properly, check out my tutorial – “How to fuse interfacing”
If you want more details about fusible interfacing for masks, check out my article “All about fusible interfacing for masks”

Step 5
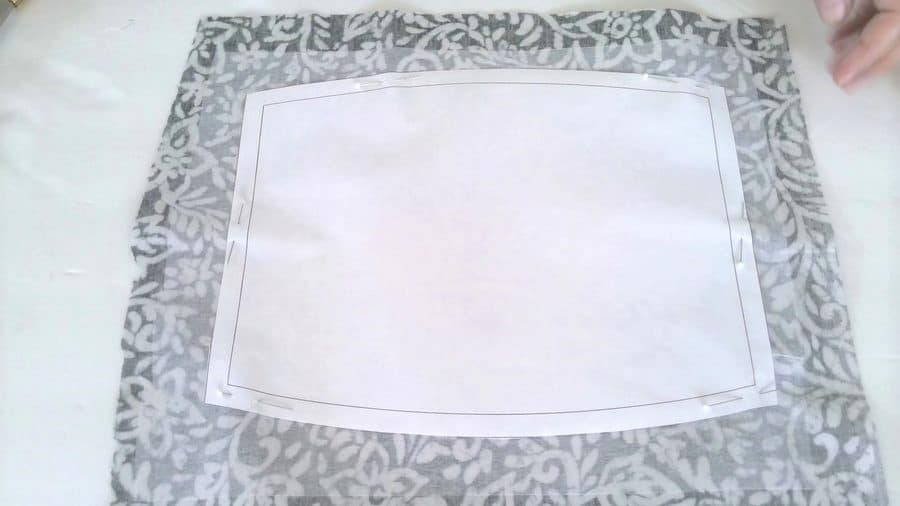
Place the pattern on the interfaced piece of fabric and pin it. But use pins ONLY in the seam allowances. It’s better TO NOT MAKE any holes in the mask because viruses are very small and they can easily go through the needle holes. Cut the fabric using good fabric shears.

Step 6
Now we need to cut the second fabric piece (the one without interfacing). You can cut it using the same mask template PDF as described above.
But I prefer to make a mask with a removable filter (for better protection) so the cutting of the second piece of fabric is different in this case.
If you would like to make a mask with a removable filter, then we have to make an opening for the filter. I don’t want the opening for the filter right in the middle of the mask so I make it somewhere on the side.
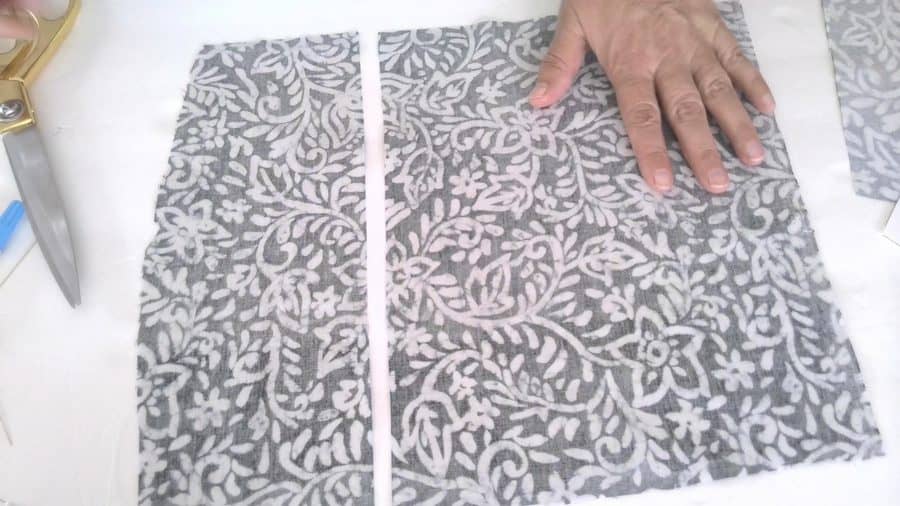

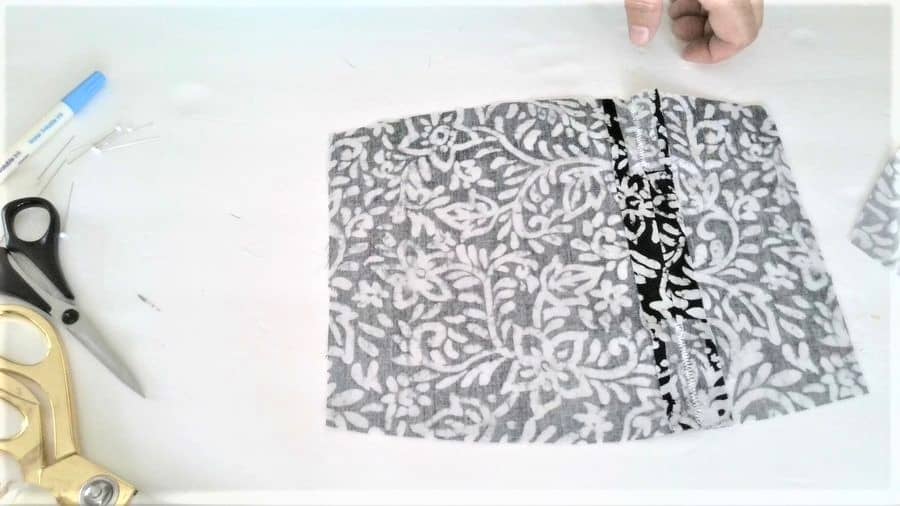
Place the pattern on the fabric and draw a line (with a ruler, so it’s straight) closer to one edge of the mask. Cut the fabric along the line. Fold the edges ⅝ “ and press with an iron.
Place these pieces of fabric side by side and cut the second piece for the mask using the pattern.

Step 7
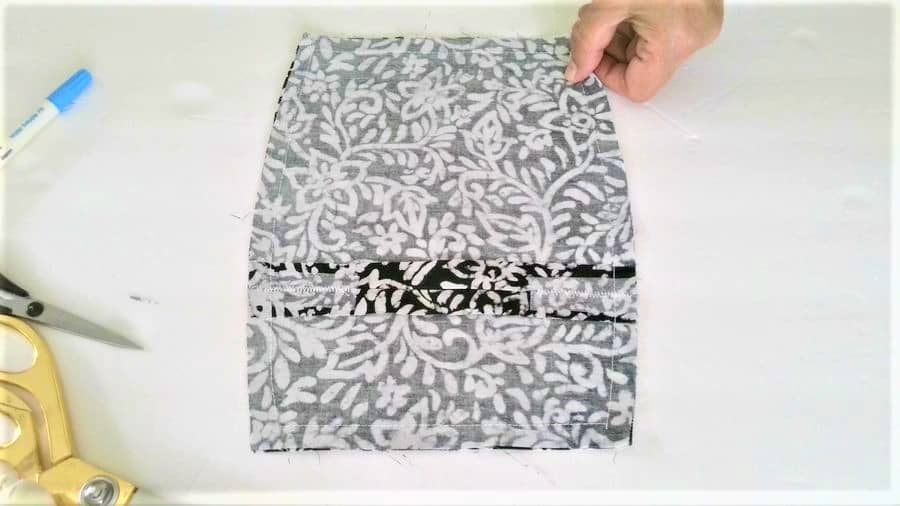
Now we need to make the opening smaller. For this, I iron on small pieces of interfacing like you see in the images below and make a few zigzag stitches over it.

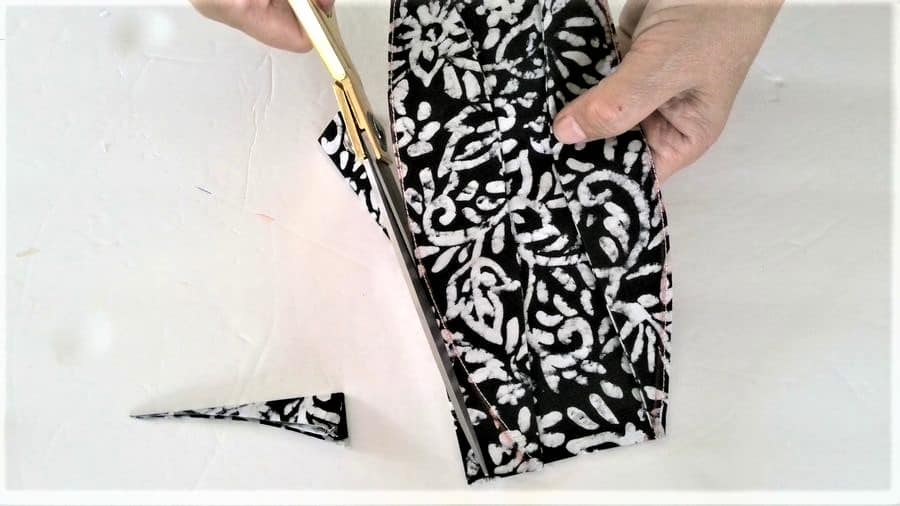
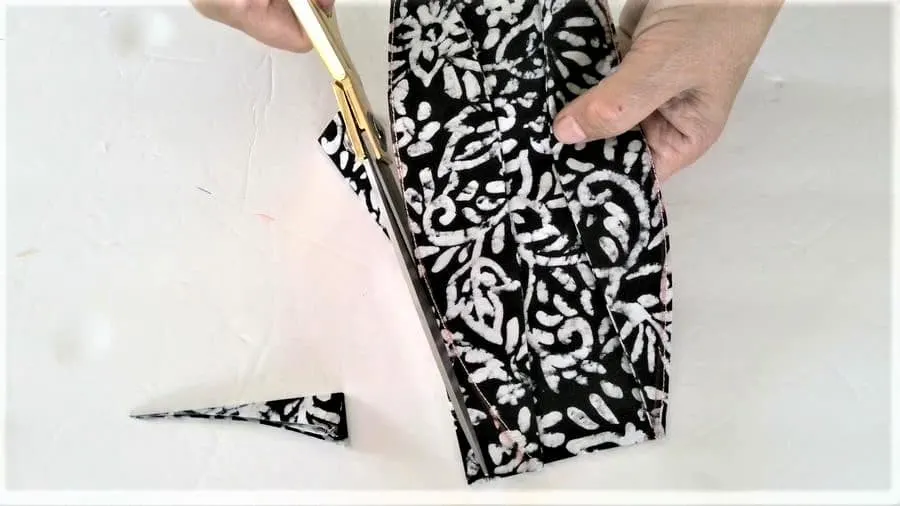
Place these pieces right sides together and stitch around all edges with ⅜ “ seam allowances.
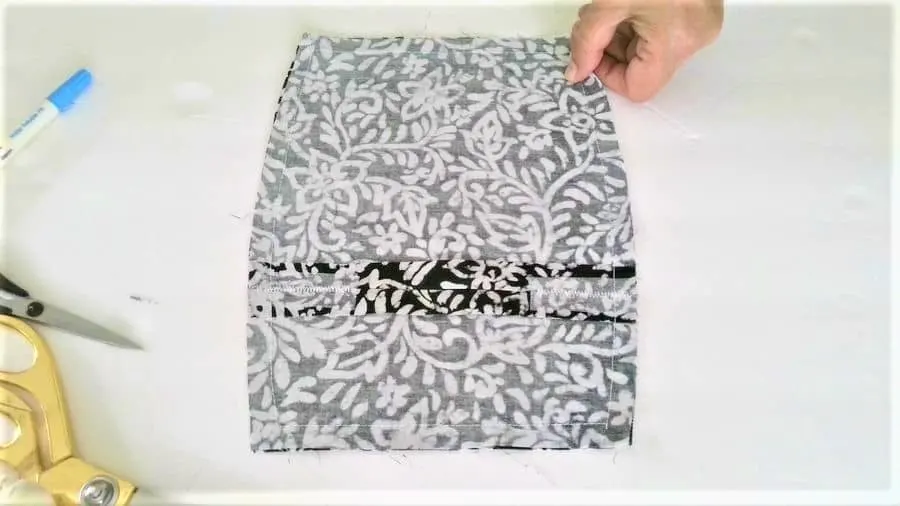
Press the stitches so it looks nice. Cut seam allowances close to stitches. Cut the corners close to stitches.
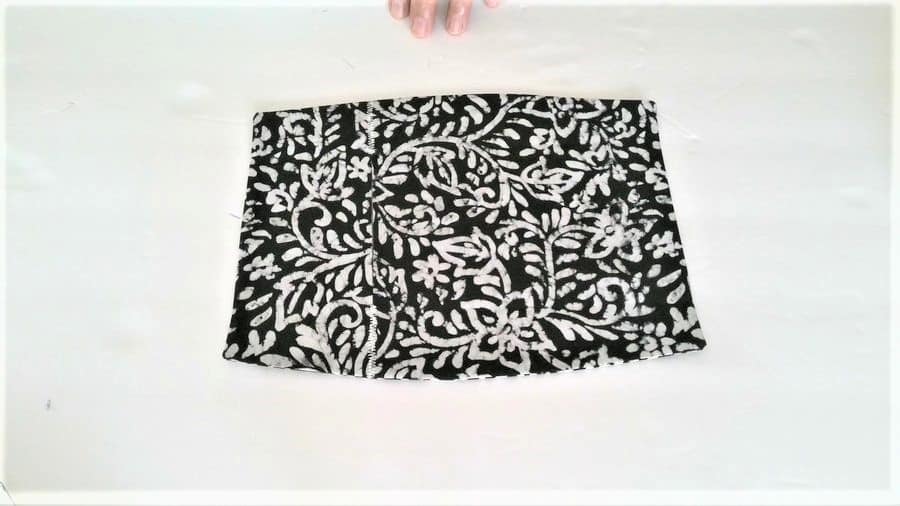
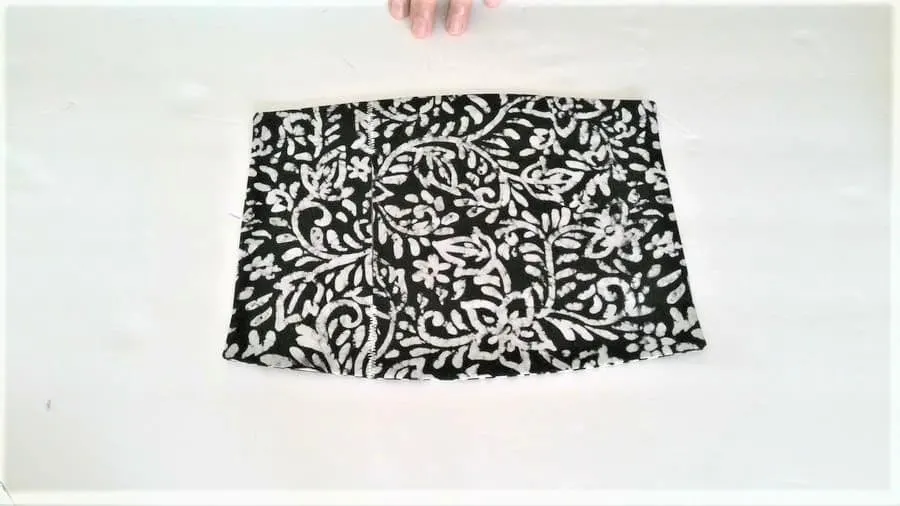
Turn the mask to the right side through the opening. Press it with a hot iron.
Step 8
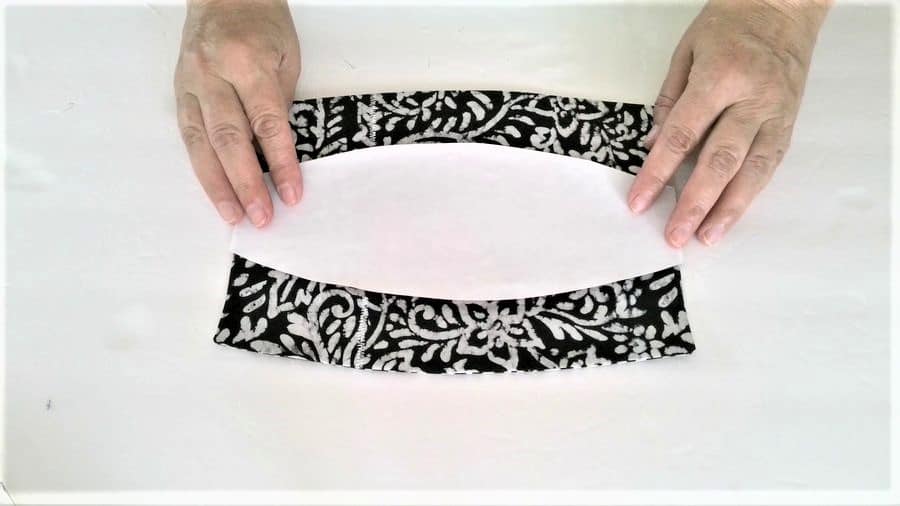
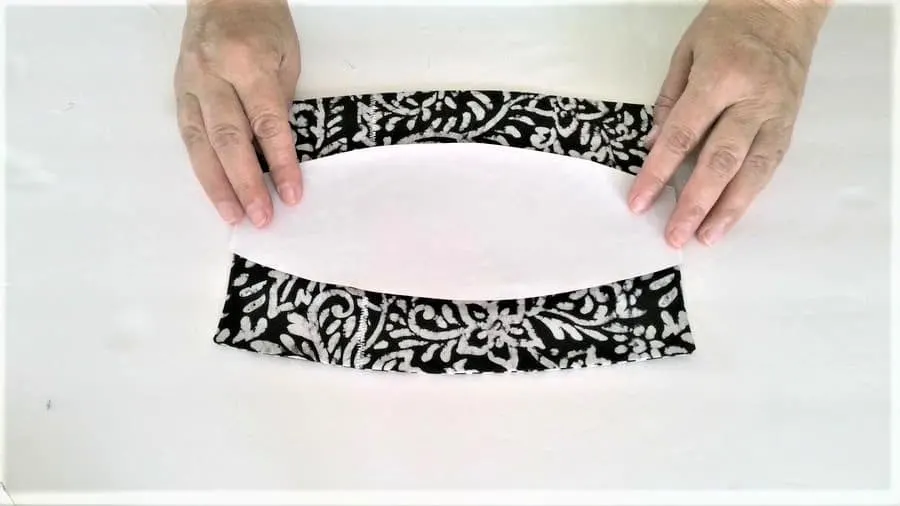
Now use the second pattern piece. Place it on the fabric like you see in the images below and fold both edges inside. Make sure the folded parts are equal. Press with a hot iron.
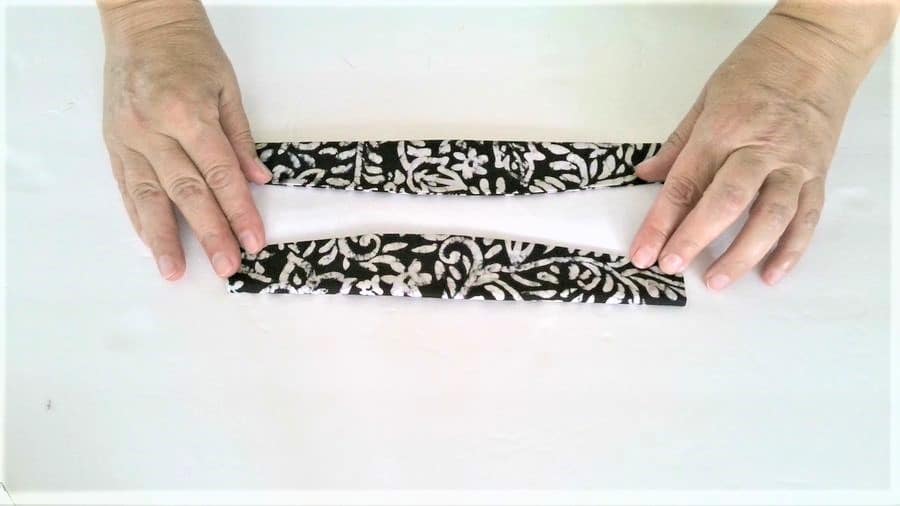


From now on the steps will be different for my 2 models of DIY masks
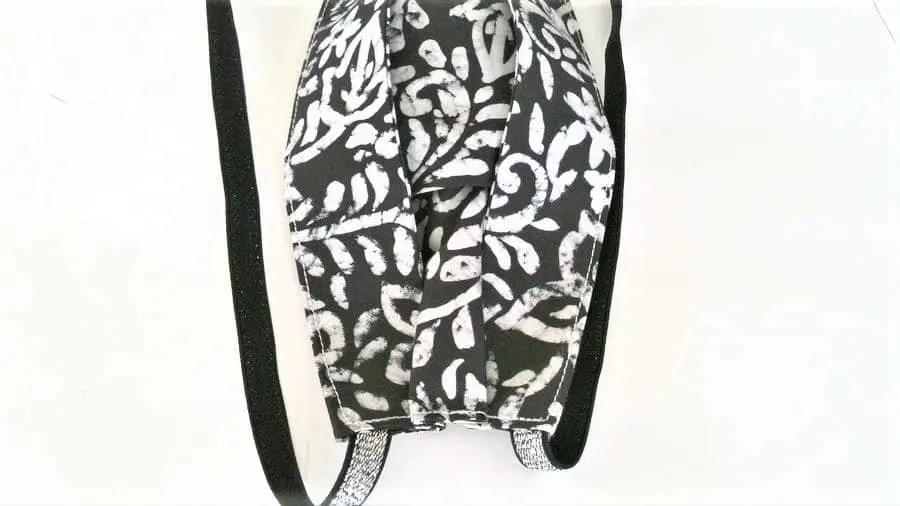
The first model has small pleats on the sides.
Step 9 a
Now we are going to attach elastic.
I don’t like elastic over my ears. I prefer masks with elastic over my head.
If you make the mask like this (with elastic over your head) for the first time you may not have the right measurements for this elastic. It’s not a big deal. You can always adjust it later. Just cut it a little bigger and later you will shorten it.
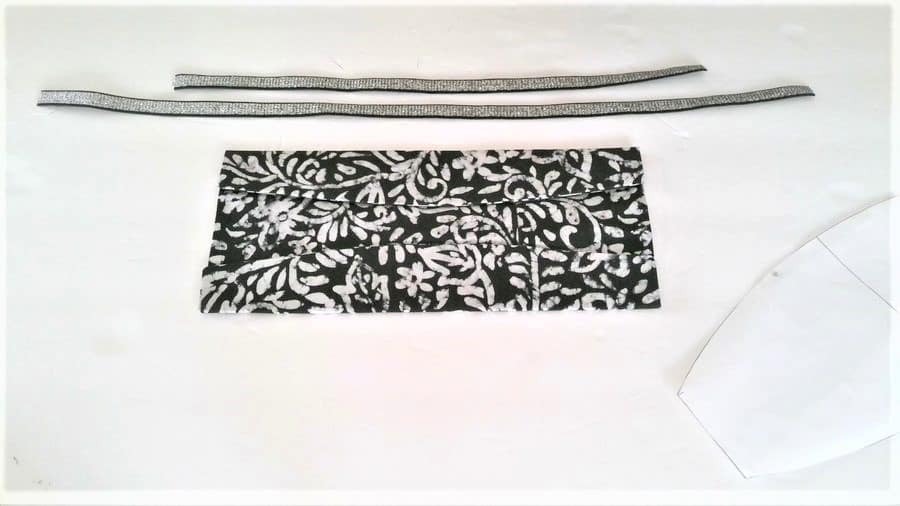
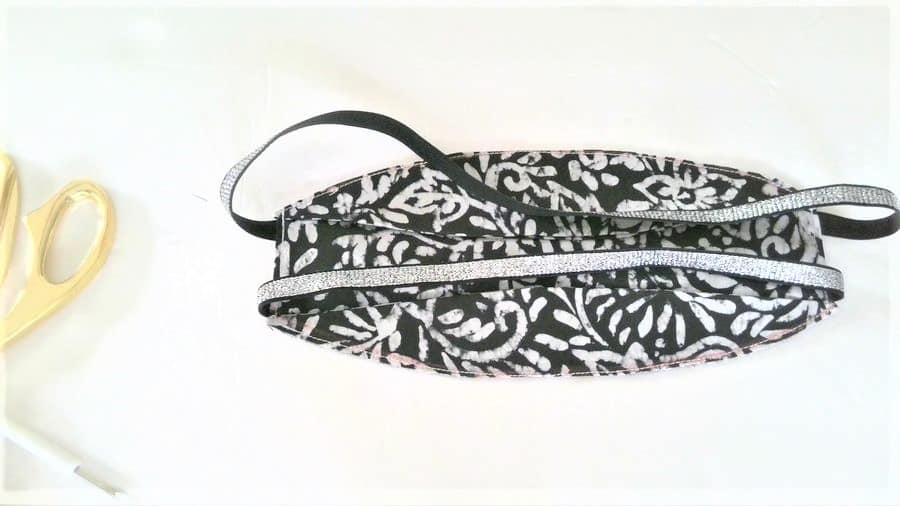
As for my elastic, the bigger piece that goes over my head is 15 inches long, and the shorter piece that goes around the neck is 10 inches.
But the elastic you are using can have different elasticities. So the measurements will be different for different elastic.
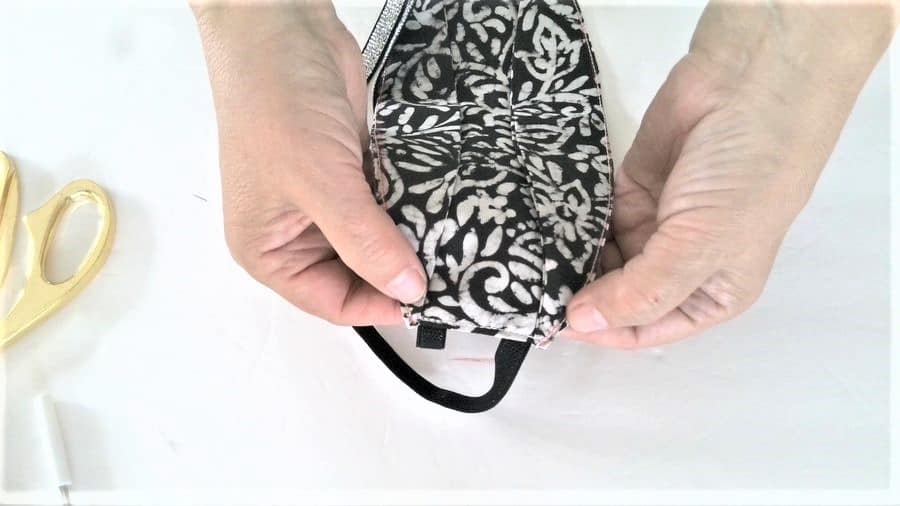
Place elastic edges under the folded fabric as you see in the images below and stitch around all edges.

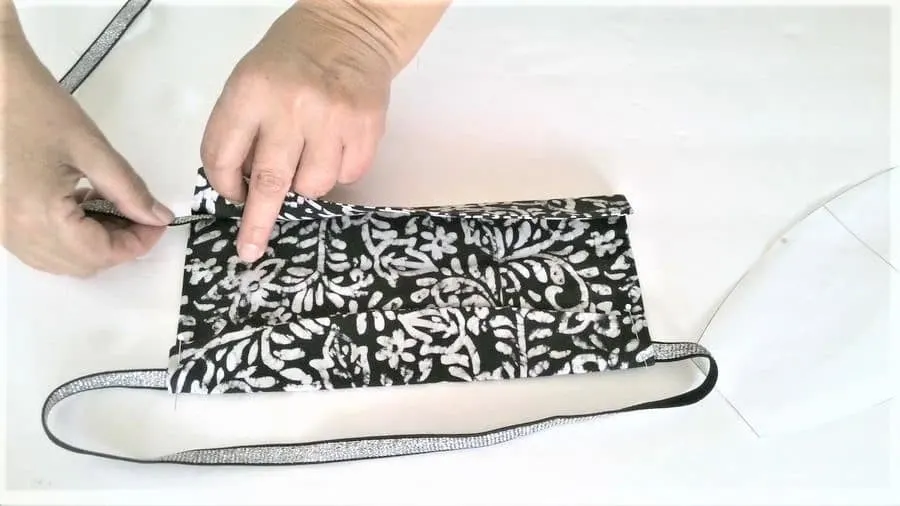
Step 10 a
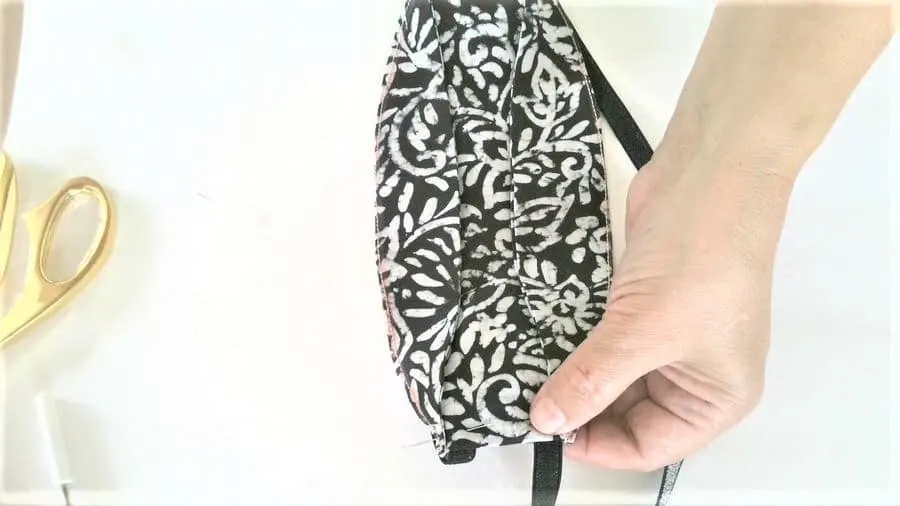
Now let’s make 2 pleats at the sides. Make sure the pleats are exactly the same. Stitch again over the pleats.
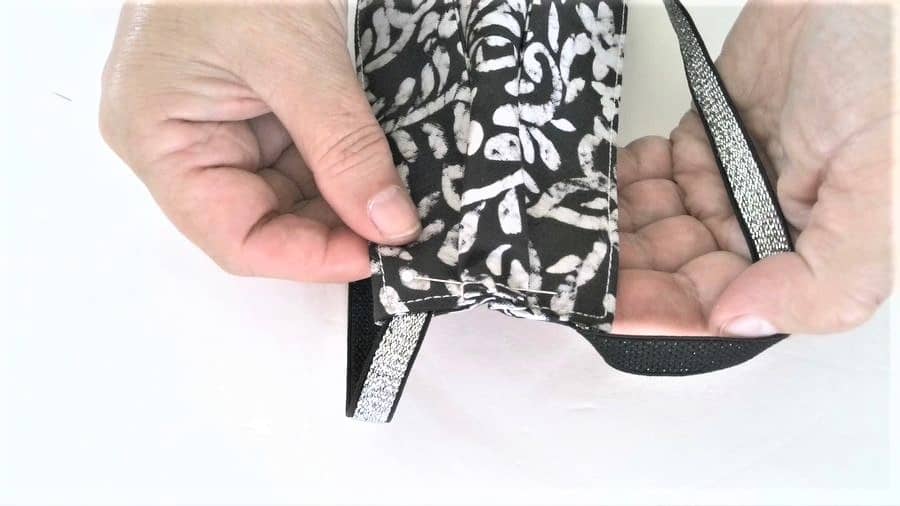
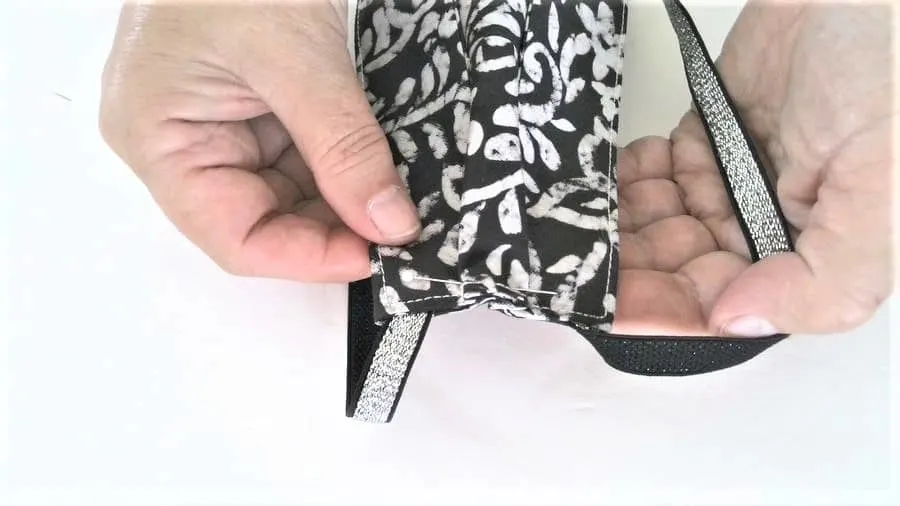
Step 11 a
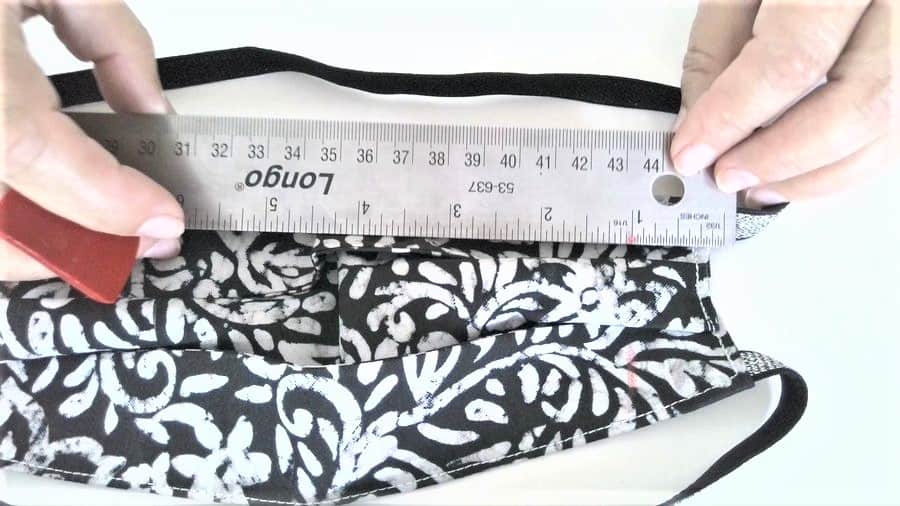
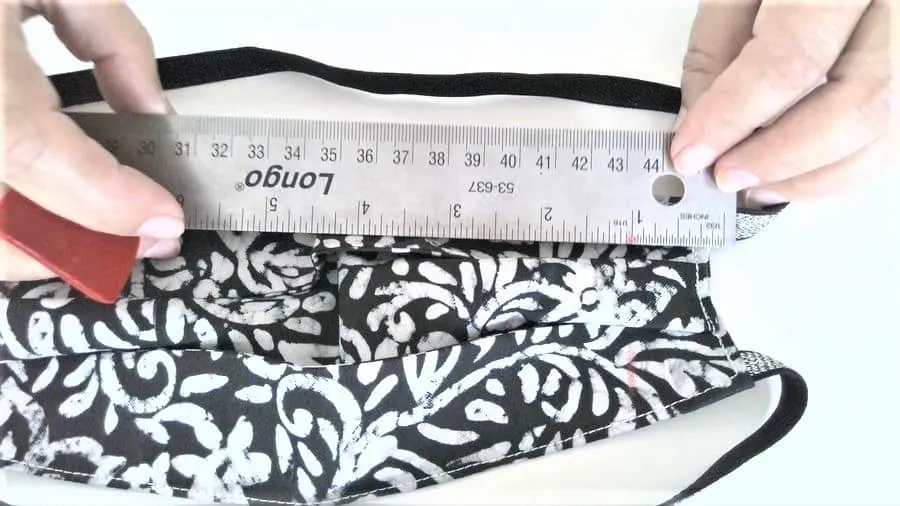
Now we need to make 2 more seams.
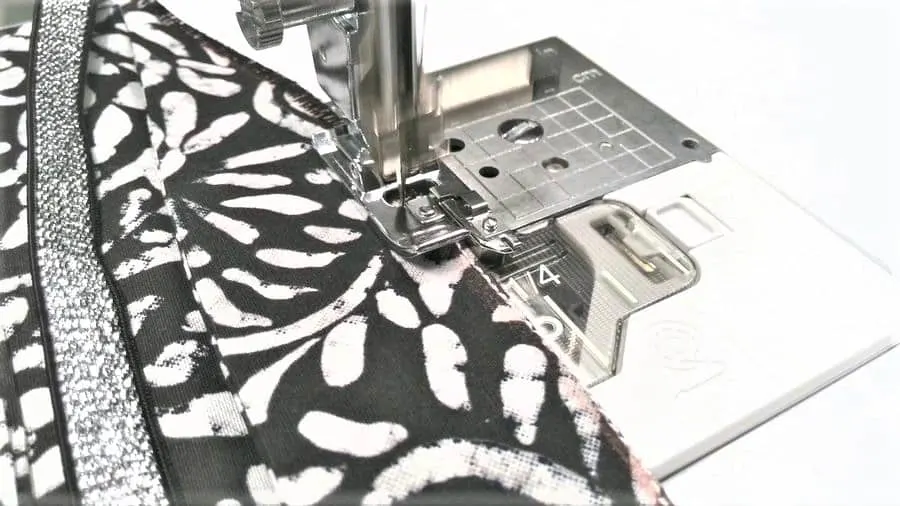
Measure 1 inch from the side edges and draw curved lines as you see in the images below. Stitch.
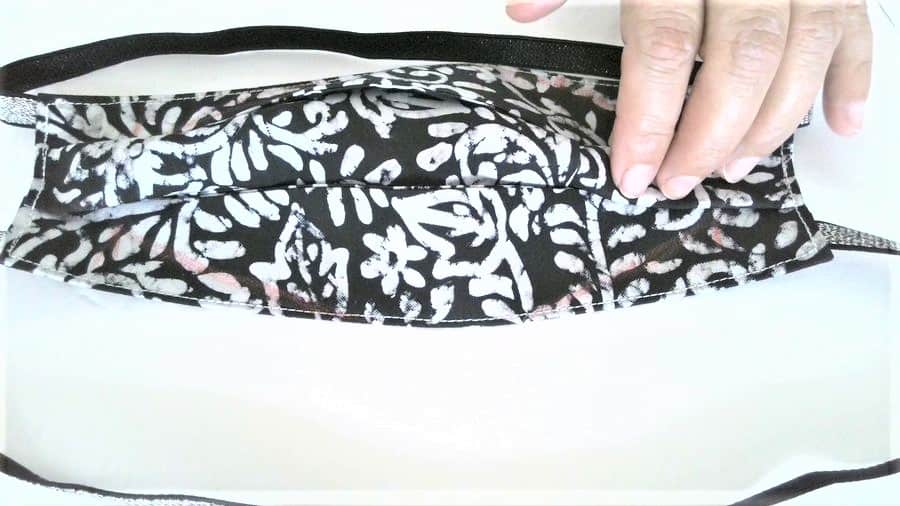

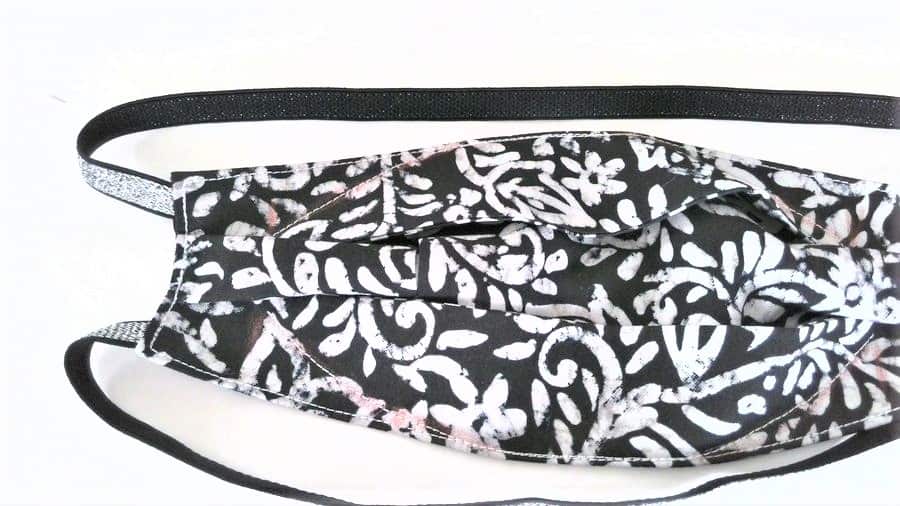
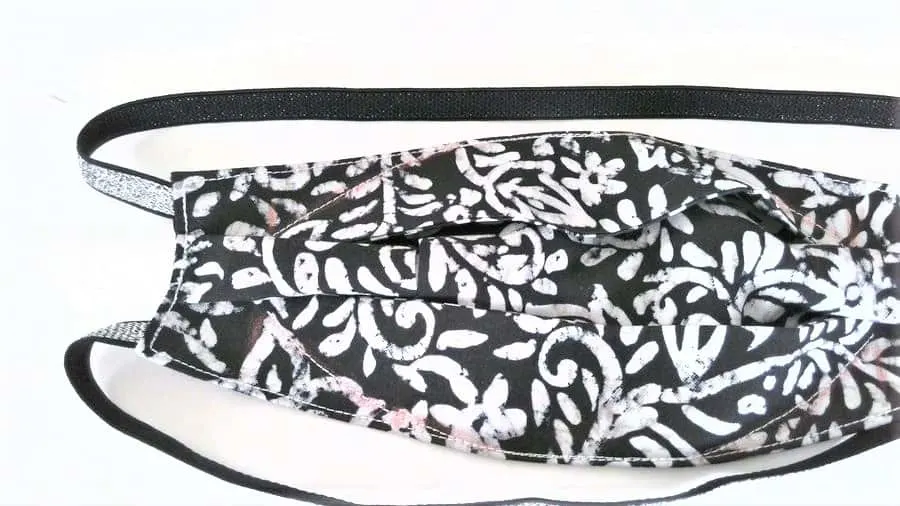
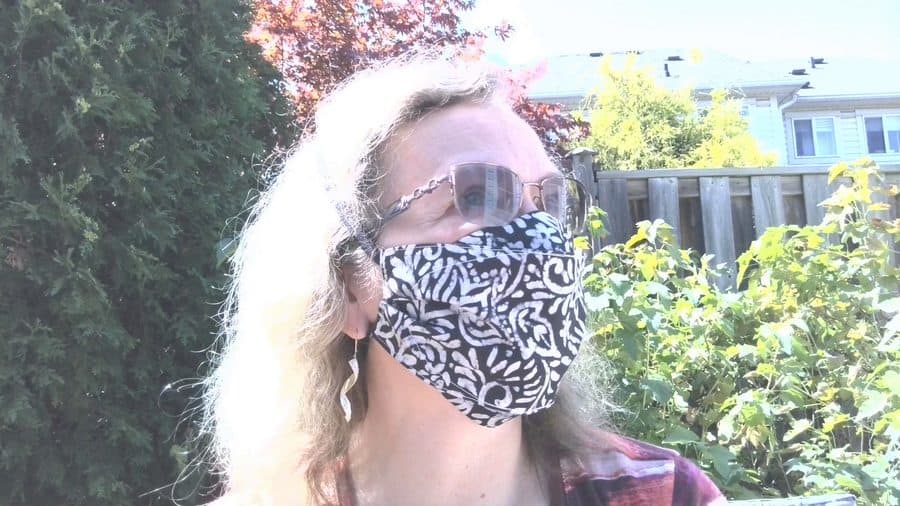
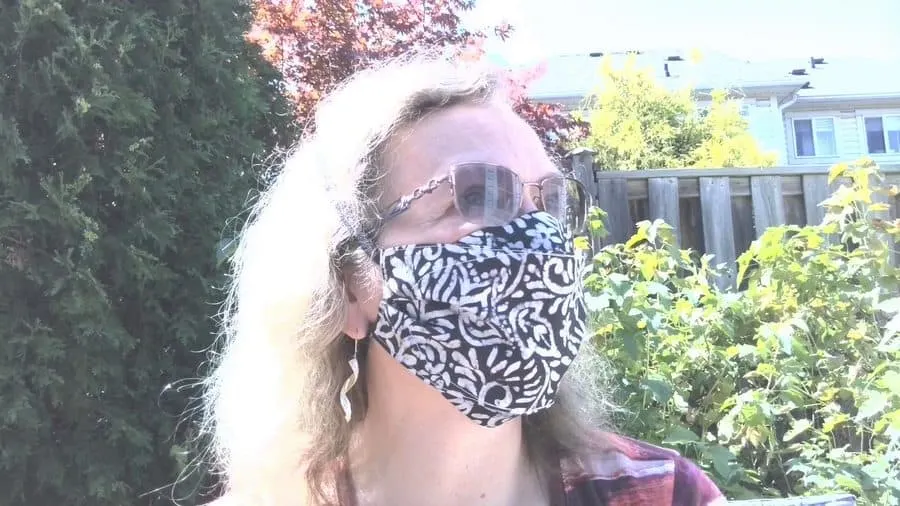
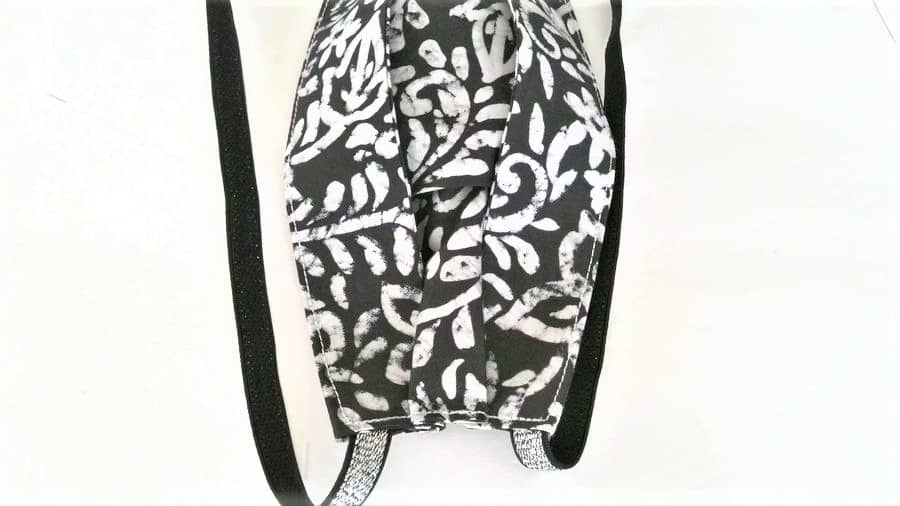
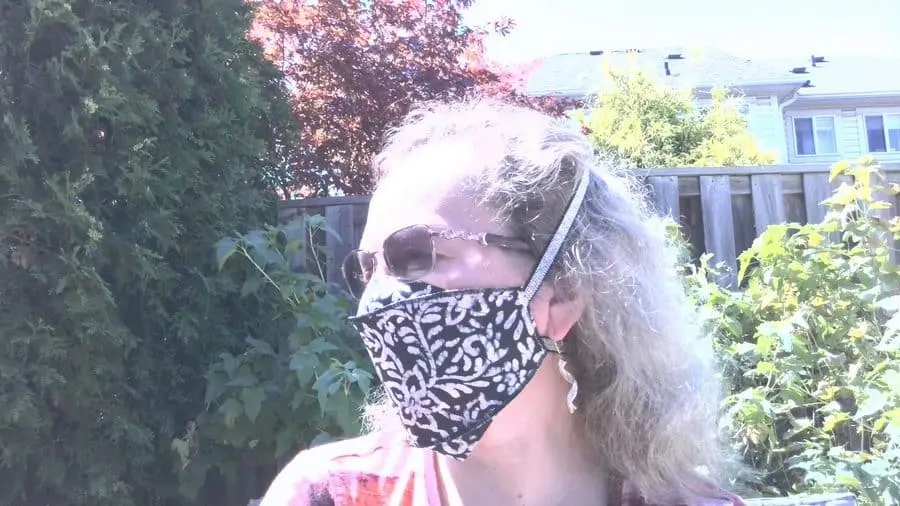
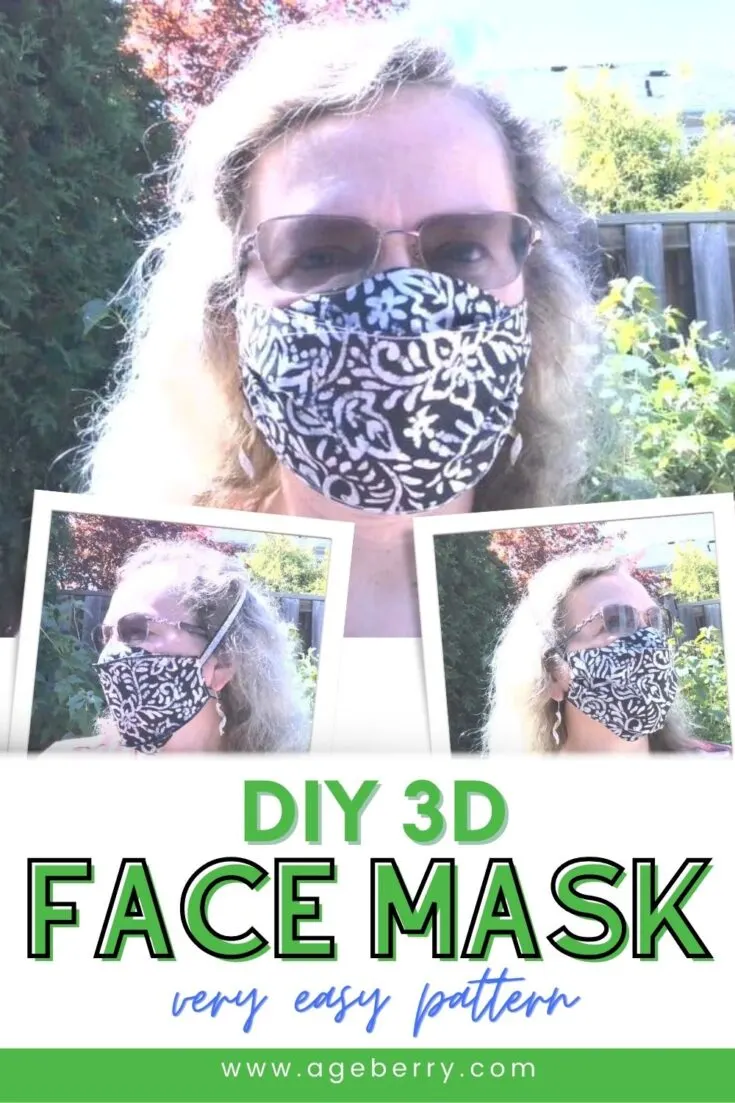
Mask A is ready!

Now let’s make the mask B.
Steps 1- 8 are exactly the same as with mask A
Step 9 B
Place the second pattern piece on the mask, mark around curved edges and make stitches over the marks. Make sure the stitches end exactly at the corners.
Cut the fabric close to stitches.
Step 10 B
Now we are going to attach elastic.
Let me repeat what I said about elastic above
I don’t like elastic over my ears. I prefer masks with elastic over my head.
If you make the mask like this (with elastic over your head) for the first time you may not have the right measurements for this elastic. It’s not a big deal. You can always adjust it later. Just cut it a little bigger and later you will shorten it.
As for my elastic, the bigger piece that goes over my head is 15 inches long, and the shorter piece that goes around the neck is 10 inches.
But the elastic you are using can have different elastic. So the measurements will be different for different elastic.
Using your seam ripper make small cuts in the side seams for inserting elastic ends.
Stitch the sides of the mask securing elastic.


Step 11 B
The mask is almost ready.
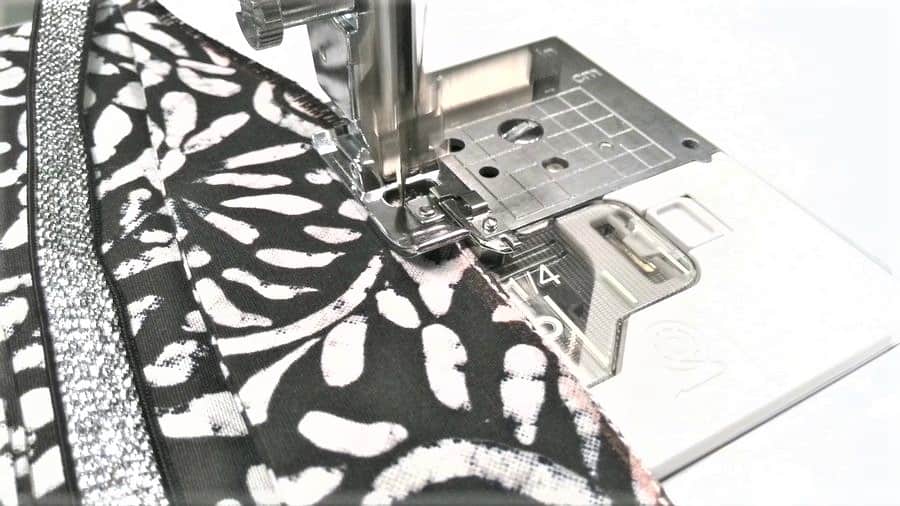
But we need to finish the curved edges we just cut. We don’t want the fabric to fray.
There are many ways to do it. You can use a piece of bias tape, you can use a piece of fold-over elastic. But I prefer the simplest method – overcast the edges with my sewing machine.
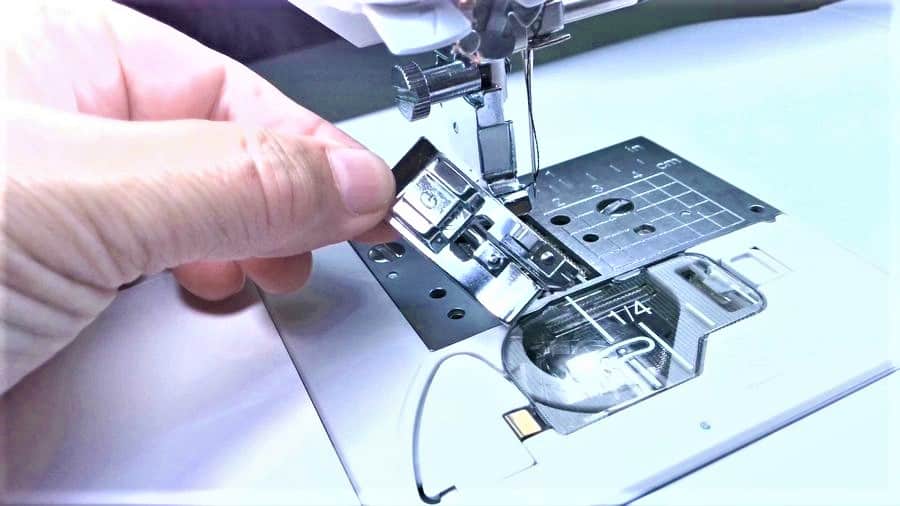
For this, I use an overcast presser foot. There are different types of overcast feet and one of them is often included in the accessories for your sewing machines. Read my tutorial on using overcast presser feet so you can finish raw fabric edges without a serger.

Make sure the bobbin thread is the same as the upper thread.
Finish curved edges with your sewing machine. This foot is pretty cool! It’s very easy to finish raw fabric edges without a serger.
Step 12 B
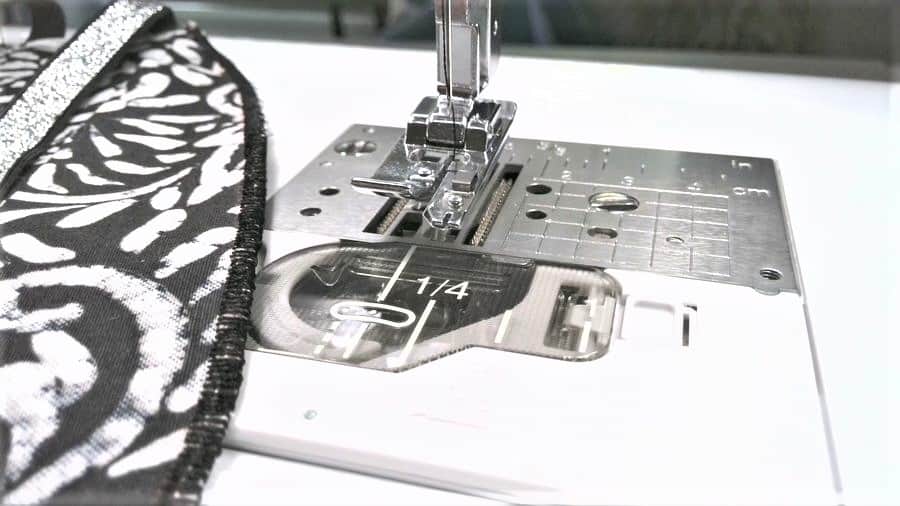
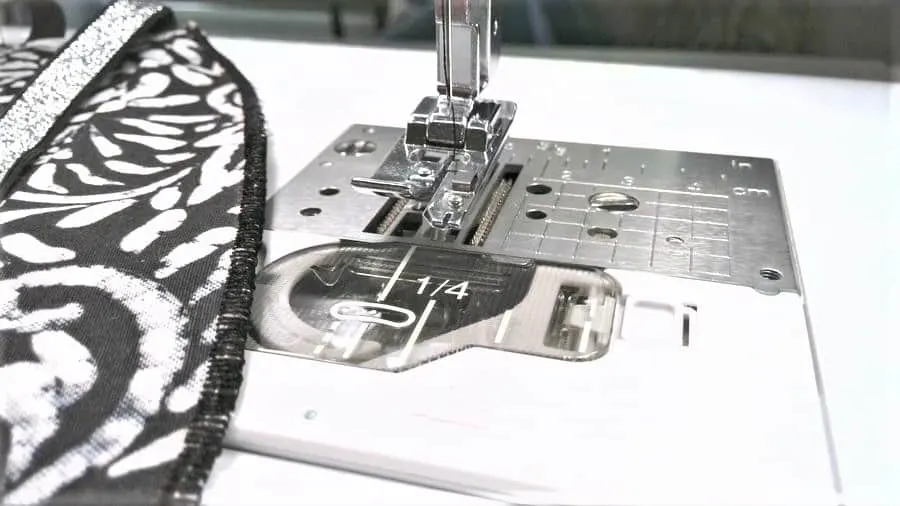
Now we need to make 2 more seams – the same as with mask A.
Measure 1 inch (or 1 ¼ inch) from the side edges and draw curved lines as you see in the images below. Stitch.

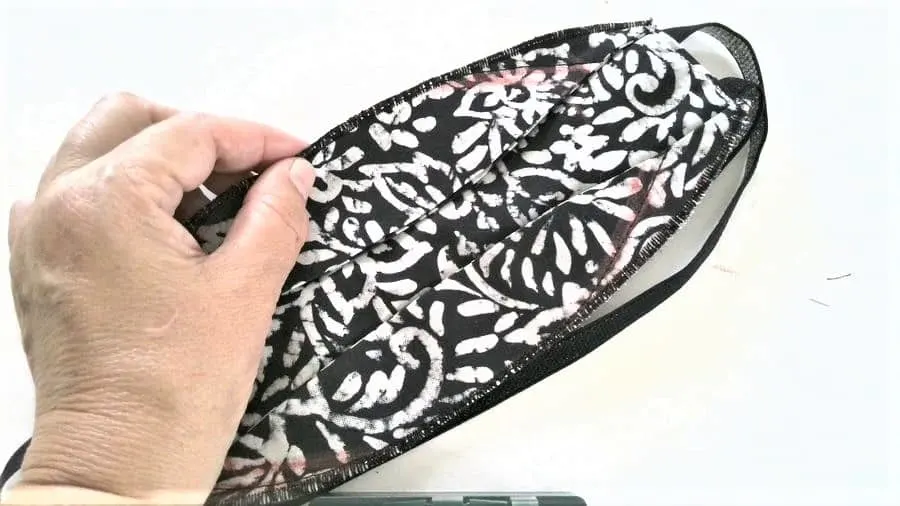
And this is the face mask version 2.

Which design do you like more?
I like both and these masks are very easy to make. They cover your nose well, they don’t press on your lips so you can talk without taking the mask off. They are very well-fitted.
Did you find this tutorial helpful? If so, save this pin (see below) on your sewing board so you can come to this tutorial later when you are ready to sew a face mask using my easy printable face mask pattern PDF and follow me on Pinterest for more tips, tutorials, and inspiration!

latest posts
- Think You Know Zippers? This Installation Guide Might Surprise You
- Why Does Your Seam Ripper Have a Red Ball? Discover Its Purpose!
- Topstitching Troubles? This Simple Trick Will Turn It Around Instantly!
- How to Sew Shirring: A Step-by-Step Guide to Elastic Thread Gathering
- Are Self-Threading Needles Really Useful?
- Amazon Spring Sale: Best Choices
- Elevate Your Prom Look: A Guide to 10 Neckline Choices (2024)
- No Pattern, No Problem: Turn Scraps into a Quilting Masterpiece
- Prom Perfection: A Guide to Choosing the Perfect Dress Color (2024)
