
In this sewing tutorial, I want to show you how to make quilt binding. I know there are many posts on making quilt binding but I am doing it a little bit differently than what I have seen. I bind a quilt with my serger and it’s really fast, easy, and accurate.

Note: Some of the links on this page are affiliate links. This means I will receive a commission if you order a product through one of my links. I only recommend products I believe in and use myself.
Do you happen to know how to bind a quilt with mitered corners by serger?
If you answered NO … read on.
If you answered YES … Nice! Read on.
✅ Related tutorial: Serger vs. sewing machine
If you are serious about sewing, I recommend purchasing a serger. There are some great serger models on Amazon that will be brought right to your door.
You will very quickly realize you need to add a serger to your sewing room! Projects will become much more polished and be able to be completed much faster with this helpful machine.
I strongly advise you to practice with scrap fabric before trying it with your project. It’s very fast and easy but you need to practice.
I guess you know what is binding? Binding is the finished edge of a quilt that covers raw edges with a strip of fabric.
Attention! If you like the video format, at the bottom of this post, look for a YouTube video version where there is a step-by-step tutorial on how to bind a quilt by serger. For a more complete picture, I recommend exploring both versions.
STEP 1
Prepare your quilt for sewing binding
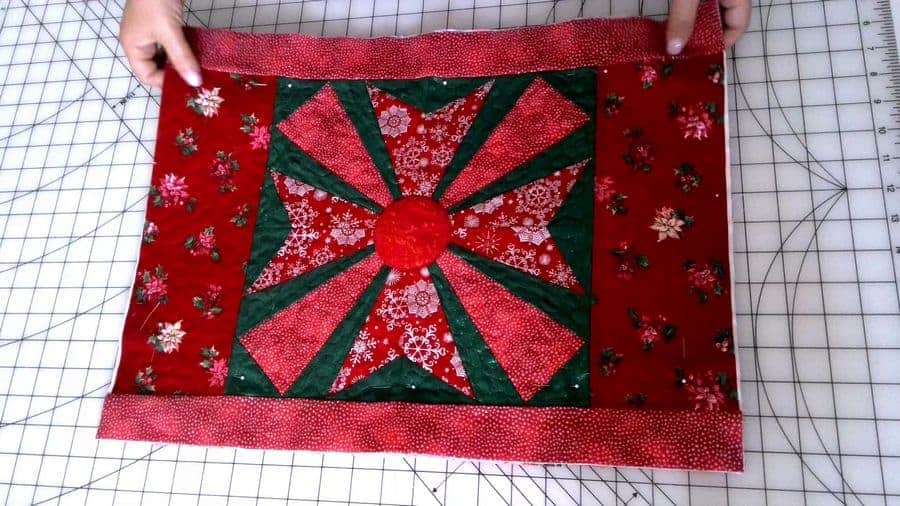
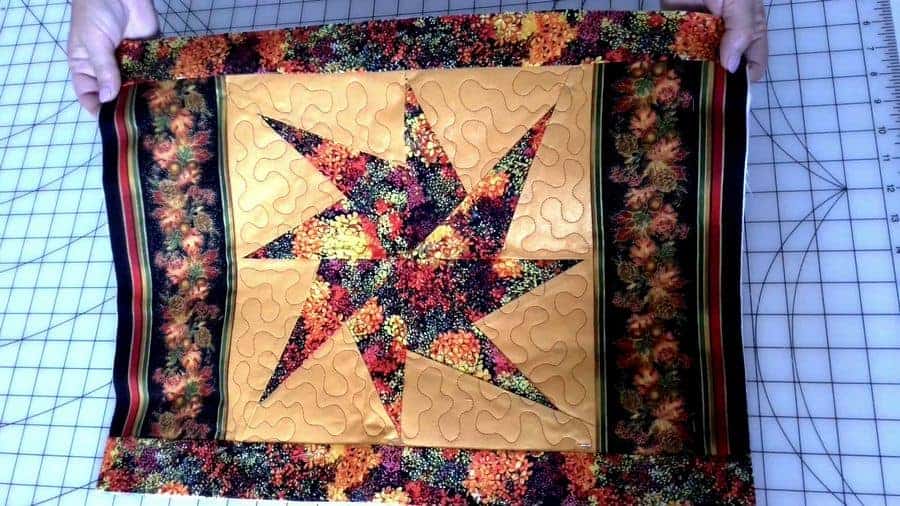
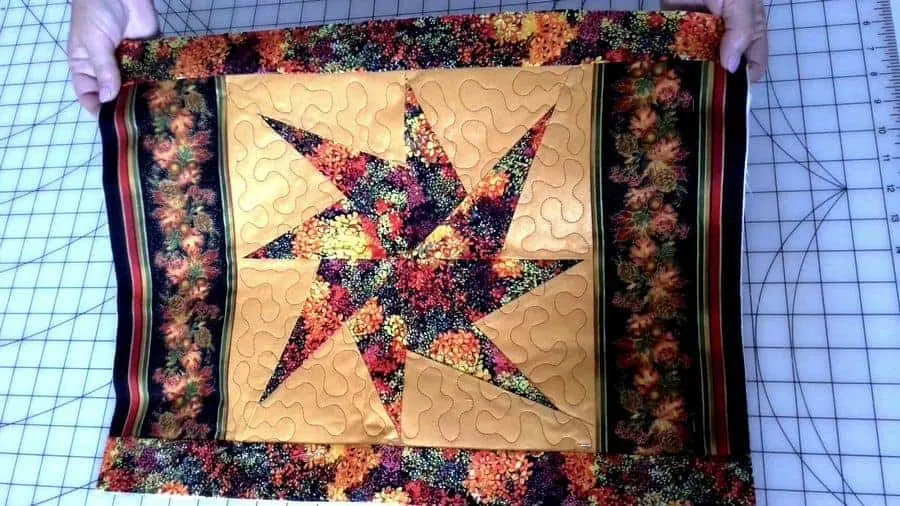
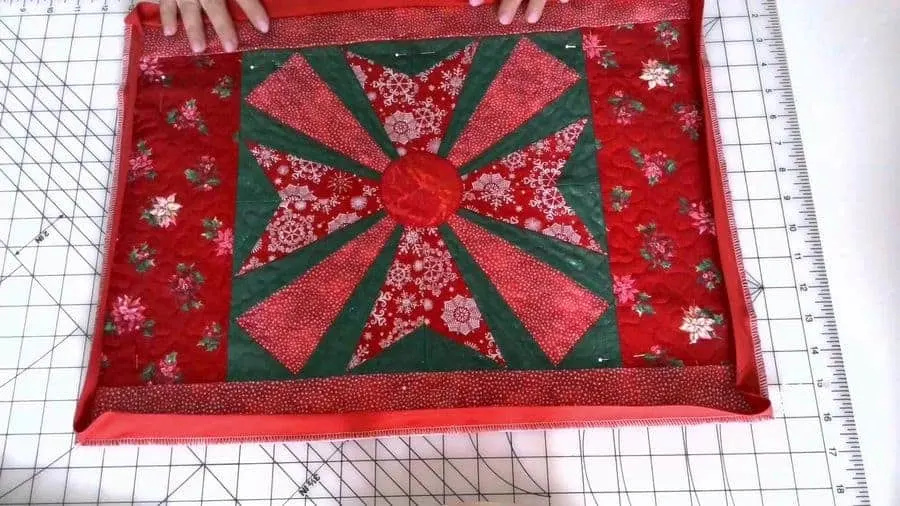
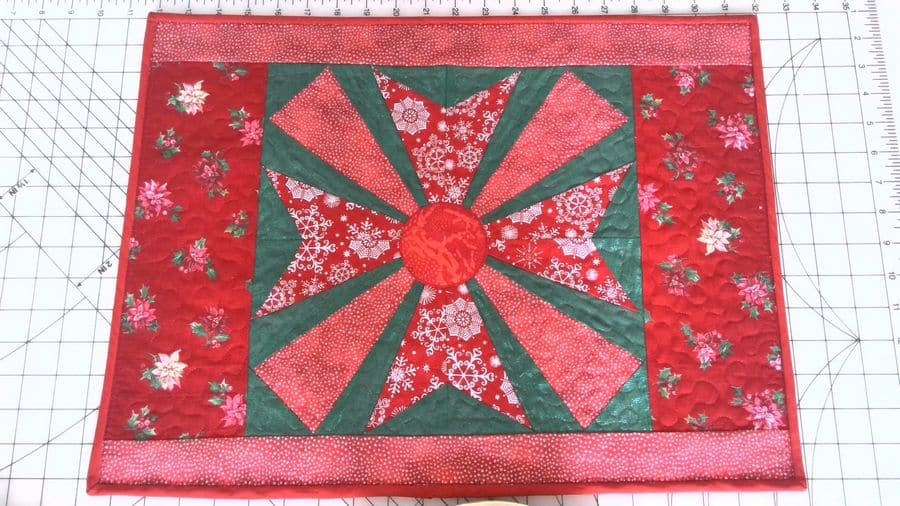
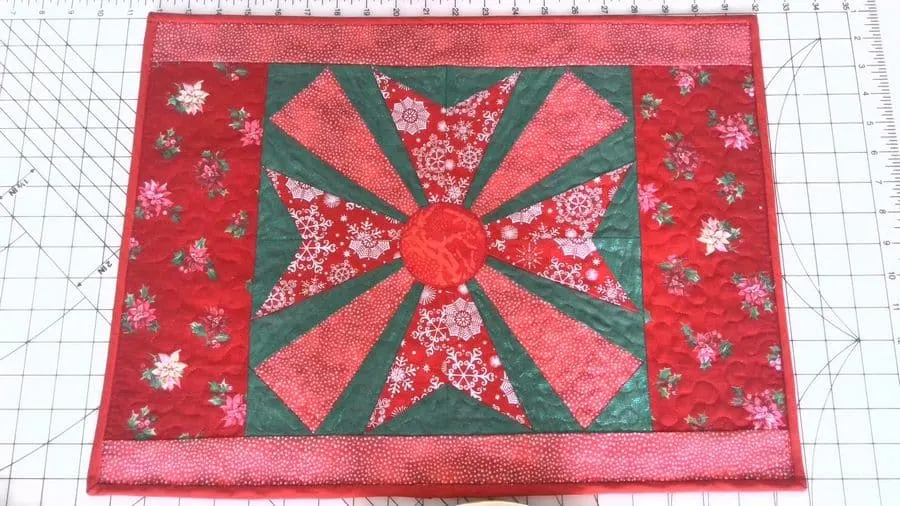
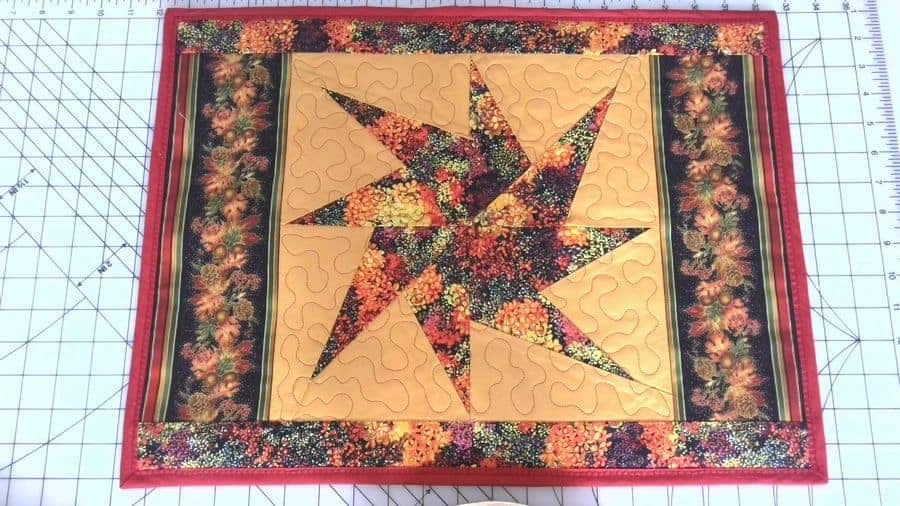
I have here a reversible quilt. It’s a reversible placemat: one side is for Thanksgiving and the other side is for Christmas.
I attached my 2 quilted sides with straight pins, they are going to hold my quilt sandwich together and prevent it from shifting.
You have to trim all edges of your quilt cutting with a rotary cutter through all layers as straight as possible.

STEP 2
Prepare a long strip of fabric for making quilt binding
Make sure your binding strip is long enough for your quilt.
How wide to cut quilt binding?
I made my binding 2 ¼ in wide but I think a good width would be from 2 inches to 2 ½ in. Of course, quilt binding can be wider but we are making quilt binding with a serger so don’t cut the binding strip wider than 2 1/2 in.
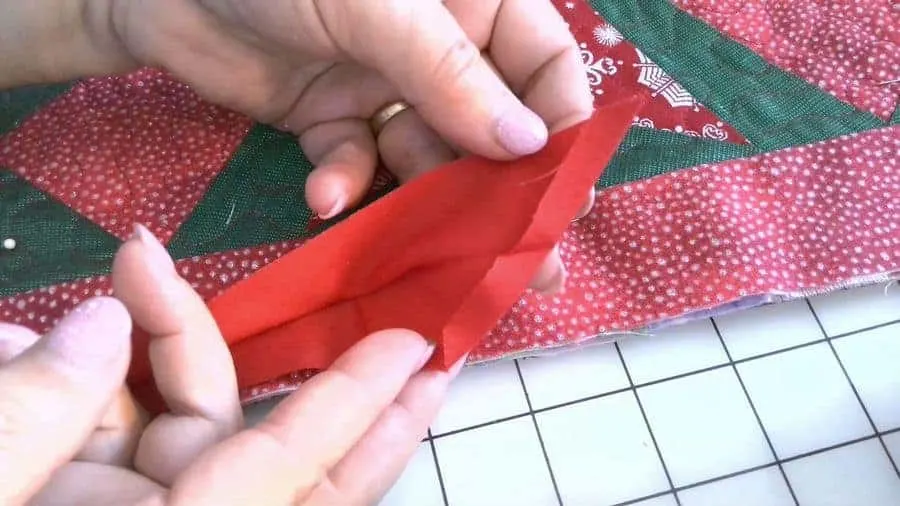
I made my binding with the ends at 45-degree angles. If you have straight edges you need to cut it at a 45-degree angle. Then fold the edge in ¼ in and press. Fold the binding strip in half lengthwise wrong sides together and press with an iron.


STEP 3
Prepare a serger
Use good quality serger threads.
Related post: Sewing thread types and uses
Change the needle – a dull needle is no good for stitching over a few layers of fabric and batting.
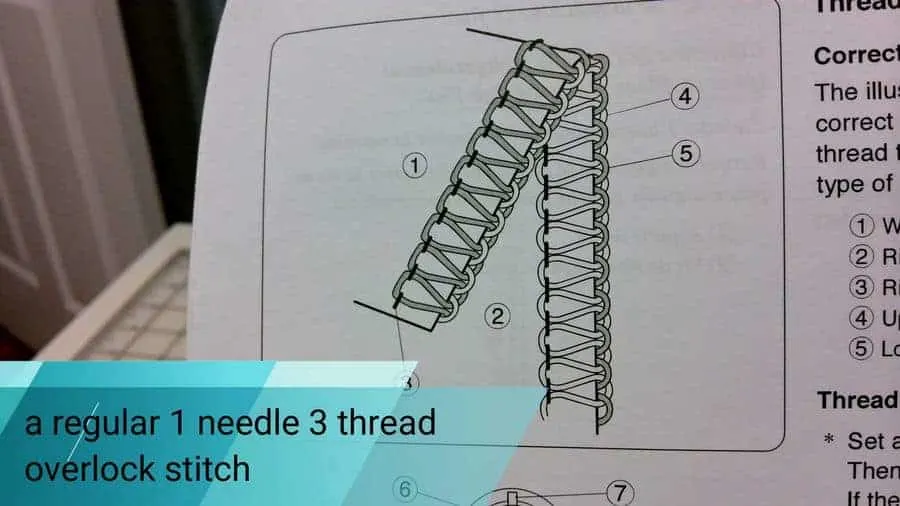
I used just a regular 1 needle 3 thread overlock stitch. But I used the left needle – in the most left position because in my case the stitch width is 1/4 in. You need to make a stitch width as wide as possible, but not necessarily ¼ in.
Serger stitches are excellent in preventing the bunching or folding of the quilt layers.

STEP 4
Start sewing binding
Start sewing binding on a side, somewhere in the middle of one side, never start in a corner.
You can begin binding anywhere along the edge of the quilt except in a corner. Allow approximately 4 in of the binding to be free (without stitching). But it’s also better not to start sewing close to the corners because it may be a little difficult to join the quilt ends near the corners.
After you have decided where to start, run the binding strip around the edges of the project to make certain that the binding seams don’t fall into corners. If you see it happens readjust your starting point until there are no seams near the corners.
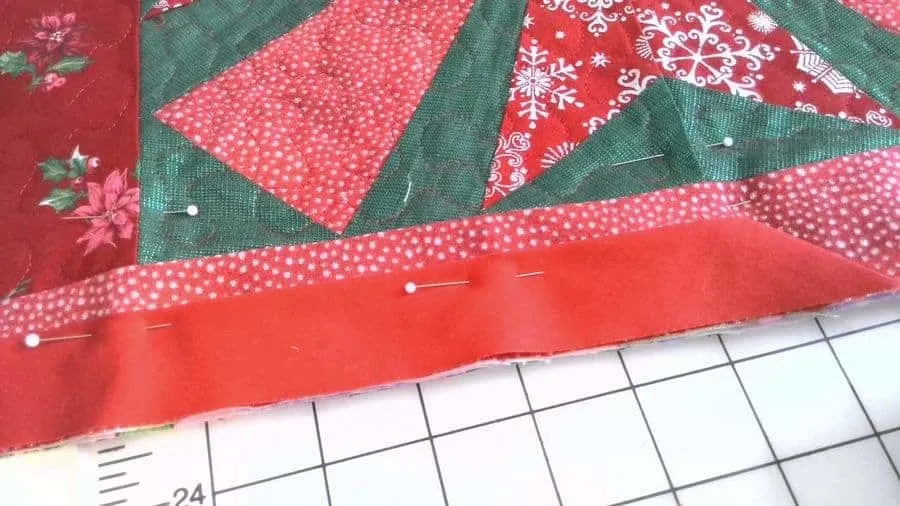
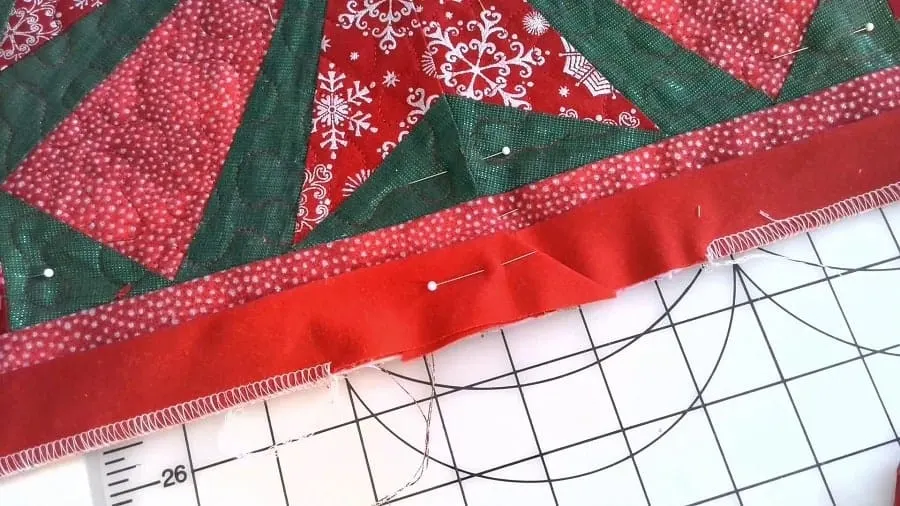
Place the folded binding strip on the quilt with matching raw edges. The raw edges of the binding are placed against the raw edge of the quilt.
I have a reversible quilt so I don’t have the front and the back of my quilt – both sides are the quilt top.
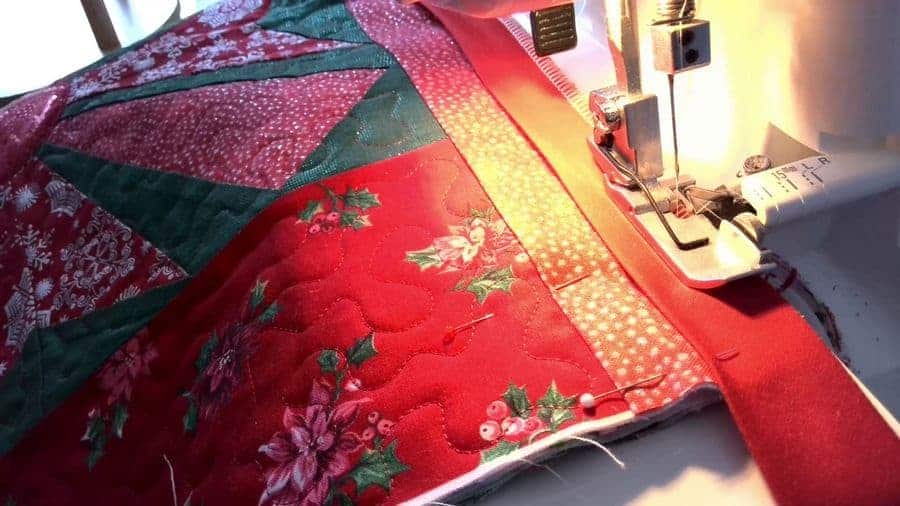
I put a few pins to secure the binding in place from the beginning. But with a serger, you don’t need to pin the binding around the entire quilt. Just align the raw edges by hand.
✅ Related tutorial: Types of sewing pins and their uses: all you need to know about straight pins for sewing
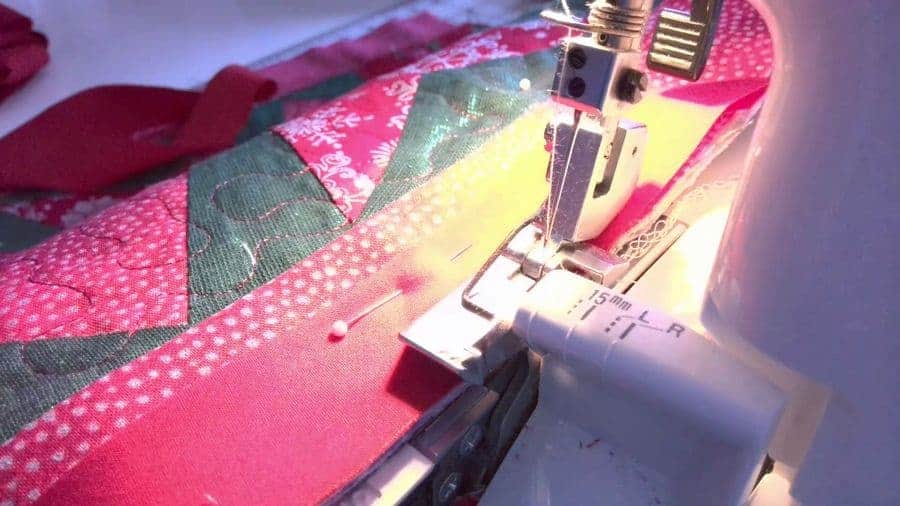
When sewing, place the serger’s knife along the edge of the quilt – don’t cut any fabric from the quilt edge, just go with the knife along the edge.


STEP 5
Mitered corners quilt binding
You have to stop sewing before you reach the corner.
So, when to stop? The distance to the quilt edge is equal to the width of the seam allowances. In my case, the seam allowances are ¼ inch, so I should stop ¼ in from the edge.
If you are not sure where to stop make a mark on the quilt. It’s better to stop before the ¼ in point (even if you stop a few millimeters before) than to sew over it. If you sew past this point your corners will never look right.
Put the needle and the presser foot in the up position and remove the project from under the presser foot. Run the serger without the project and make a thread tail around 3 in.

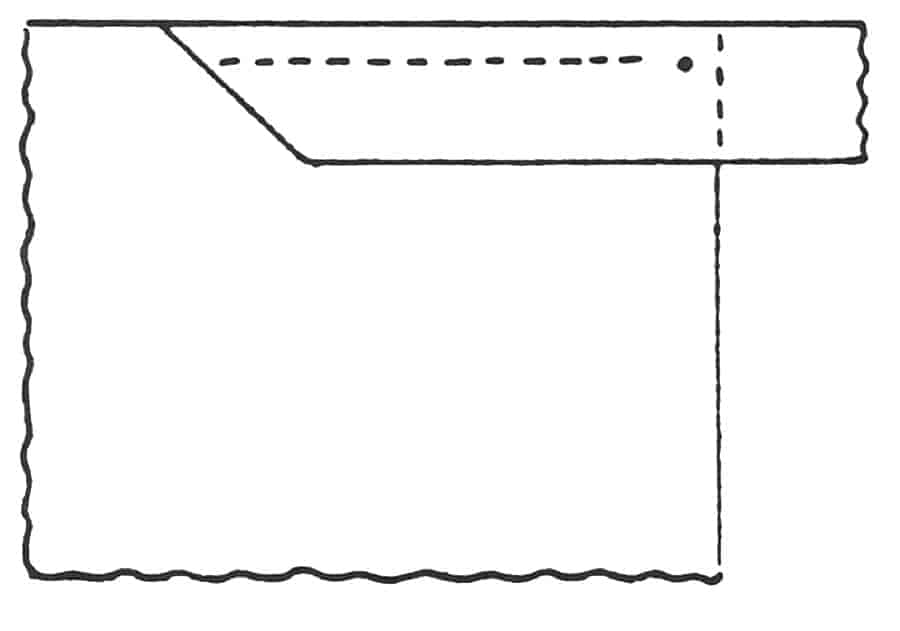
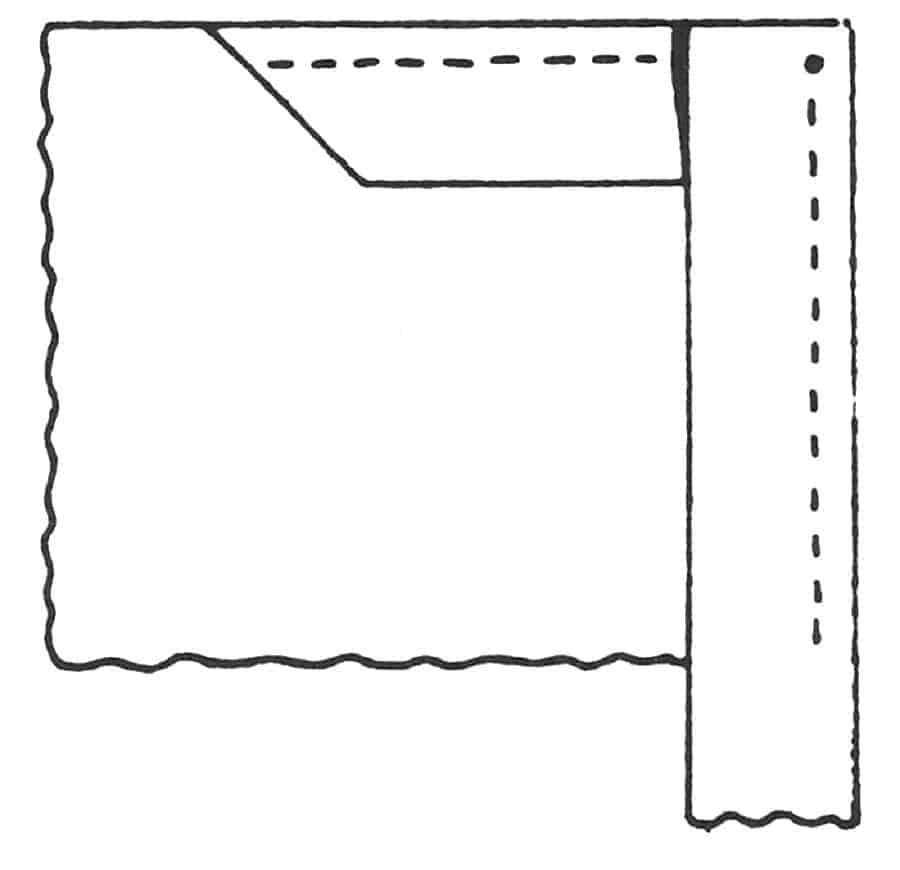
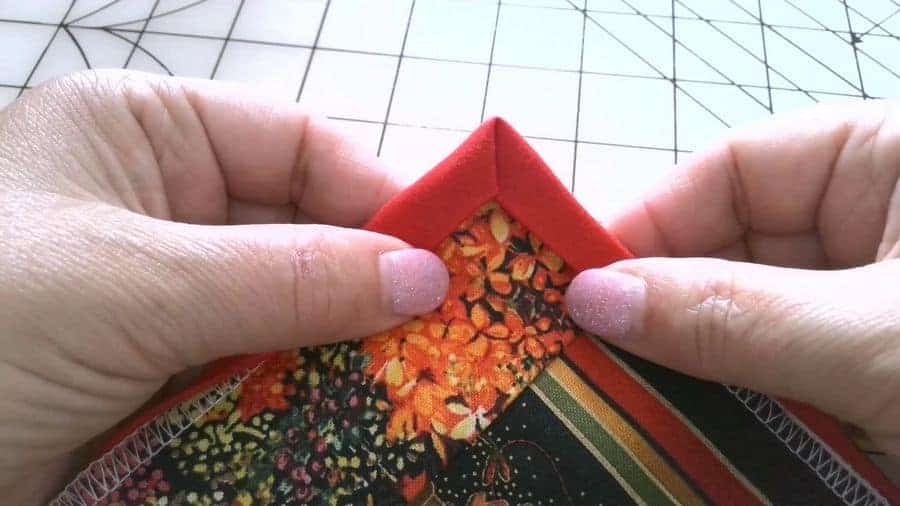
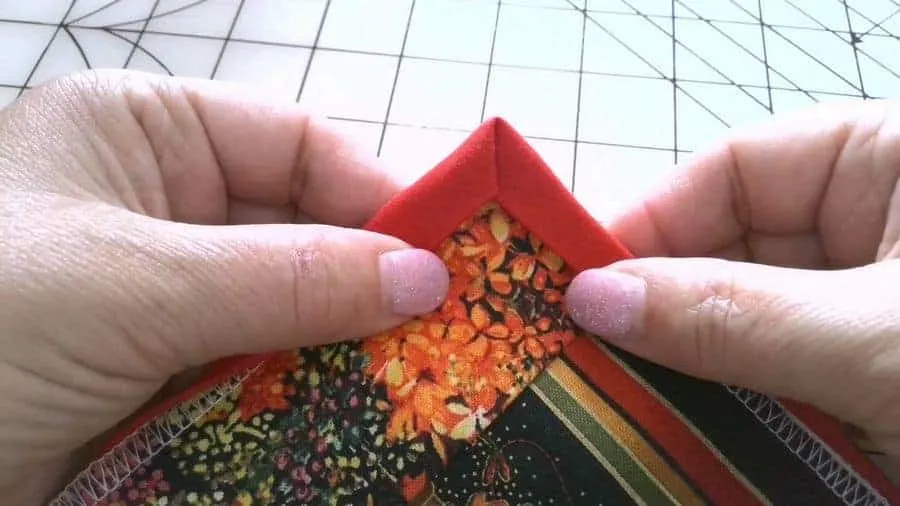
Fold the binding strip up diagonally to form 45 degree angle at the crease as shown in the image below (45-degree angle). The binding strip should be exactly perpendicular to the quilt side you just sewed and the raw edge of the binding strip is exactly parallel to the other side of the quilt.


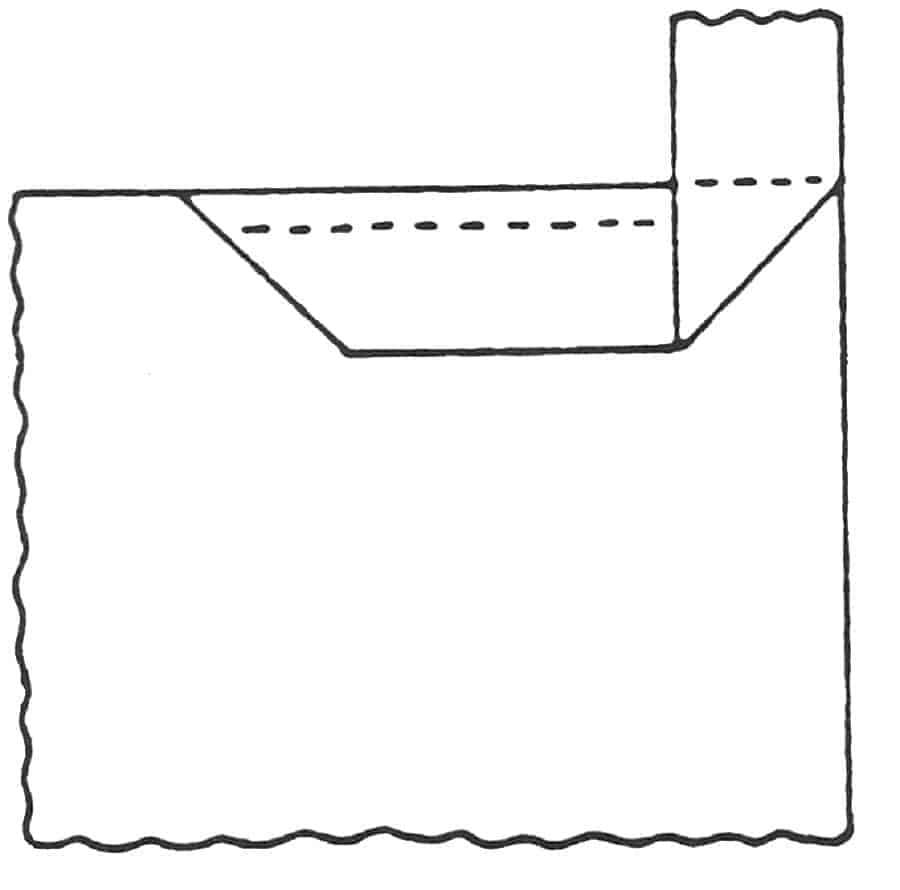

Fold the strip down, so that fold is even with the top edge and the raw edges are lined up with the raw edges of the quilt again.
Start stitching again from the very edge of the quilt.
Continue around the entire quilt, repeating this procedure at each corner.


Step 6
Quilt binding joining ends
Stop approximately 8 in from the beginning.
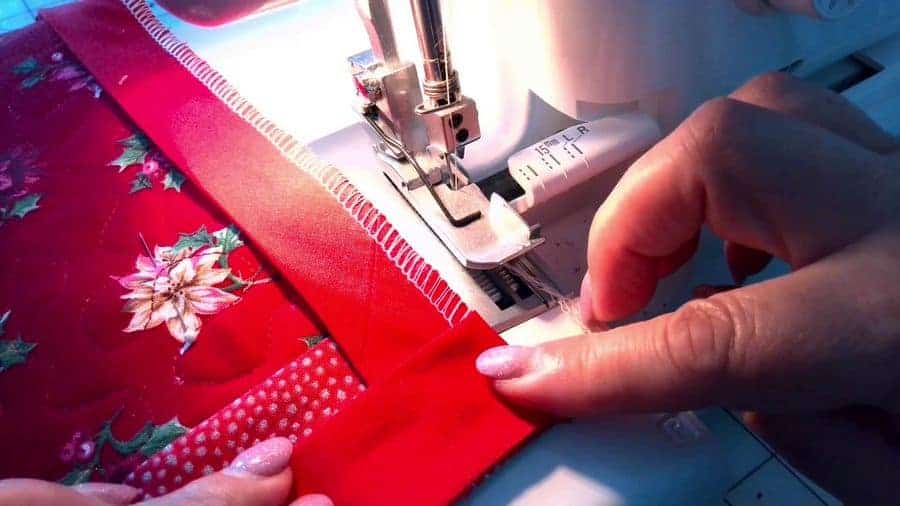
Overlap the edges of the binding strip to enclose raw edges. Slip the end of the binding strip into the starting end.
Stitch the final section of binding to the project trimming any access.

Step 7
Finishing the quilt binding
That’s what the binding looks like after stitching with the serger. I need to cut thread tails and remove the pins that were holding my quilt layers together.

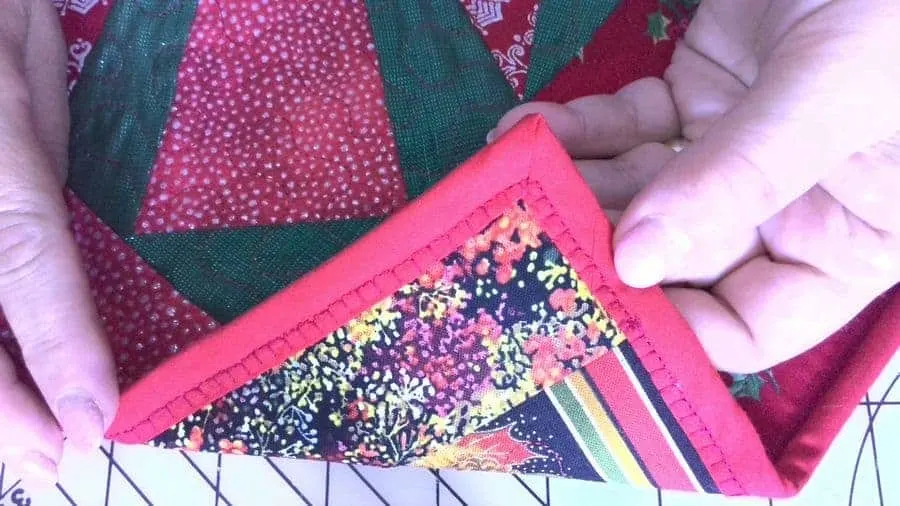
Flip the binding over and form the corners. You can see that the corners are perfectly mitered on this side.
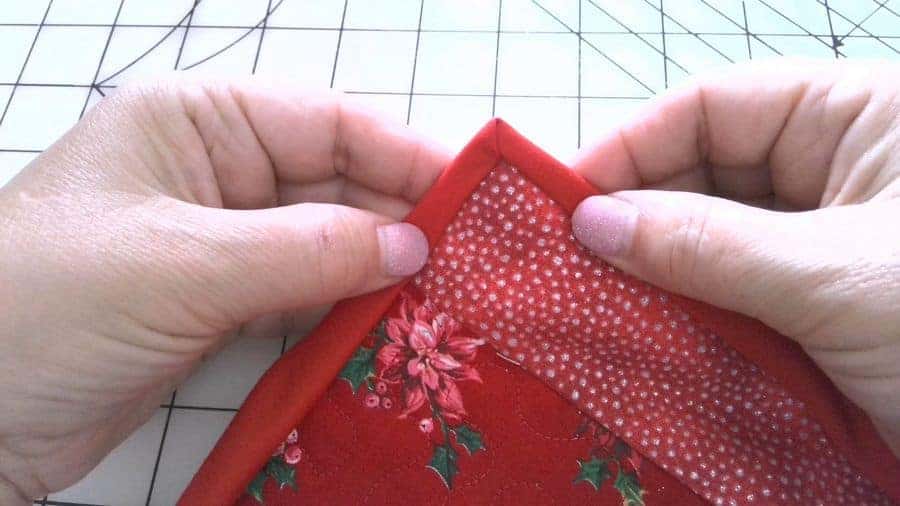

On the other side, you just need to fold them properly – and this is so easy to do.
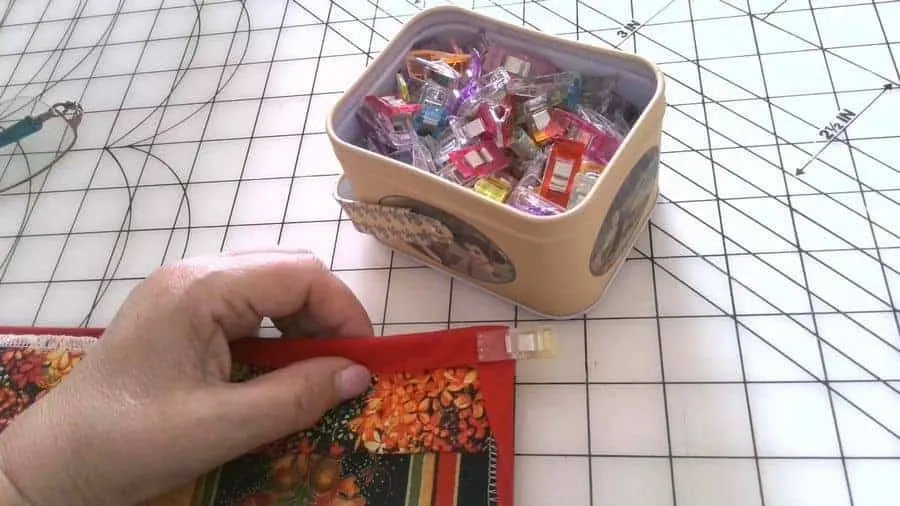
I like to use Wonder clips to hold the binding in place. They are very helpful and well, wonderful!
Work your way around the quilt.
I want my binding to be perfectly even so I decided to baste the binding in place before final stitching. I also pressed the binding after basting. It really helps to make a crisp nice finish to the quilt.

There are many different ways to sew the folded edge down. You can sew it by hand, you can stitch in the ditch. But I decided to use a decorative stitch of my Janome sewing machine. So, I put this stitch along the edge of the binding.
Sew carefully, use caution, because it must look good on both sides of the quilt.

I think I like the clean finish on the front and back.

I made a YouTube video for you if you are the watching type. Check this out if you like to see how to make a quilt binding by serger instead of reading…
Do you make these 15 mistakes with your serger?
Enter your email in the box below to download your free eBook and find out which mistakes you should avoid!
Subscribe to my weekly newsletters with sewing tips and tutorials, free sewing patterns, printable PDFs, and other useful content and you’ll find the eBook in your inbox.
Subscriber exclusive offer.


Did you find this tutorial helpful? If so, save this pin (see below) on your sewing board so you can come to this tutorial later when making quilt binding, and follow me on Pinterest for more tips, tutorials, and inspiration!
latest posts
- Think You Know Zippers? This Installation Guide Might Surprise You
- Why Does Your Seam Ripper Have a Red Ball? Discover Its Purpose!
- Topstitching Troubles? This Simple Trick Will Turn It Around Instantly!
- How to Sew Shirring: A Step-by-Step Guide to Elastic Thread Gathering
- Are Self-Threading Needles Really Useful?
- Amazon Spring Sale: Best Choices
- Elevate Your Prom Look: A Guide to 10 Neckline Choices (2024)
- No Pattern, No Problem: Turn Scraps into a Quilting Masterpiece
- Prom Perfection: A Guide to Choosing the Perfect Dress Color (2024)
Pat.
Friday 8th of April 2022
Thank you, Olga. This is an excellent tutorial.
Olga Balasa
Saturday 9th of April 2022
Thank you; always glad when my articles are helpful.
Jane Coombs
Tuesday 9th of November 2021
Just wondering about the knife, can it be removed or be non functioning. Maybe I did not explain this correctly. Thx for the tutorial. There was a man in my serger class who made the entire quilt on the serger. Handy having that quarter inch built in.
Jane Coombs
Olga Balasa
Tuesday 9th of November 2021
The serger has two knives: upper and lower. You can change and in some models lift the upper knife, the lower knife is fixed. But if you remove or lift the upper knife, the lower knife will do nothing. Some modern sergers will allow you to move a lever and lift the upper knife, some (like my first Singer), not, that knife is also fixed. Of course you can physically remove it and sew without. I have never done it though, but I don't see why it wouldn't be possible. Only certain stitches can be used without a knife.