
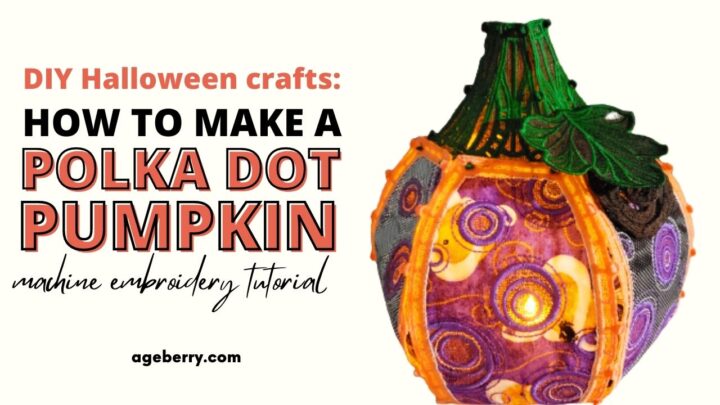
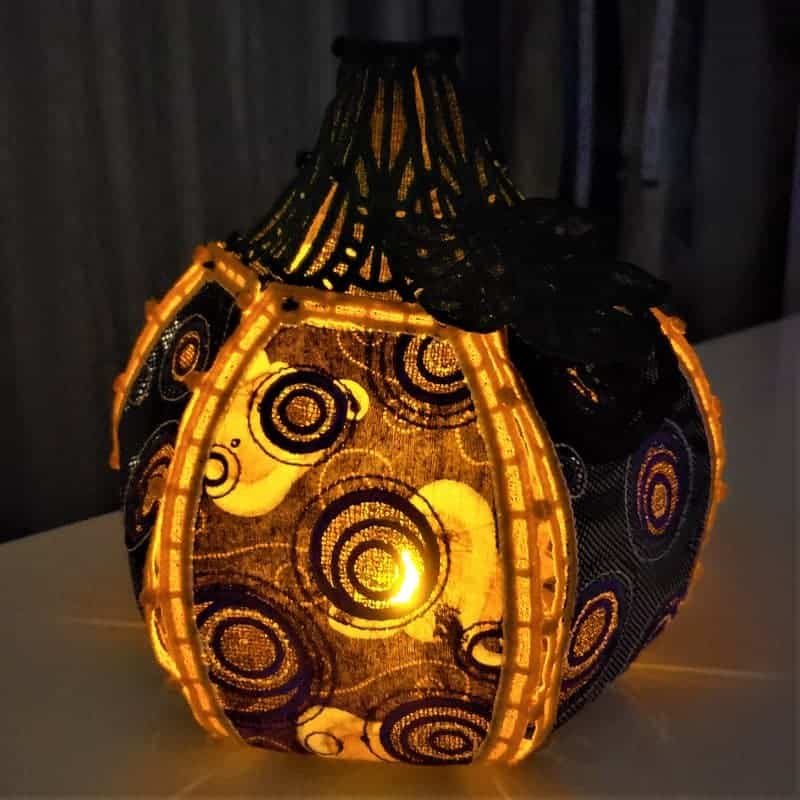
This is a step-by-step machine embroidery tutorial on making freestanding lace/applique with a design from the OESD Embroidery library called Polka Dot Pumpkin. This candle holder is great for exclusive Halloween decorations.

Note: Some of the links on this page are affiliate links. This means I will receive a commission if you order a product through one of my links. I only recommend products I believe in and use myself.
I went to a dollar store to buy a hand sanitizer and was really surprised to see how many Halloween decorations are there: they all look so nice from afar but as soon as I take something in my hand, I can see that they are all so cheaply made. I understand that they are mass-produced fast and that’s why they cost only a dollar each.
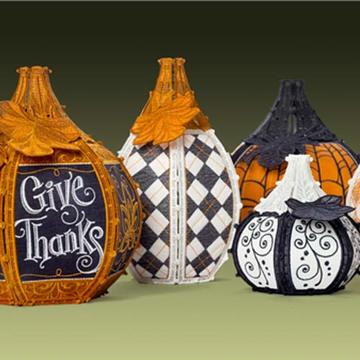
But I would like something exclusive and really nice like these pumpkin candle holders or this Halloween wreath.


Those are great but if you do not want to buy and want something that has your signature, we can do something like that too!
So I went to my favorite embroidery site and look what I found there – OESD Freestanding Pumpkin Patch – a set of awesome embroidered pumpkins.
There are 6 different amazing designs! The set costs only $29 and I can make as many pumpkin candle holders as I want.
Let me show you step-by-step how I made this pumpkin.
What you may need
Embroidery machine that has at least 6×10 inches embroidery hoop (or bigger). These designs won’t fit 4×4 or 5×7 hoops.
Embroidery design files from the OESD site (you have to buy them for $29)
Fabric (2 different colors)
Threads (check below what threads I recommend)
Bobbins
Needle (check below what needles I use)
If you prefer to watch the tutorial GO TO MY YOUTUBE CHANNEL TO SEE THE VIDEO

Step 1.
Download the design files and unzip them
You have to know what kind of embroidery files you can use with your machine. For example, for Janome it’s JEF, for Brother/Babylock it’s PES/PEC, for Husqvarna – HUS, etc. So choose accordingly.
After downloading the file find the zipped folder on your computer and unzip all the content at once like this: right-click the folder, select Extract All, and then follow the instructions on the screen – usually it asks in what folder you want to extract the files.
For this Pumpkin Set, I got 29 PES embroidery files. But what to do with all those files now?
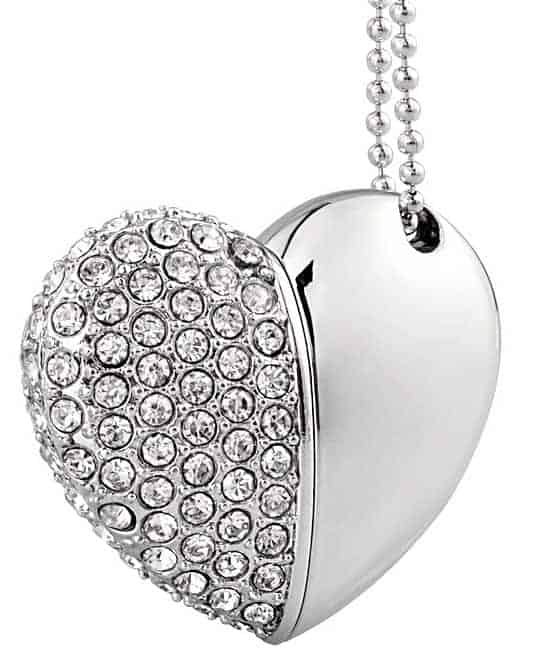
I usually transfer the embroidery files to my machine using a USB drive. I like to use this fancy one.
Also, you will need to download a PDF file from the OESD site with general instructions. For this, go to this page https://embroideryonline.com/freestanding-pumpkin-patch-2/ and download the PDF file from the link under the image.

Step 2.
Prepare everything necessary for the project
Decide what kind of pumpkin you will make ( because there are 6 different pumpkins in the set!), what fabric you will use, what colors and types of thread you want, find a water-soluble stabilizer, and put a new needle into your embroidery machine.
As for the needles, I like to use Schmetz Gold embroidery needles, for this project I used size 75/11, but size 80/12 is good also.


You will need to use the same thread in the bobbin as in the needle. That’s a must for freestanding lace designs. I used polyester embroidery threads in my project because this is what the design recommended. I like to use good-quality threads that don’t break easily. After lots of trial and error, I finally found this type that I really like.
I usually buy my embroidery threads at Amazon, brand name threads are usually cheaper there. Not always.
I like the free lace embroidery designs and I wrote about other projects like How to make free standing lace embroidery and Machine embroidery tutorial: stunning Halloween embroidery project. I also used cotton threads in one of the projects (because that was what the design recommended) and I was not impressed because of the amount of lint generated. I definitely recommend using polyester or rayon thread if possible.
There are very many stitches in the design. So wind the bobbins for the lace part of the design – I used 2 colors purple and orange, and I prepared lots of bobbins with the same threads.
It’s recommended to prewash the fabric in warm water and iron it because if you need to put the water-soluble stabilizer in warm water (for the lace) the fabric may shrink. But I skipped this step because on my stabilizer it’s written that it dissolves in cold water.
For the project, I used a water-soluble stabilizer. I usually buy my stabilizer at Amazon, unless I find it on big sale locally. Specialty stabilizer like this water-soluble one is unlikely to be on sale often, so probably Amazon is the best source here.
Also, they recommended using two layers of heavy-weight stabilizer for the applique fabric because it gives the fabric a more rigid structure. Well, I didn’t notice that advice and didn’t use any stabilizer for the applique fabric. But the project still turned out good, it’s not that rigid though. So, I am going to do it next time I make the pumpkin.
But now I am thinking that it would be pretty hard to cut inside circles of the applique fabric with two layers of heavy-weight stabilizer. Also, the more rigid fabric would not let the light go through.
Step 3.
Hooping
I decided to use the biggest hoop of my embroidery machine so I could make three pumpkin sides in one hooping.
I used 2 types of water-soluble stabilizer in my hoop – on the bottom it was just a mesh water-soluble stabilizer and on the top – a film water-soluble stabilizer. The stabilizer should be hooped very tightly.

Step 4.
Preparing the machine for embroidery
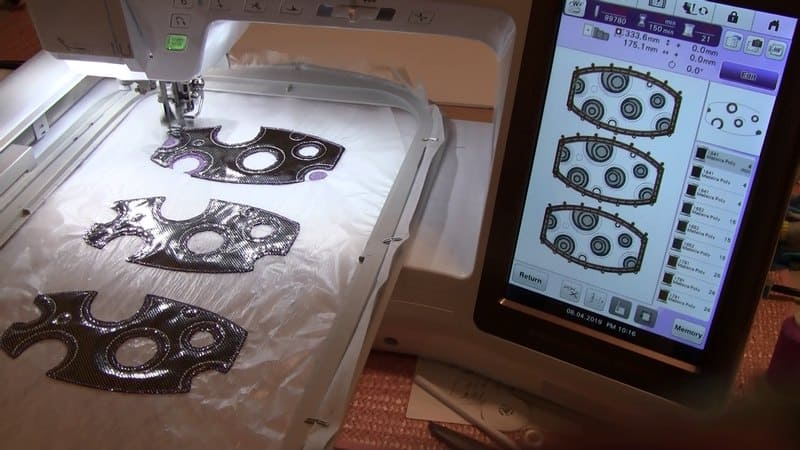
My embroidery machine is a powerful computer. And it can do magic. Let me show you.
On my embroidery machine, I could easily combine all the same thread colors for my 3 designs. This saves lots of time! Instead of embroidering each design separately the machine goes by colors and embroiders all 3 designs at once with the same color.

Step 5.
Embroidery
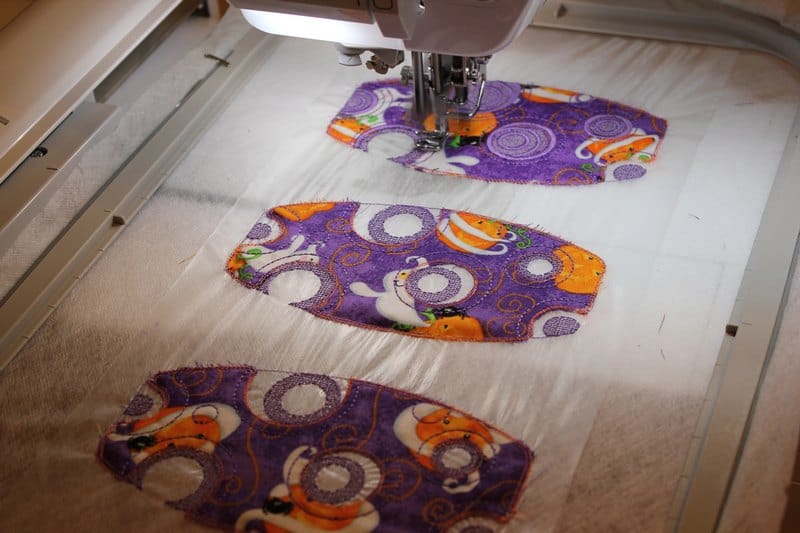
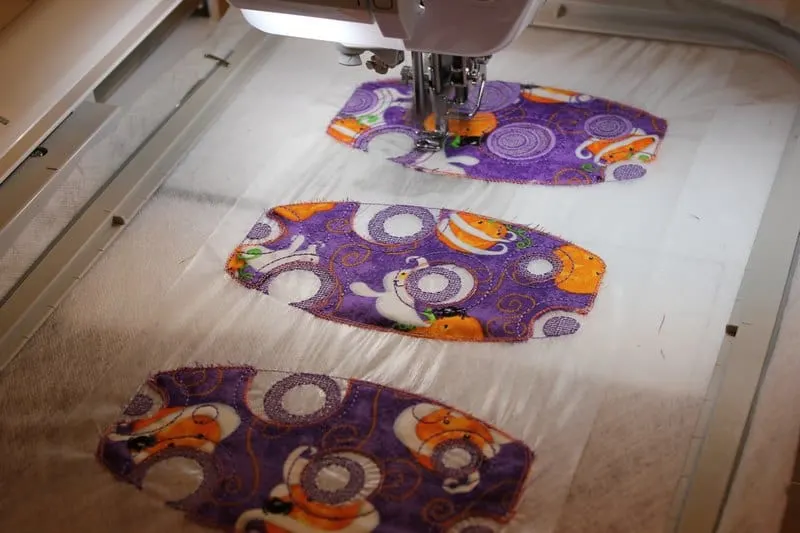
Embroidery starts with the placement of stitches for the applique fabric. The placement stitches should be done right on the water-soluble stabilizer.

After that, I put my applique fabric over placement stitches and made Cut Line stitches. Usually, I hold the fabric in place so it doesn’t pucker or bunch up on me.

Next, I removed the hoop from the machine and cut away the excess applique fabric. For this step I like to use my duckbill scissors – with them I can cut very close to the stitches without worrying that I will cut the fabric or the thread.

After that, I put the hoop back and the machine-stitched the remainder of the design for all three pieces. The number of stitches was quite big so it took quite a while to finish the design. I needed to change the thread sometimes and also changed a few bobbins. But with my machine it was easy – it tells me when the bobbin is empty! I don’t need to babysit the machine while it’s embroidering.
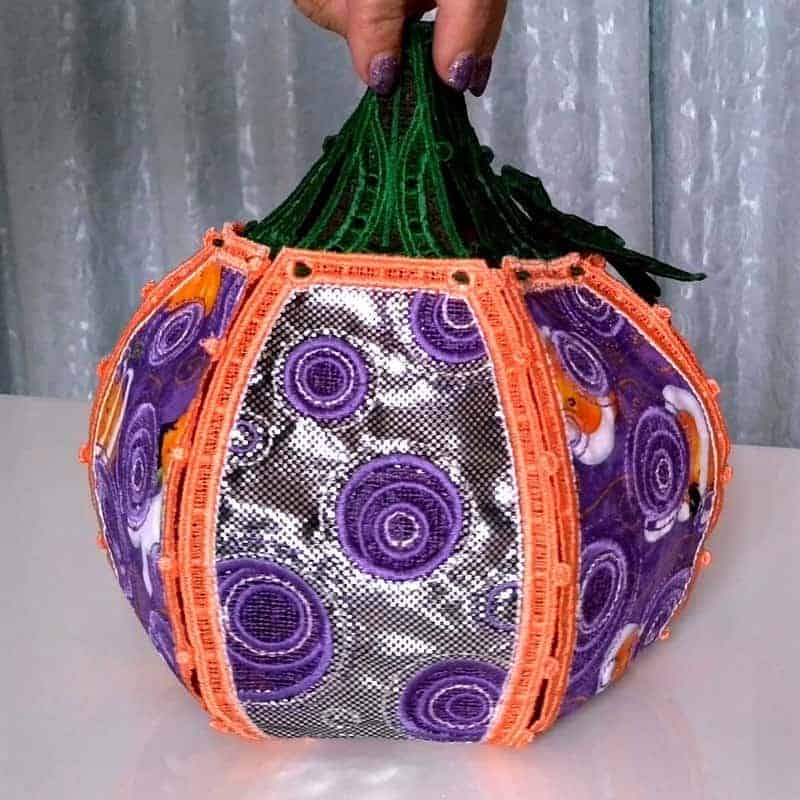
I did the same with my other fabric – I used cotton (Halloween print) fabric for the other 3 pumpkin sides.
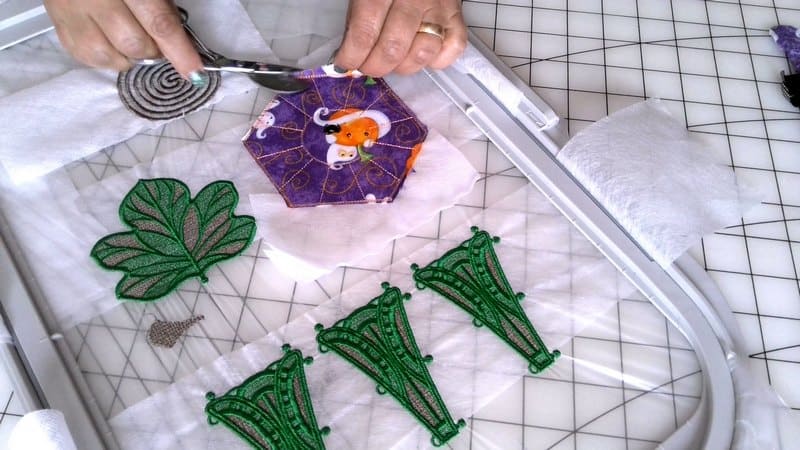
The design set for this pumpkin had also other parts I had to stitch: pumpkin stems (6 of them), pumpkin leaf, base, and vine. I did most of them in one hooping. Pumpkin base is also the applique design and stem, leaf and vine are just freestanding lace designs.
I need to mention here that all designs were digitized very well and I didn’t notice any one small mistake.

Step 5.
Rinsing the water-soluble stabilizer
The next step after all embroidery is done is washing away the water-soluble stabilizer. I trimmed the excess stabilizer from all the pieces and placed everything in cold water. When the stabilizer got dissolved (in about 5 minutes) I took out all the pieces and put them on the flat board to dry. Everything looked a little curved so I had to flatten the pieces out. I covered this board with another one and placed heavy books on it. And they stayed like this for a few hours. After that I uncovered them but they were still damp so I left them as they were for the whole night to allow them to dry completely.
When I took the pieces out of the water I noticed that the threads changed their colors – they became much darker. But as soon as the pieces got dry the colors became lighter again.
I didn’t rinse away all the stabilizers from my embroidered pieces on purpose because I wanted my pumpkin to be stiff and firm enough.

Step 6
Connecting
The last step in this pumpkin-making process is connecting all the pieces together so they form the pumpkin. OESD company came up with an innovative process of connecting pieces together. I made freestanding lace before – for example, check my other tutorial How to make free standing lace embroidery. Before I was sewing the pieces together and it was not really easy when the lace is stiff and hard to sew through. But now with this pumpkin, I connected the pieces pretty fast and easy. Look – one side of the design has “eyelets” and the other side has “buttonettes”. I never heard the word “buttonette” before but it’s a nice word!
But I had to buy a special tool to connect eyelets with buttonettes called “alligator clamps”. This is the tool as I used it, similar tools are available on Amazon.
Grid
How to put in an invisible zipper using Wonder tape for sewing

36+ simple and effective ways to sew faster


How to dress well: flattering clothes that hide figure flaws
How To Cut Fabric Straight | 8 Easy Ways Explained
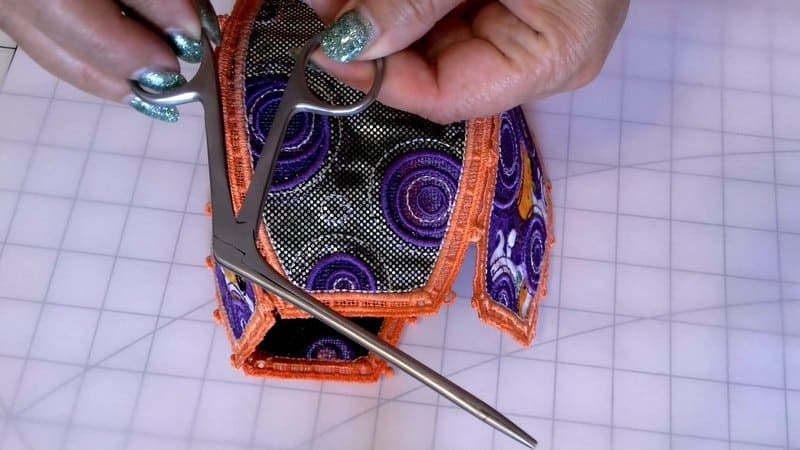
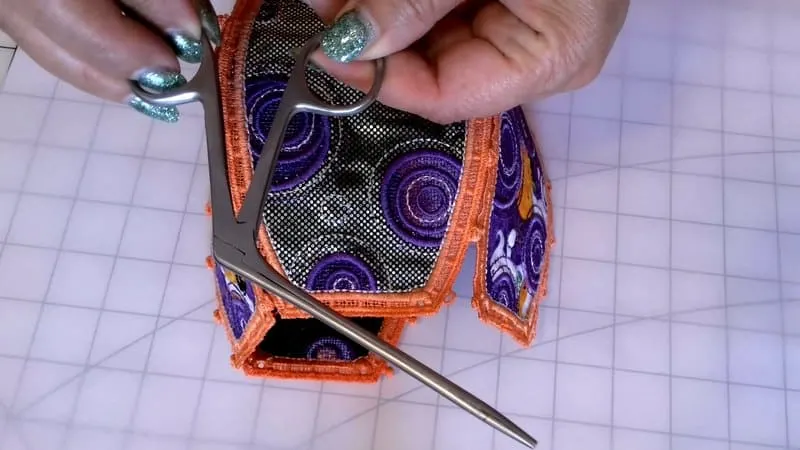


So I had to insert the tip of the toll into the eyelet, grip the buttonette and pull it through the eyelet.
In the PDF file that’s coming with the designs, you can find detailed instructions on how to “build the pumpkin” and in what order to connect the pieces.

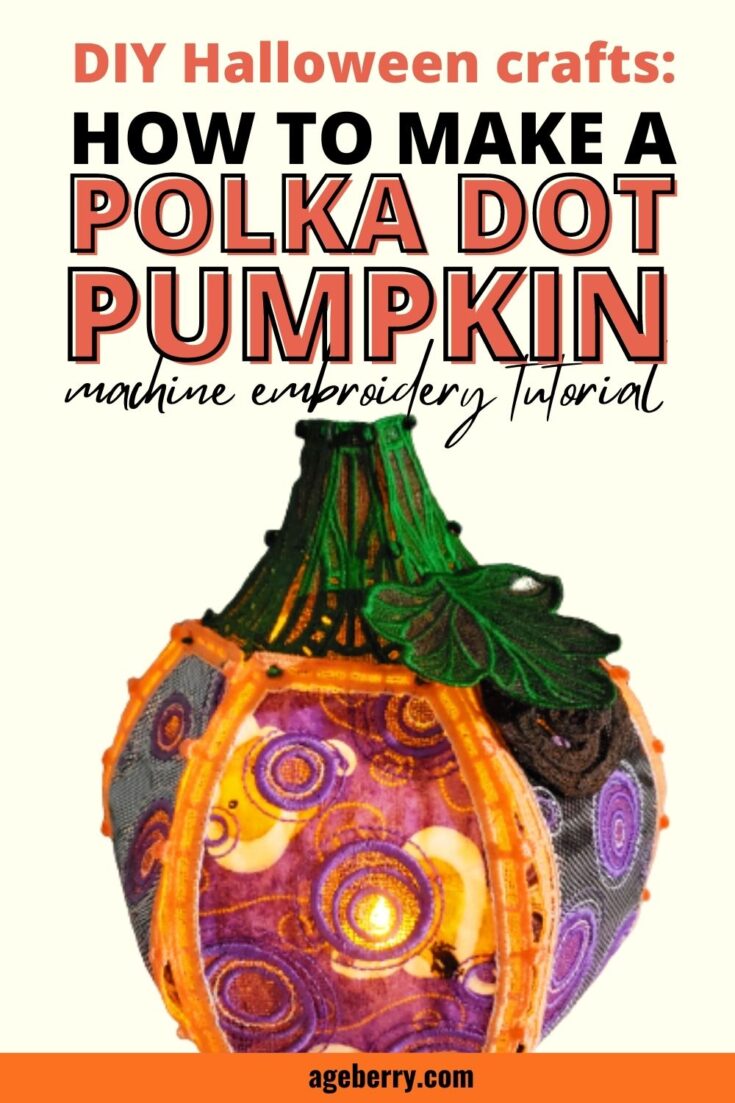
This is my pumpkin. I think it looks great and the pumpkin is actually a candle holder so I put a candle in it. And I can do the same design over and over again with different fabrics and different color threads for a new look every time.
And on this page from OESD embroidery online you can see what all the other designs from the OESD Pumpkin Set look like.
Did you find this tutorial helpful? If so, save this pin (see below) on your sewing board so you can come to this tutorial later when you are ready to make the pumpkin, and follow me on Pinterest for more tips, tutorials, and inspiration!

Ready to take the next step in your sewing journey? Check out more step-by-step tutorials from my blog and don’t forget to share on Facebook or Twitter!
latest posts
- Think You Know Zippers? This Installation Guide Might Surprise You
- Why Does Your Seam Ripper Have a Red Ball? Discover Its Purpose!
- Topstitching Troubles? This Simple Trick Will Turn It Around Instantly!
- How to Sew Shirring: A Step-by-Step Guide to Elastic Thread Gathering
- Are Self-Threading Needles Really Useful?
- Amazon Spring Sale: Best Choices
- Elevate Your Prom Look: A Guide to 10 Neckline Choices (2024)
- No Pattern, No Problem: Turn Scraps into a Quilting Masterpiece
- Prom Perfection: A Guide to Choosing the Perfect Dress Color (2024)