
There are many different ways to hem a curved edge; in fact, there are few garments where knowing how to sew rounded edges doesn’t come in handy. It depends
- on the fabric you use for the project (for example, for chiffon it will not be the same as for denim)
- on the type of the curved edge ( if it is a full curve when hemming a circle skirt or curved skirt, or just a slight curve)
- on the types of sewing machines and their accessories you have ( do you have a serger? a cover stitch machine? a blind stitch foot? etc.)
- on the design, you have in mind ( do you want a narrow hem? a standard hem? or a decorated hem?)
- and on your sewing experience also (if you are a beginner sewist you probably shouldn’t use all those specific presser feet available now)
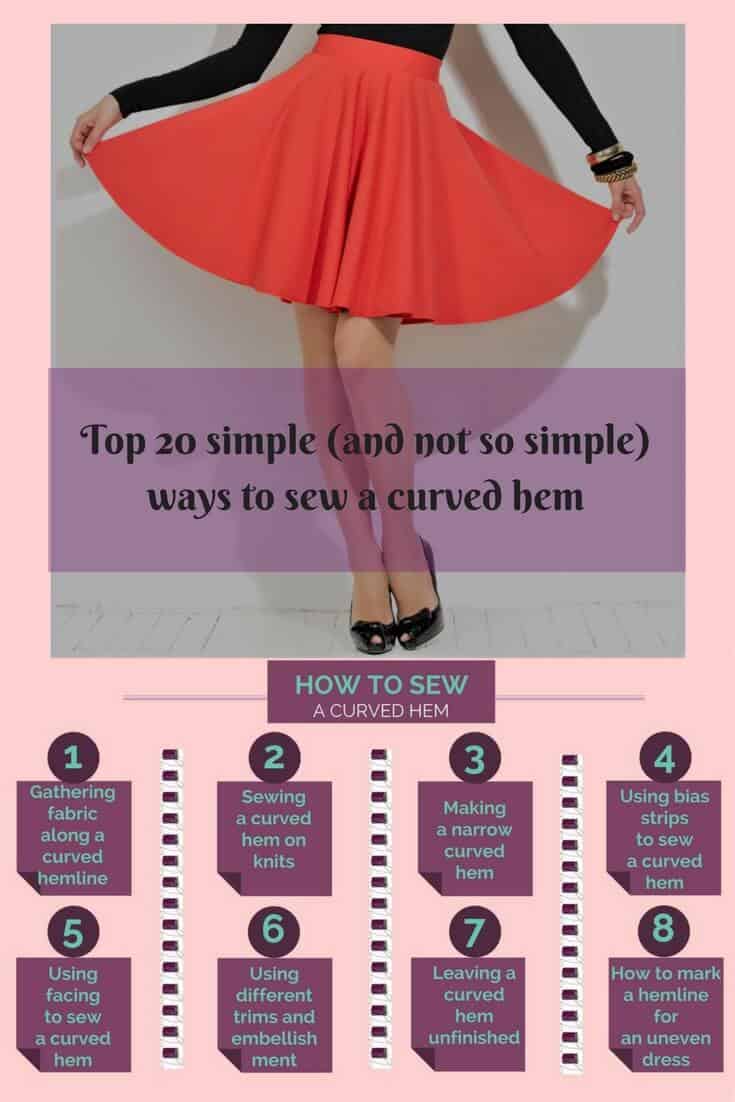

But no matter what fabric or design you use you have to finish the hem beautifully. A well-finished hem is a very important sewing operation and adds a professional touch to any garment.
Did you ever happen to wash a beautiful glass vase, only to drop it after and watch helplessly how it shatters ( clean, nevertheless ! ) into a million pieces? Frustrating, right? The same is true when hemming a dress for which you have probably worked many hours. Since the hem is one of the last items to be sewn, rushing the job to get it done may result in costly mistakes that are difficult to fix.
So choose one of the sewing techniques below that best suits you. I will try to show many types of curved hem finishing (in no particular order), but before that, I want to remind you that you have to use the proper needle, and proper sewing threads for your projects and adjust the thread tension. Test your machine stitching on scrap fabric. Double-check that your bobbin is full before you start. It’s awful when you think you are done hemming, just to discover the bobbin was empty and you have to start over again.
Note: Some of the links on this page are affiliate links. This means I will receive a commission if you order a product through one of my links. I only recommend products I believe in and use myself.
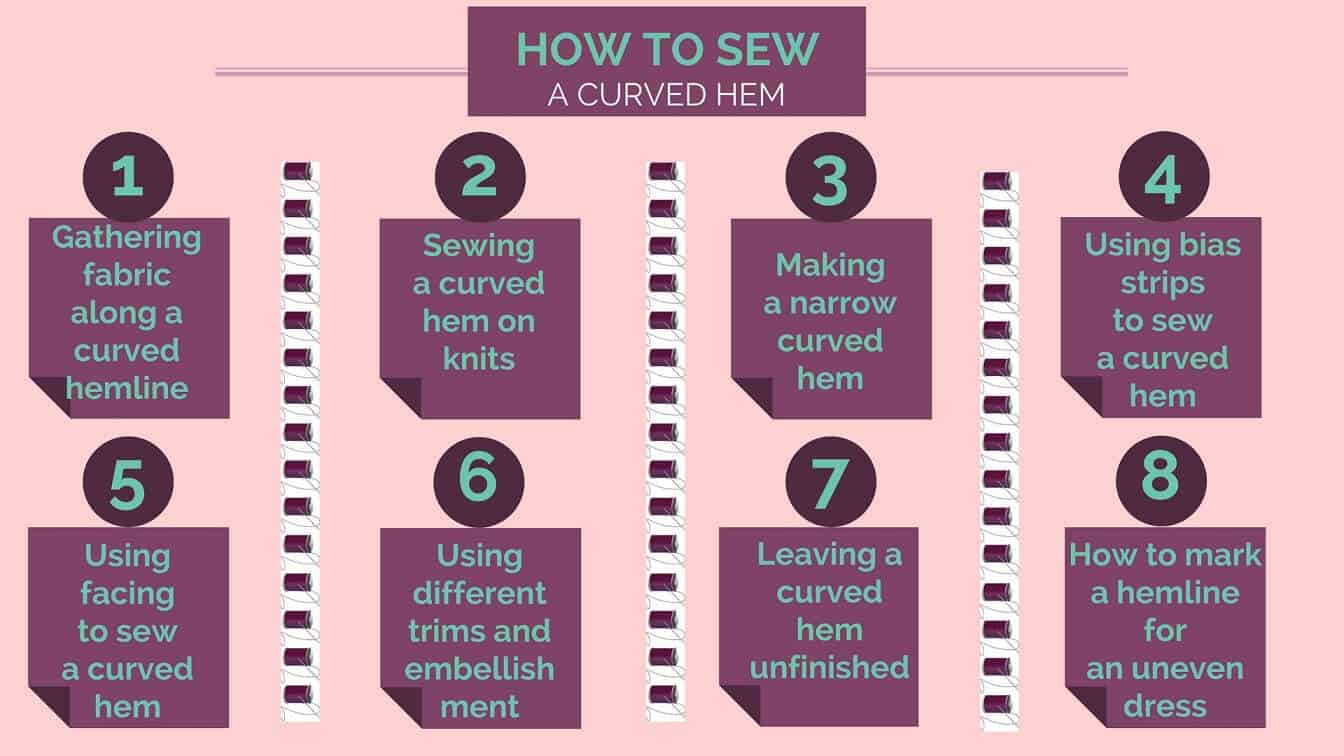
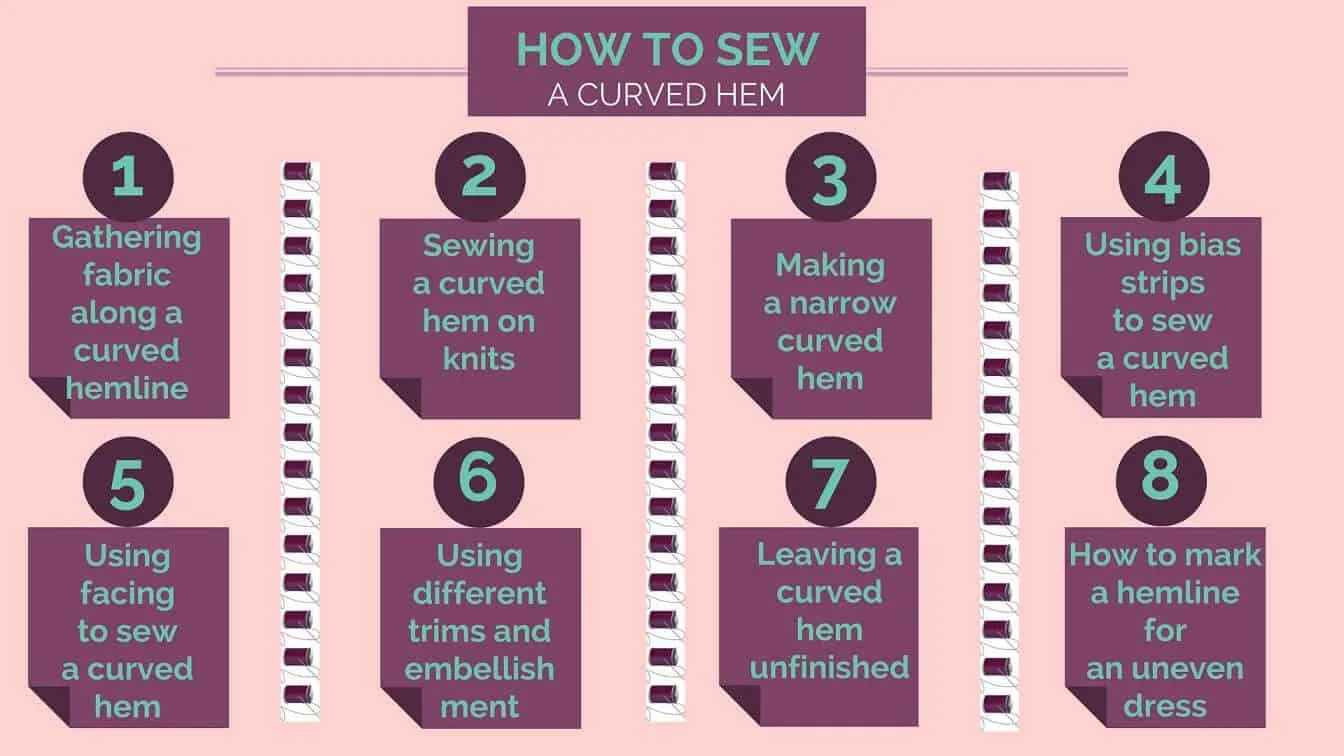
Gathering fabric along a curved hemline
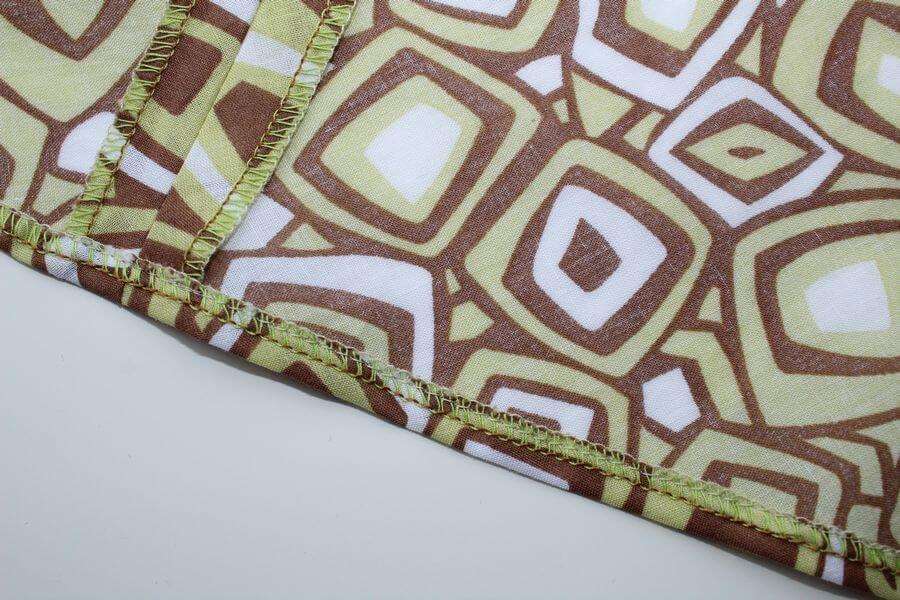
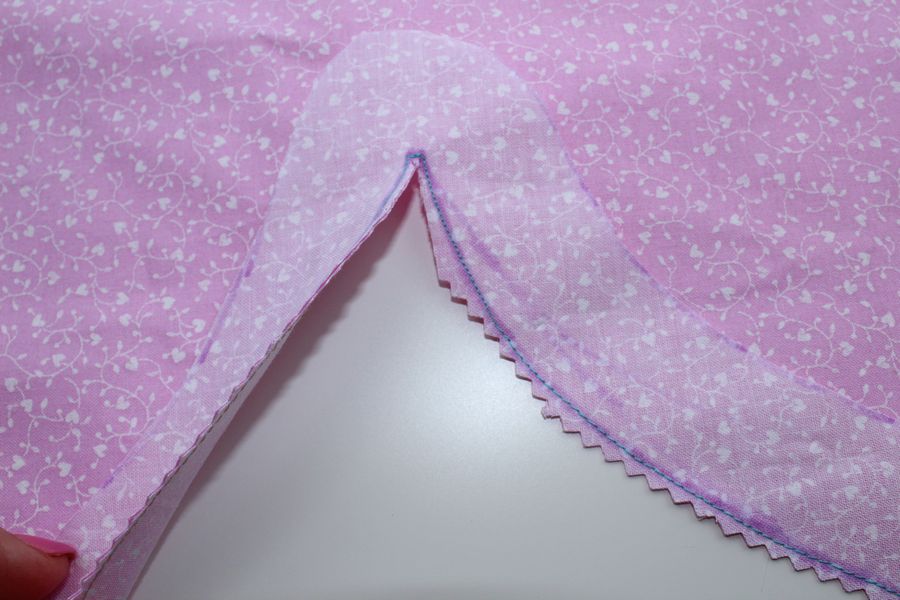
1. This type can be used if you want your hem to be quite wide – 3-4 cm. It is suitable for woven medium and heavyweight fabrics like flannel, gabardine, denim, coat fabric, twill, linen, all kinds of cotton, some types of silk, for example, silk dupioni, etc., and also for faux and natural leather. It can be used on circle skirts and half-circle skirts made from medium-weight fabrics.
The problem with this type of curved hem is that the hem size at the edge is larger (or we can say also longer, wider) than the size of the hem on the fold (an actual hemline). And because of this, we will have to deal somehow with this fabric surplus – we will have to make it smaller for the hem to look nice.
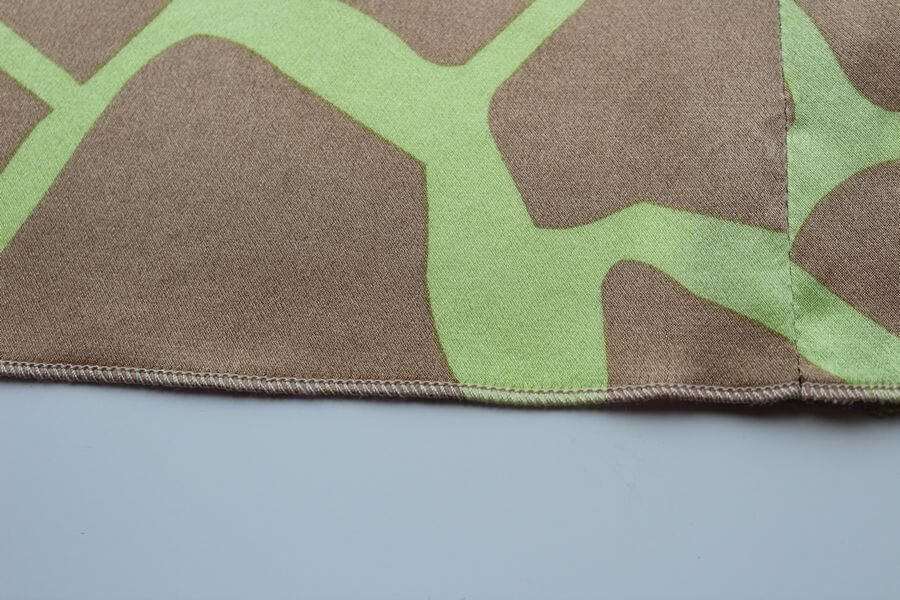
So first step for many fabrics is to neaten (or finish) the raw edge with a serger (if you don’t have one I strongly recommend the JUKI MO 2000 QVP self-threading serger, for which you can read the review on my site) or a special overlocking stitches of a regular sewing machine (like zigzag stitches). You can also make a 0.7 – 1cm fold, baste it, and press (for mediumweight fabrics). We need to deal with the raw edge so it doesn’t fray. For heavyweight coat fabrics, you can skip this step.
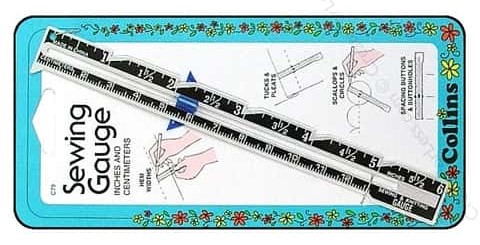
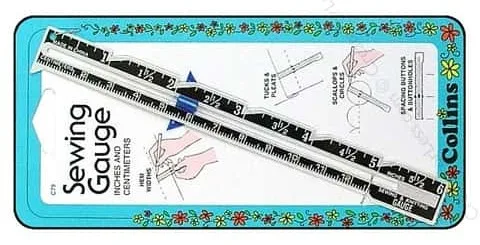
The second step – measure and mark the distance of 6-8 cm from the hem edge. You can use a regular ruler or some special measuring tools like this small gauge for marking the distance.
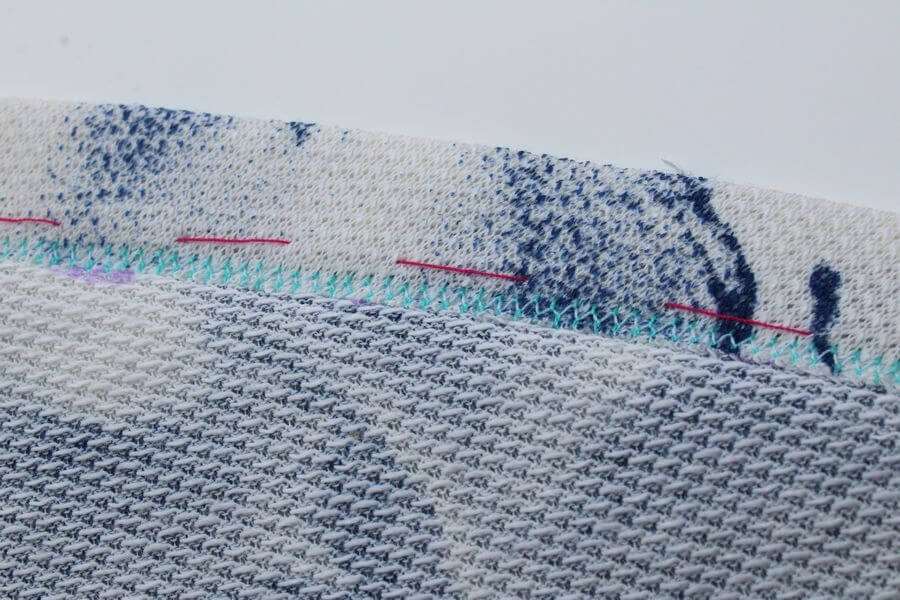
The third (and the main!) step is to make a gathering stitch at about 0.7 – 1 cm from the curved hem edge. Put stitch length to 4-5 mm and tension to 0. Stitch on the wrong side of the fabric. Don’t stitch around all hem at once. Divide it into smaller sections (at the side seams for example) and gather each of them separately.
Forth – fold the curved hem to the wrong side keeping proper distance and fix the folding with pins. At the same time pull up the bobbin thread to the required length and distribute gathers evenly so it doesn’t make any little tucks and stays flat. Don’t overtighten! Baste and press.
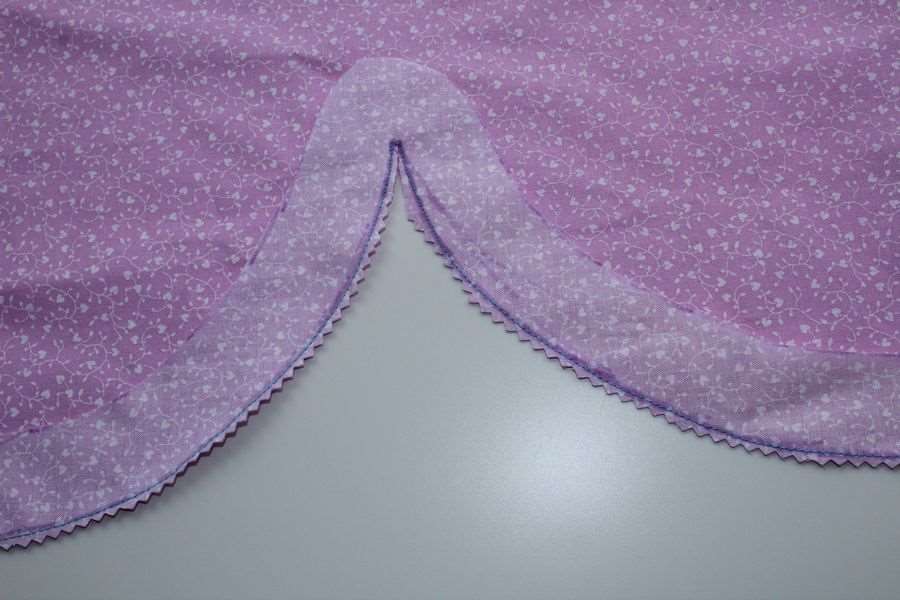
The fifth step – finish sewing this type of curved hem by
- Hand sewing ( invisible stitches). If you don’t know how to do it check my hand sewing tutorial https://ageberrycom.bigscoots-staging.com/sewing-basics-learn-sew-hand/. Try to secure your stitches now and then so that if your hem is caught on something you won’t need to redo the entire hem. Try to grasp one thread of the fabric so that no stitches are visible on the garment’s right side.
- Straight stitch your sewing machine with a stitch length of 2-3 mm for lightweight fabric and 3-4 m for heavier fabric.
- Special “invisible” stitch of your sewing machine (using a special presser foot – a blind stitch foot)
Remember, that often we don’t want any stitches showing through to the right side of the garment. And also make sure no folds or ridges from gathering the fabric are visible from the right side of the garment.
Make sure that you are using the proper needle size for your fabric, the right thread size, and the proper thread tension. Check your sewing machine manual if in doubt. Also, test your machine’s stitching on a piece of scrap fabric first to be sure of the best results.


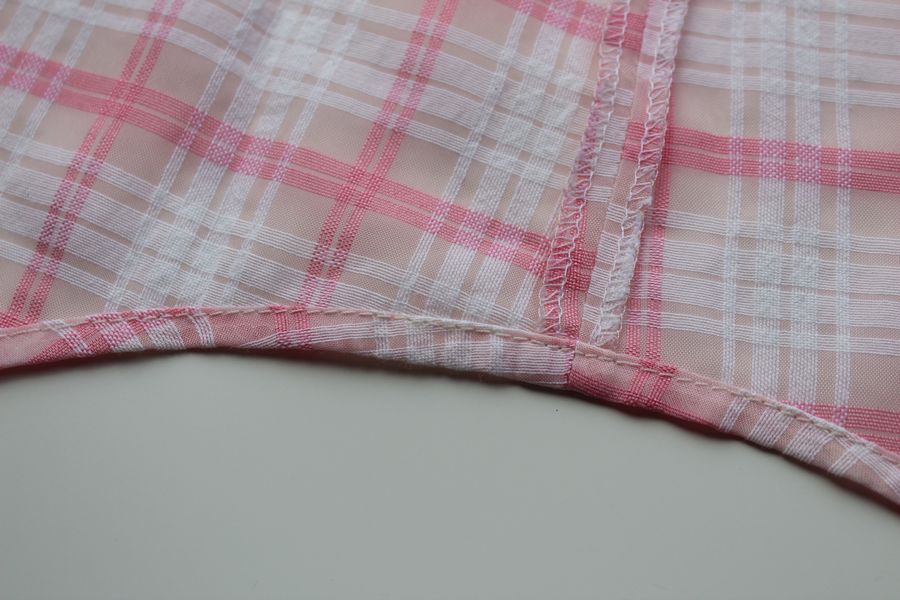
Sewing a curved hem on knits
If you are using knit fabric for your project and want to make a curved hem (usually it is a 1.5 – 3 cm hem with knits) you can use one of these methods.
1. The easiest is to use a cover stitch machine – a special sewing machine for working with knits.
If you have the machine you can just fold in 2-3 cm of the knit fabric, ease in some fullness if necessary, baste and sew with two or three needle cover hem.
You don’t need to make gathering stitches as we did for woven fabric. Knit fabric is stretchy and you can always make it flat without any tucks. You don’t need to neaten the raw edges of the curved hem. The cover stitch machine will take care of it!
Just make sure you know the exact distance where you insert your machine needles, so left needle goes a little bit to the left of the hem edge. This type of the curved hem is sewn with two needles and forms two parallel rows of straight stitches on the right side of the garment.


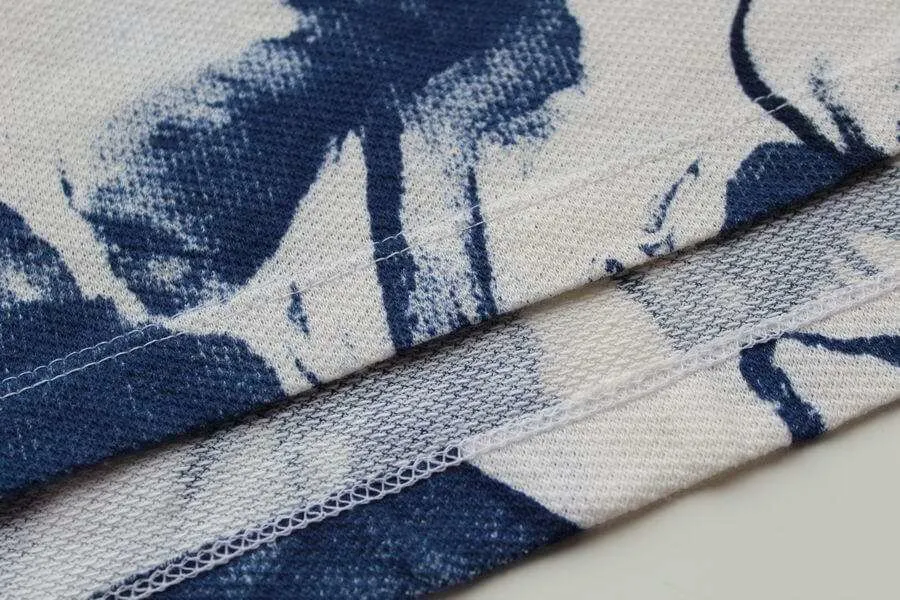
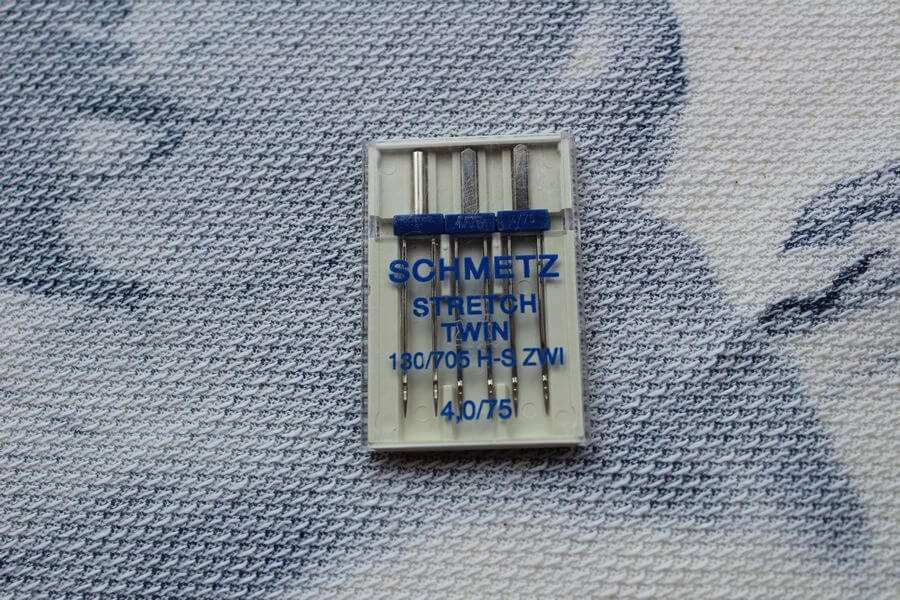
2. Use a twin needle from your regular sewing machine. It is better to use a ball point twin needle for knit fabric. And also you can use a special stretchable thread Eloflex (check my article How to use Eloflex), so your stitches will stay strong and will not break when the knit fabric stretches. Twin needles come in different sizes and with different distances between the needles.
But before sewing the hem with a twin needle you better neaten the hem edge with a serger or special overlocking stitches of your sewing machine.
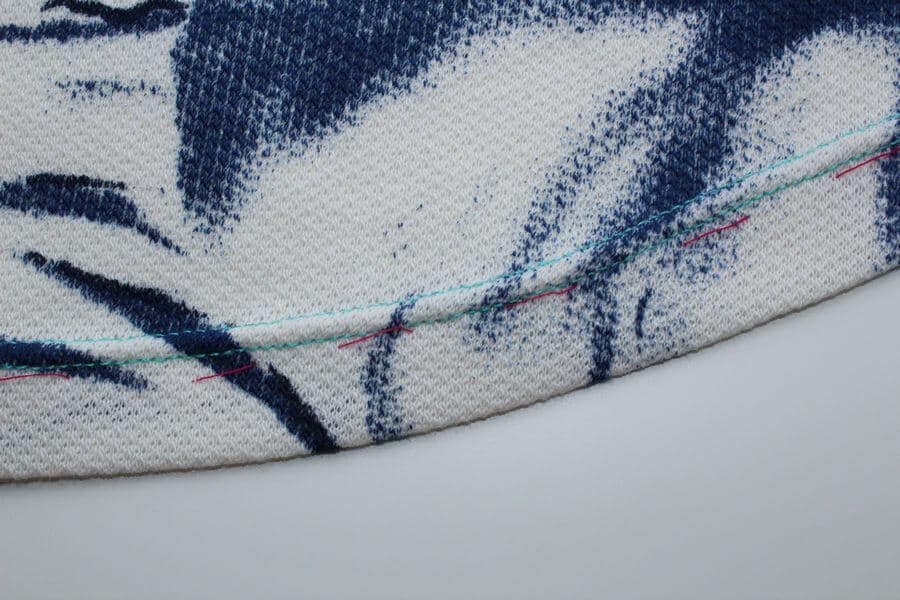
After finishing the raw edges turn the hem to the wrong side, baste, and press. Stitch with a twin needle from the right side of the fabric. You will have to use two upper threads and one bobbin thread. You will see two lines of straight stitches on the right side and zigzag stitches on the wrong side of the garment.


3. You can always sew the curved hem on knits by hand (invisible stitches). But in this case, fold the hem in 1 cm, baste, press, and then fold it again (2 -3 cm), baste, press and sew. Use thin but strong thread, like Eloflex, or silk thread.
4. You can topstitch hems on knits with a narrow or triple zigzag.
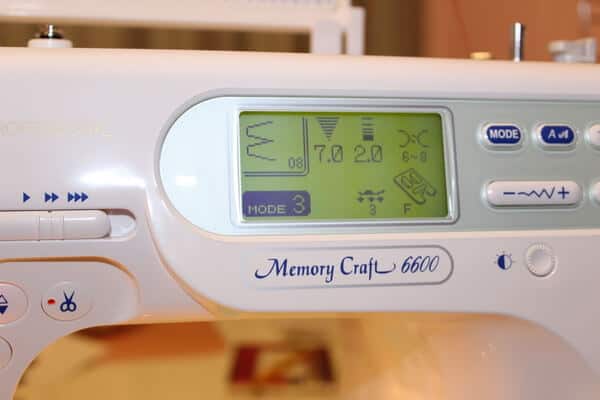
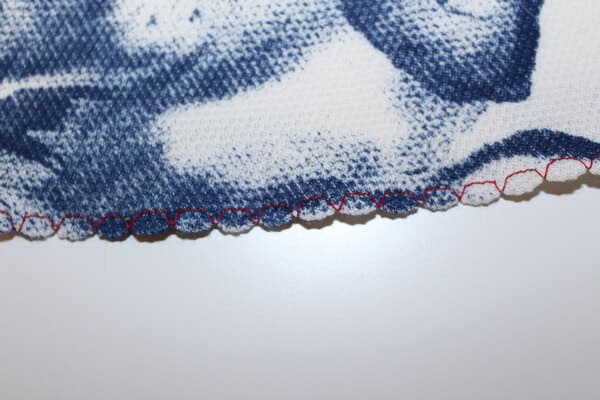
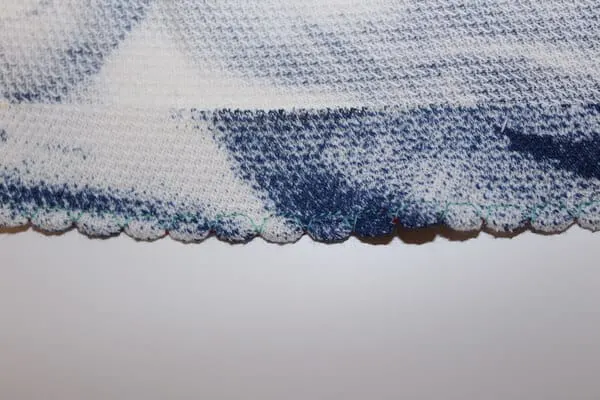
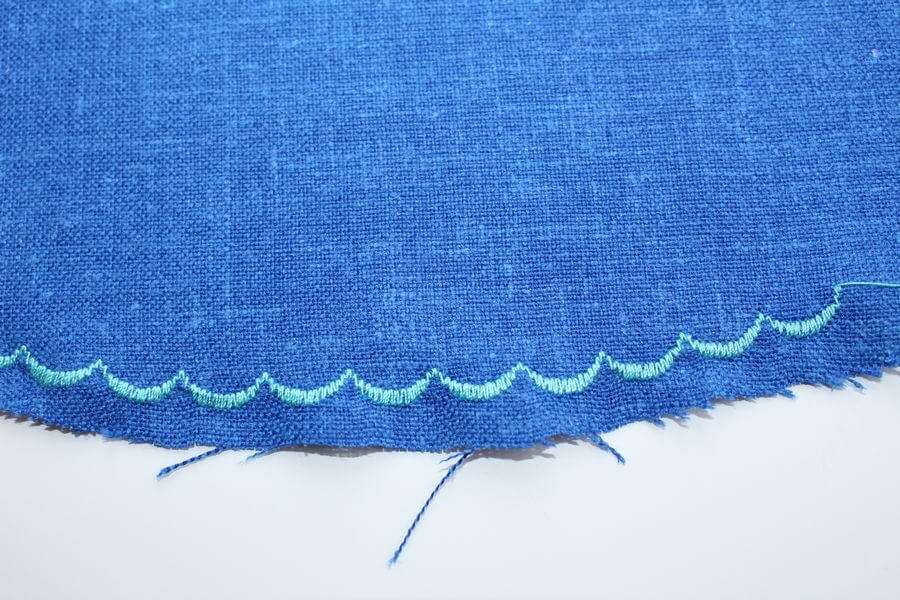
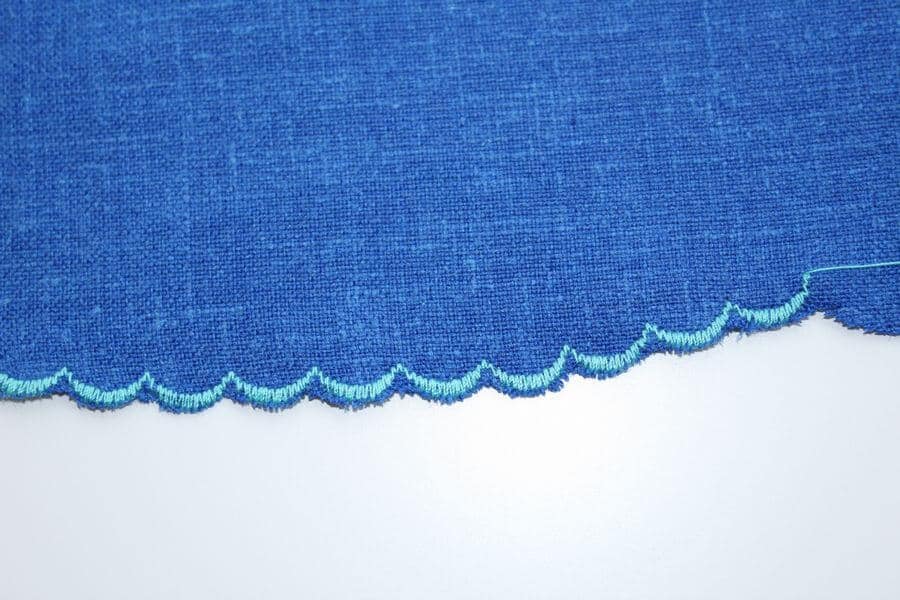
5. I like to make a picot edging with a curved hem and it is very easy to do with a regular sewing machine. I use settings you see in the image below. I use Eloflex thread because the hem is stretchy. I discovered it quite recently and I am still amused by how beautiful and at the same time simple it is. It gives very nice hem finish for lightweight silk fabric and cotton knits.
It is done with a kind of zigzag stitch that sews two or three straight and one long zigzag stitch. On my Janome sewing machine, it is called Shell Tuck but I see that it can be called Picot Edge.
To sew this, fold the raw edge of your hem to the wrong side about 1 cm or more, set your sewing machine for this decorative stitch and sew very close to the fold so the zigzag goes off the edge. You may need to increase the thread tension of your machine so the needle will create a scalloped edge. Carefully trim the fabric on the wrong side.


Making a narrow curved hem
For lightweight fabric we usually make a narrow curved hem. There are many different methods of sewing the curved hem with lightweight fabrics like silk charmeuse, chiffon, georgette, cotton voila, etc.
- Using zigzag stitch on your sewing machine.
It can be used with chiffon, organza, silk charmeuse, georgette, thin cotton, etc. (if you have problems sewing with chiffon check out my article “How to cut chiffon without problems“). It is not always easy hemming chiffon or thin fabrics!
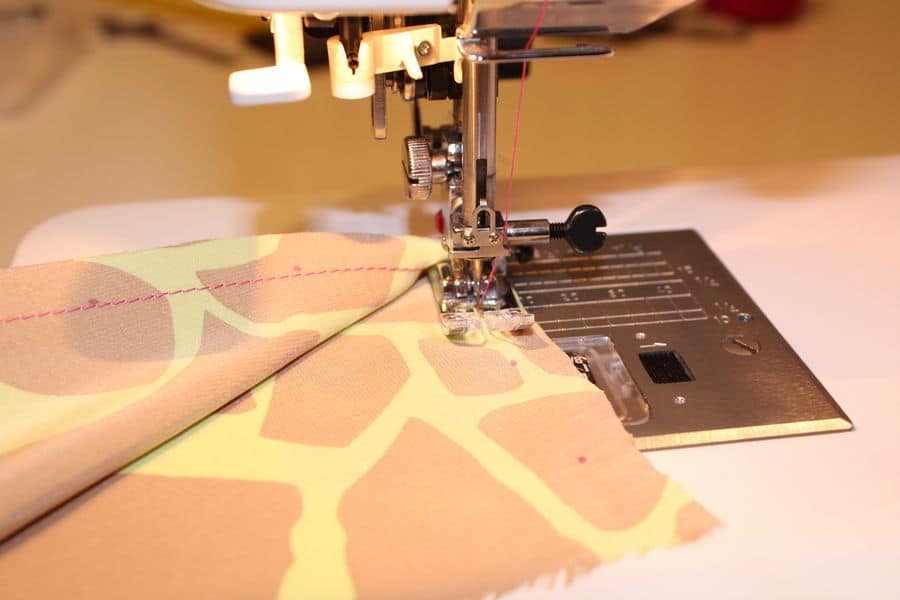
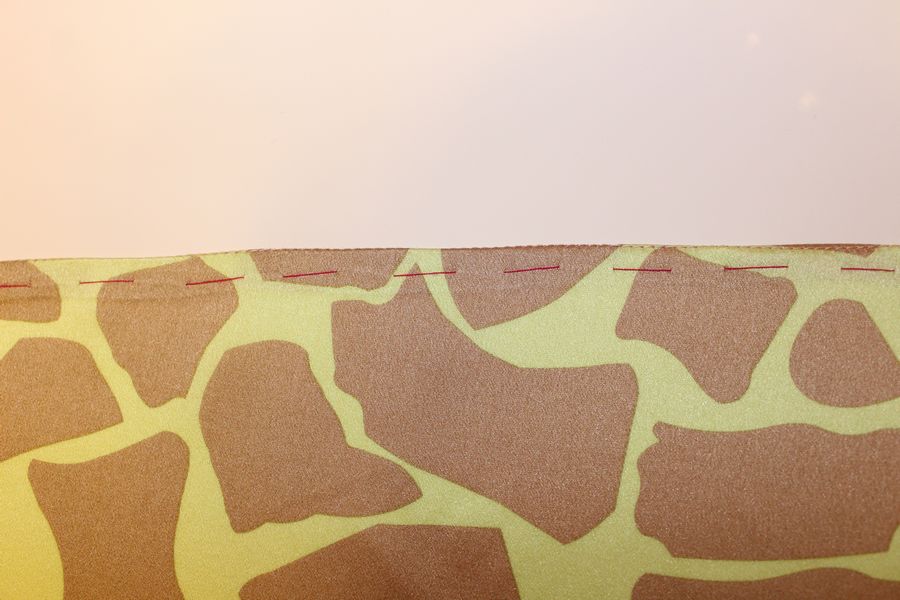
Make a regular straight stitch (2mm length and tension at 0 or close to 0 ) about 1 cm from the edge. If you are making them for a circle skirt you will see that in some places the fabric will be a little gathered and in other places the fabric will be a little stretched after you made that stitch. Try to evenly distribute the fabric so that it will be no gathering and stretching, make it as flat as possible, and press.
Fold the hem in (1 cm ) along the stitched line, baste and press again.
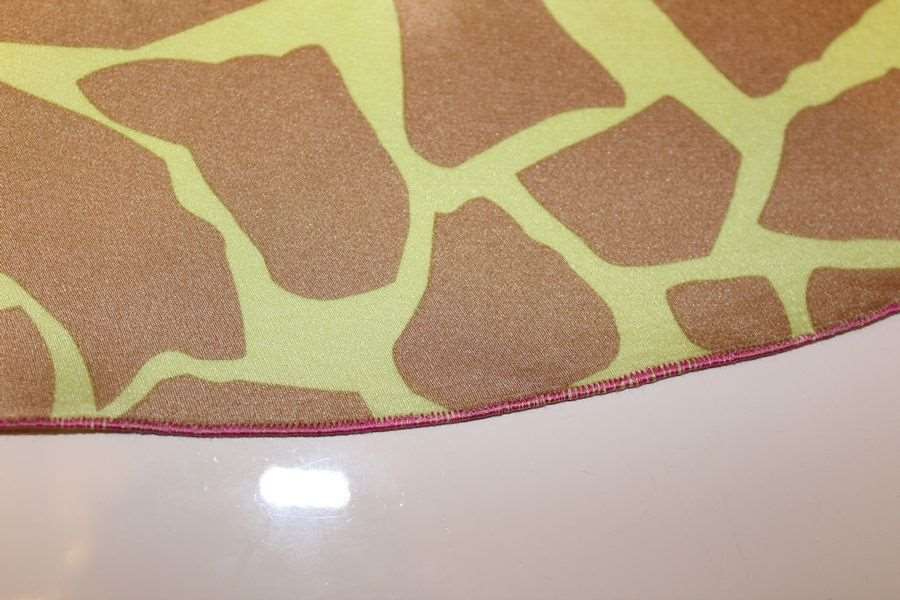
Make adjustments on your sewing machine for zigzag stitch – it should be 1.5-2.00 mm by 0.3-0.4. Use proper needle for your fabric, and suitable thread. I like to use 100% silk threads for this kind of hems. Stitch along the folded edge so that on the left the needle is going into the fabric and on the right of the zigzag it goes out and doesn’t touch the fabric. Practice scrap fabric before sewing your garment.
After you are done with the zigzag cut the fabric on the inside close to the stitching and be careful not to cut the thread.

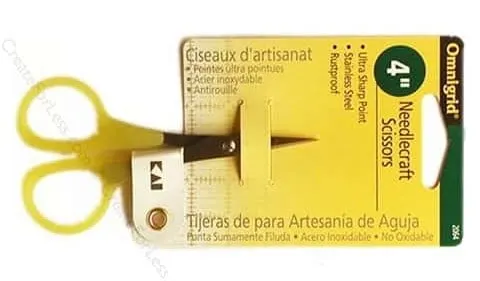
It gives a pretty nice edge to the curved hem but cutting the seam allowances off close to the stitches is really hard work. You need very sharp small scissors to do a good job.


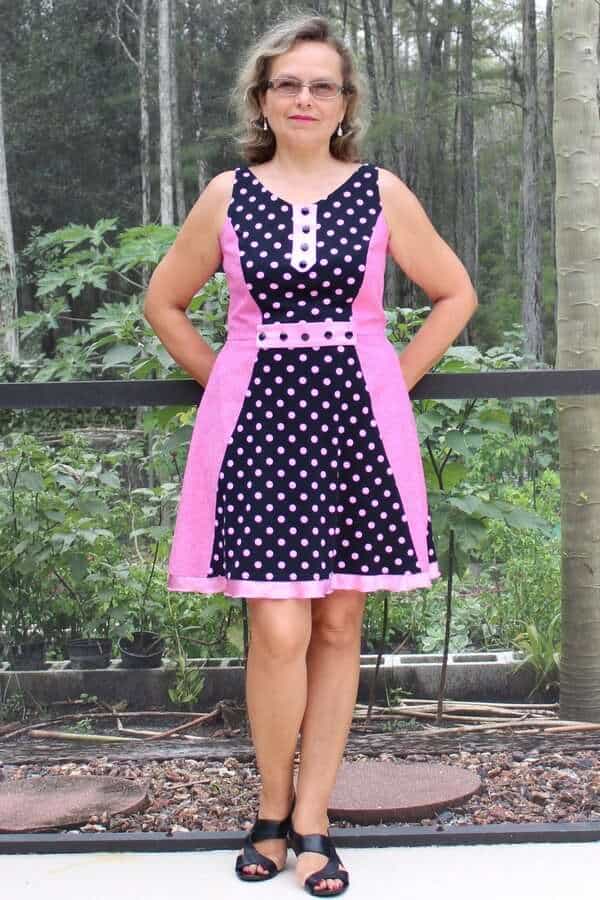
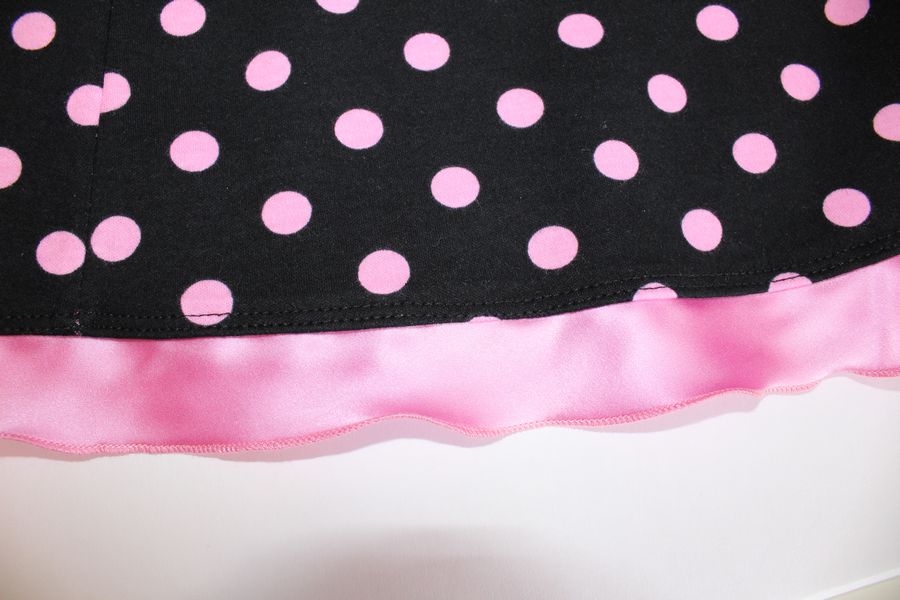
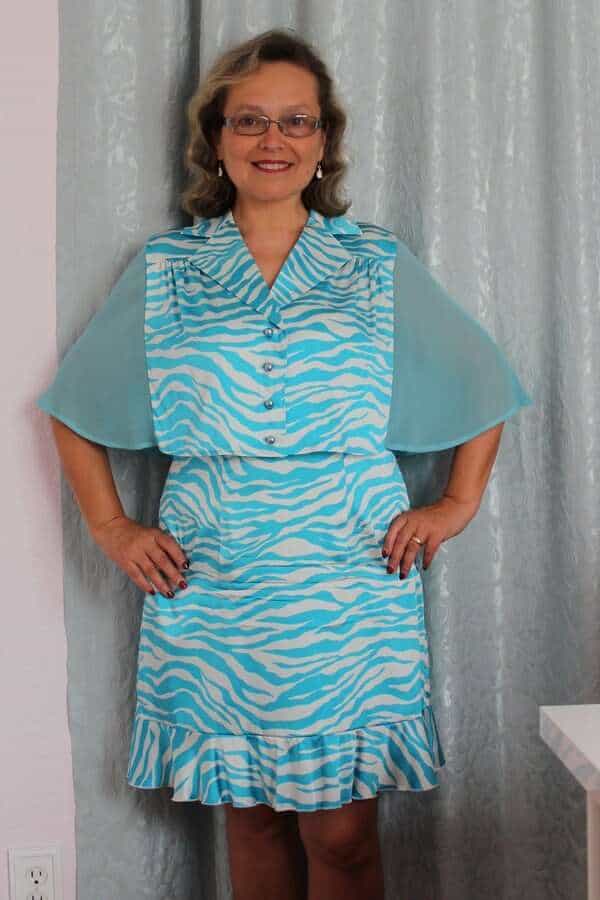
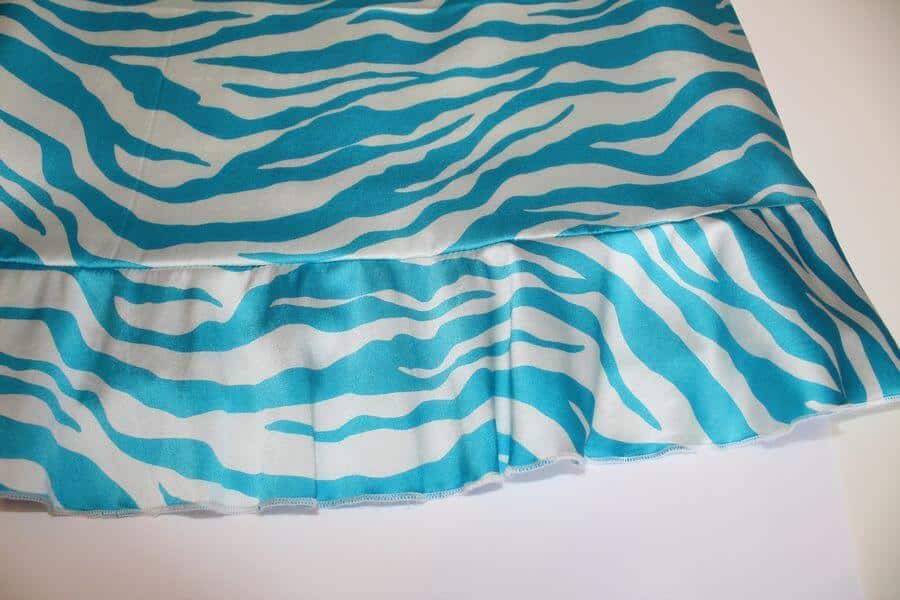
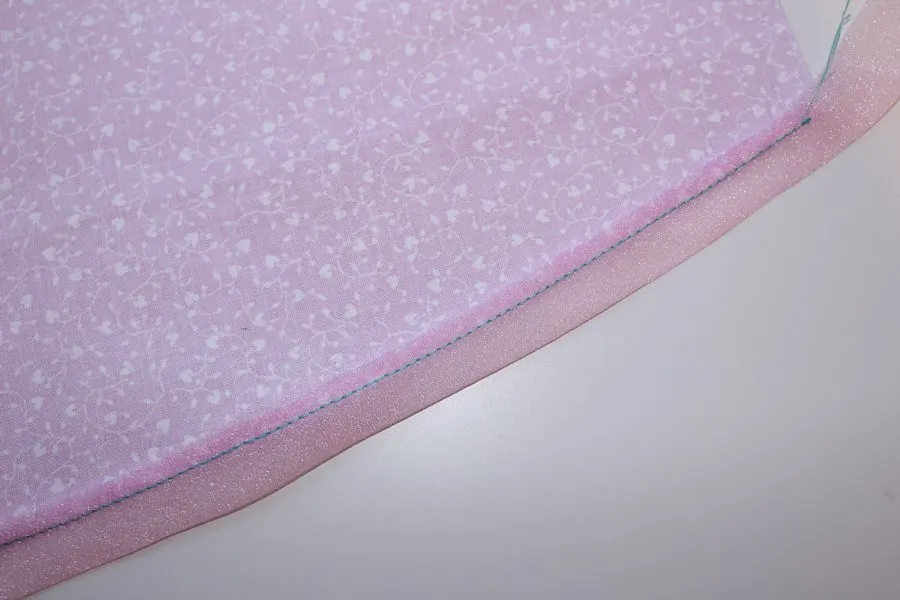
2. Making a rolled hem with a serger. It is perfect for any lightweight to mediumweight fabric. I love to use it, especially with natural silk fabric.
If you have a serger with a rolled hem function (like Juki MO 2000 QVP) you can use it to sew a curved hem. This method is the fastest and easiest, and your hem will be ready in a flash. The only problem with it is hiding the tail of the threads coming from the serger at the end of rolled hemming.
I usually cut the tail to 1-1.5 cm, glue it to the stitching with fabric glue, and sew it by hand so it doesn’t unravel after I wash the garment.


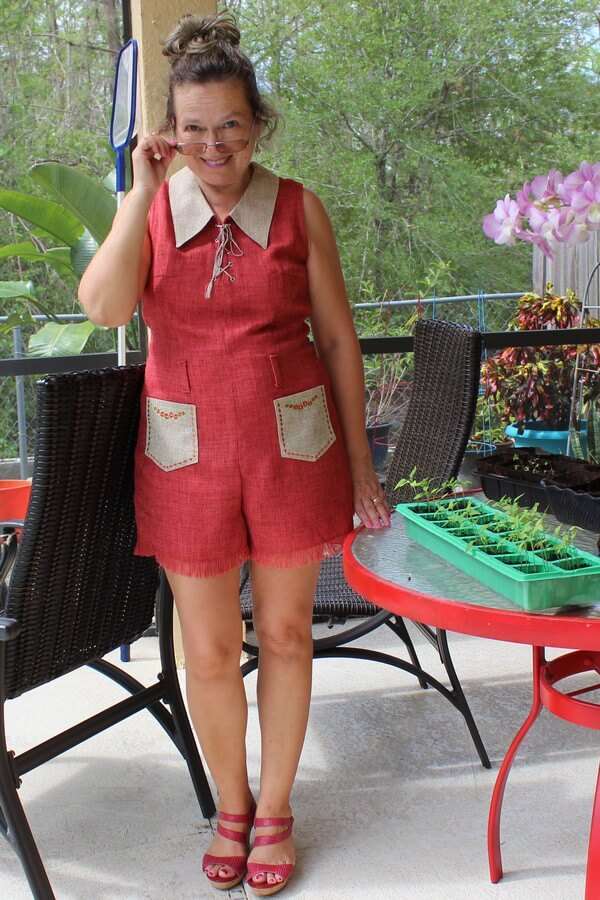
Below are examples of garments I made with rolled hem stitching.


3. Using a special rolled hem foot of your sewing machine.
You can use a special rolled hem foot of your sewing machine. But for this to work nicely you have to practice a lot on scrap fabric. I don’t really like to use this method with curved hems, it works much better for straight hems. Your sewing machine manual should contain detailed instructions on how to use this foot.

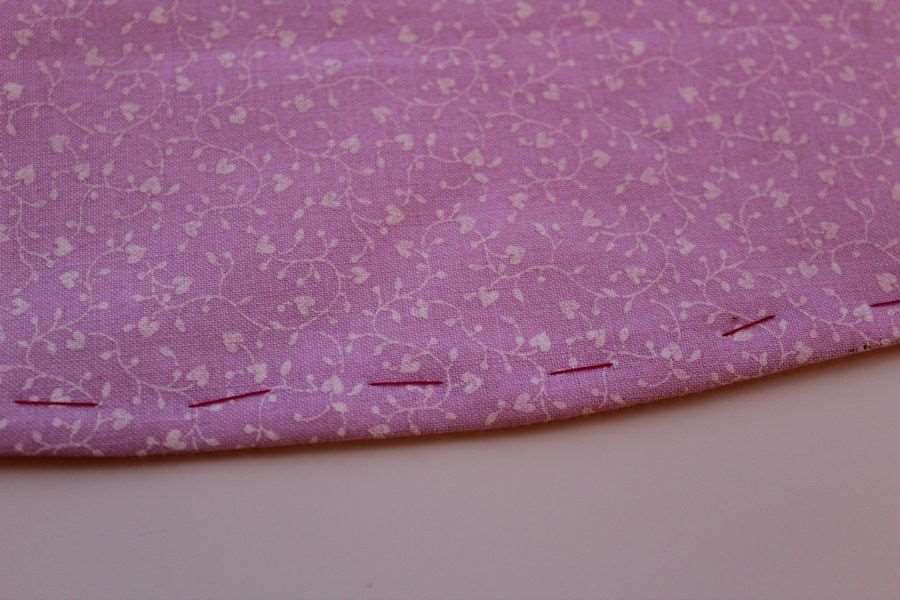
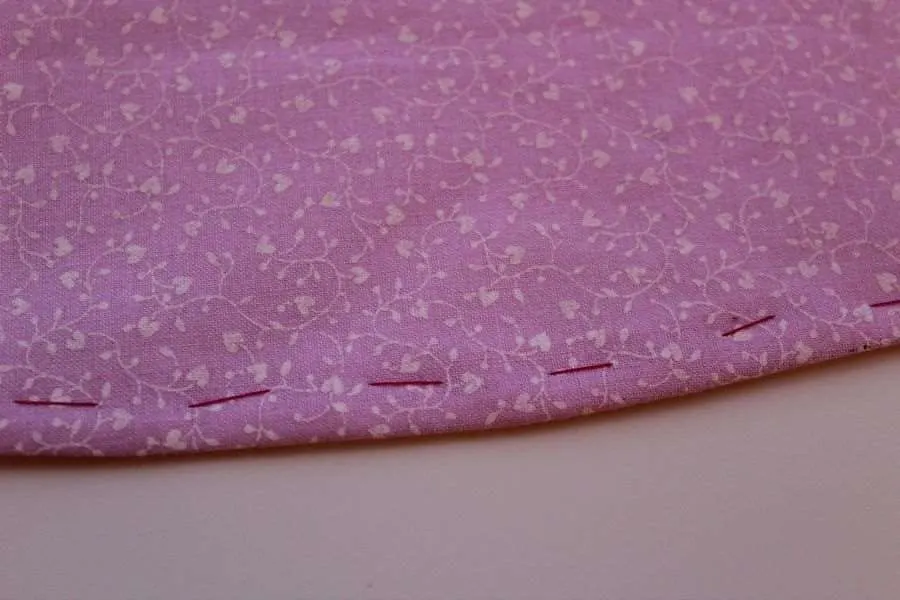
4. Sometimes it is enough just to neaten the curved hem raw edge (with a serger or overlocking stitches of your sewing machine), turn it in 5-7 mm and make a regular straight stitch over it. It works well with thin cotton fabric but is not good for sheers.


5. A double-turned narrow hem is used more often then the previous one. You can do it by two different ways.
- Turn allowances on a curved hem to the wrong side 1- 1.5 cm, easing in fullness. Press. Open up the hem and tuck under raw edges so they stay along the crease. Pin or baste, press, and stitch the hem along the top fold in place about 5 mm from the edge.
- Or fold the hem edge (around 5 mm) to the wrong side of the garment, baste and press. Fold the edge again, baste, press and topstitch with a straight stitch right along the fold.


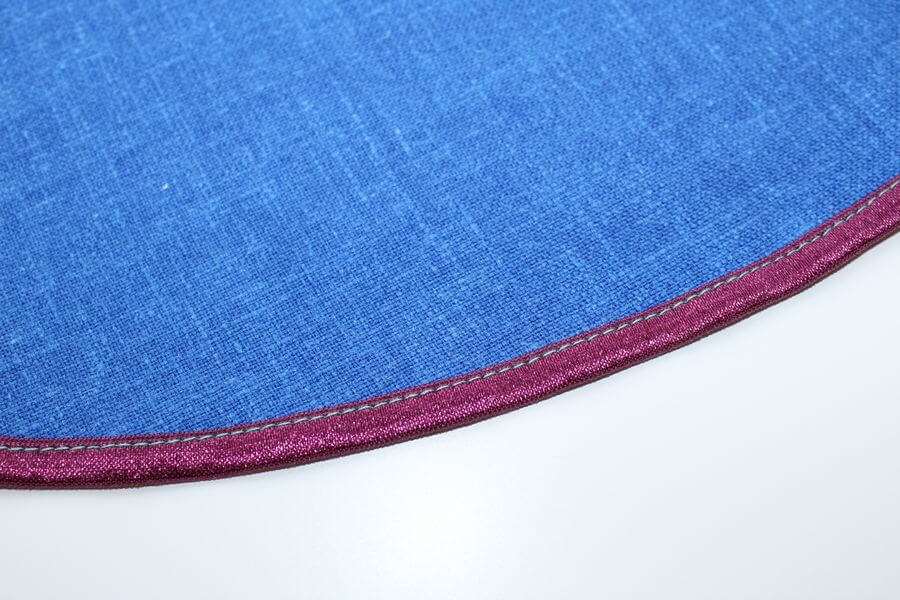
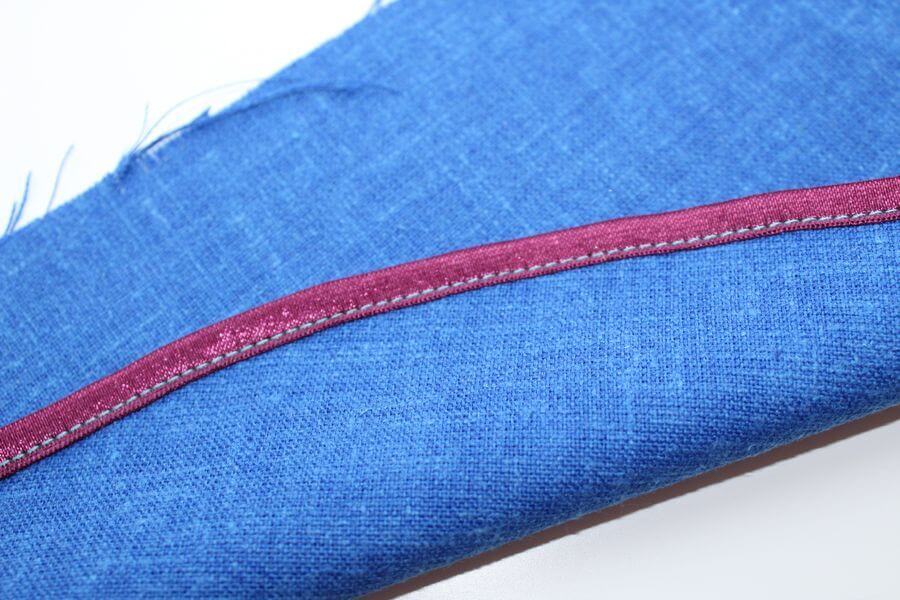
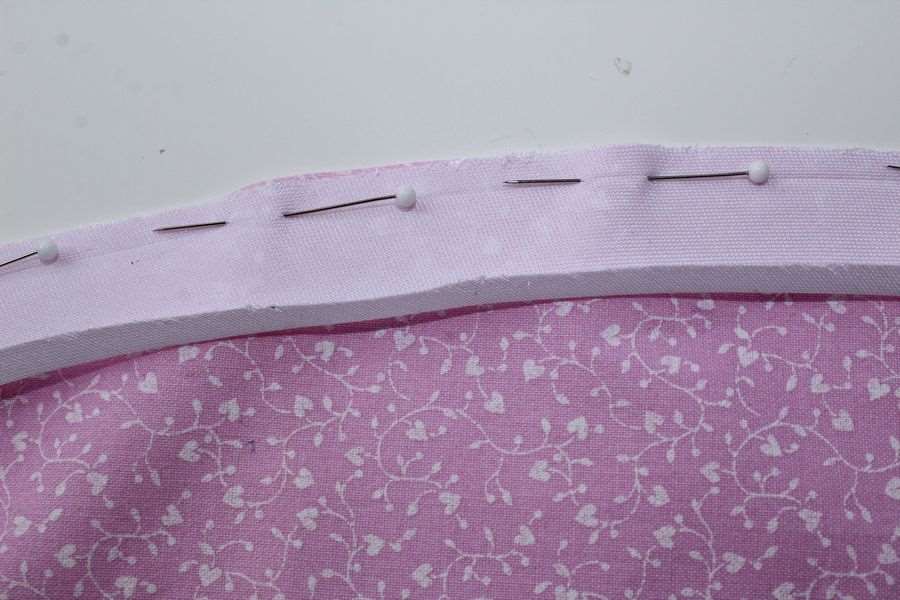
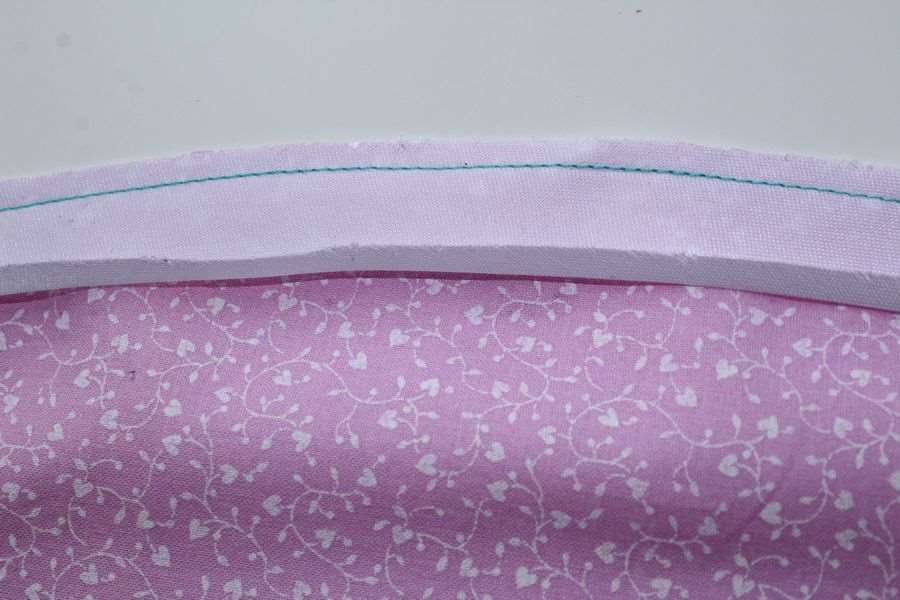
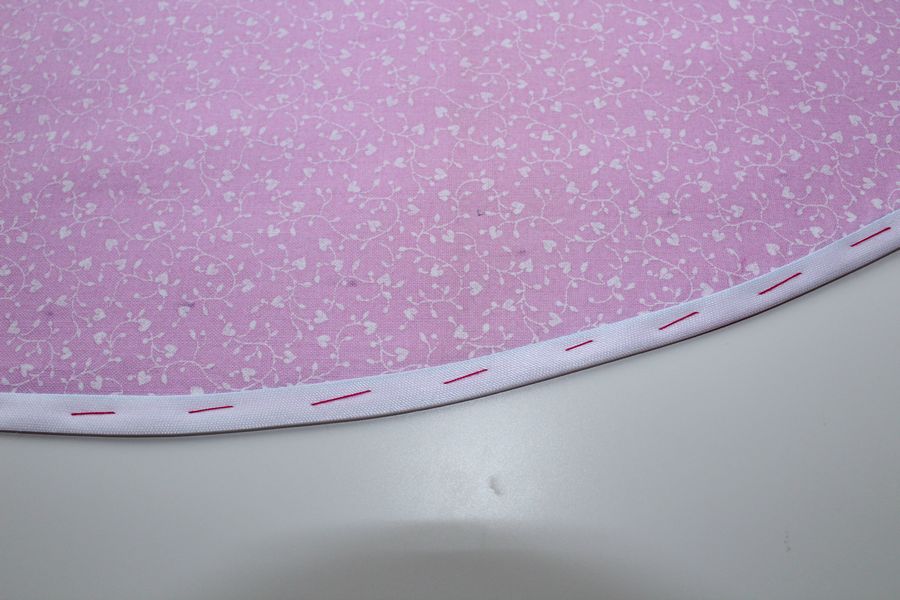
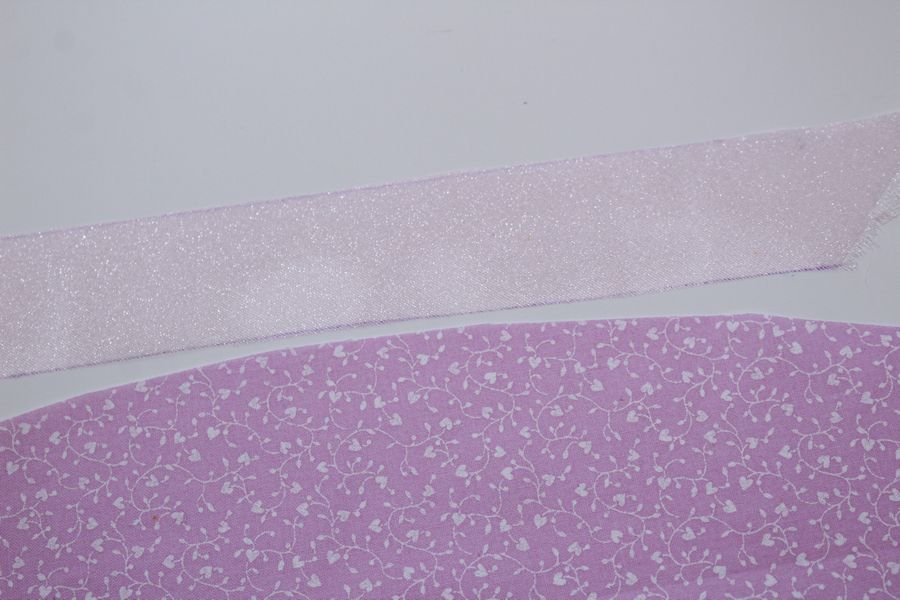
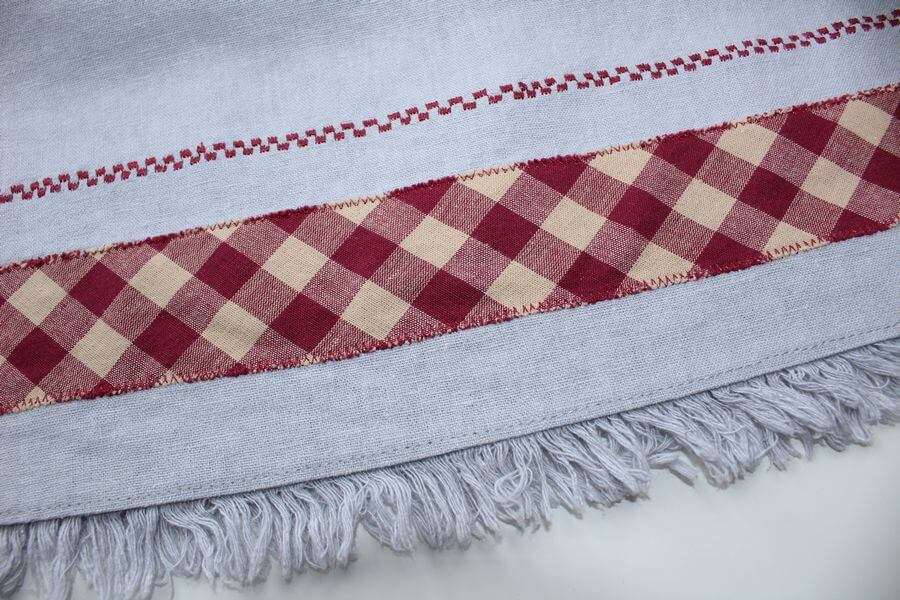
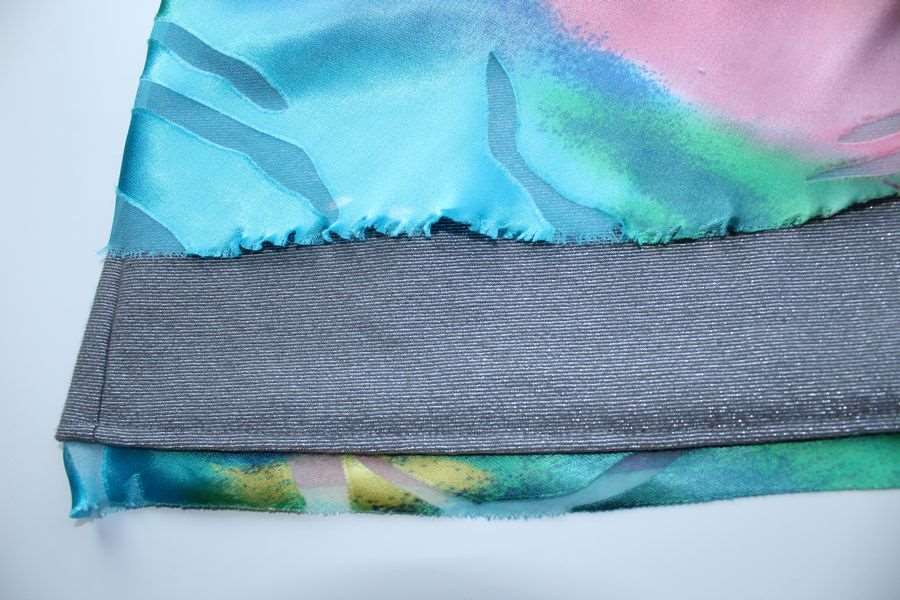
Using bias strips or fold-over elastic strips to sew a curved hem
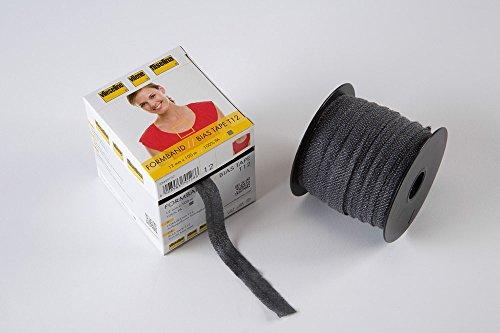
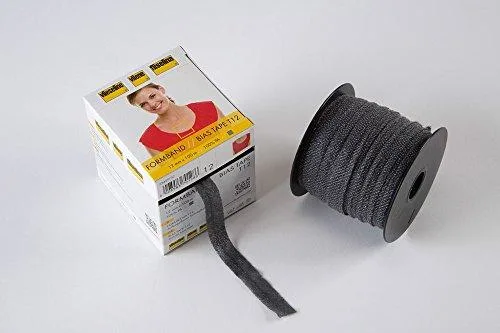
I like to use bias strips (or just elastic strips) with any lightweight and medium-weight fabric, especially with silk organza fabric. You can make bias strips yourself, or use already made ones bought from a store. Bias tapes are cut on the bias so they are a little stretchy which is good for sewing curved hems.
There are also a few methods to sew bias strips. But for all of them, you have to make sure that the part of the bias tape that stays underneath is caught in the stitching.
- First – stitch the bias strip (which is not folded yet) to the curved hem (about 5 mm seam allowance) trying to sew very precisely. Turn the bias strip over the edge of the hem, fold it and sew by hand or by your sewing machine.
- Second – if the bias strip is already pre-folded, or if you are using fold-over elastic strips (OMG, the choice is really huge now), you can put it over the curved hem edge (basting, using pins, or using a sewing glue) and stitch.


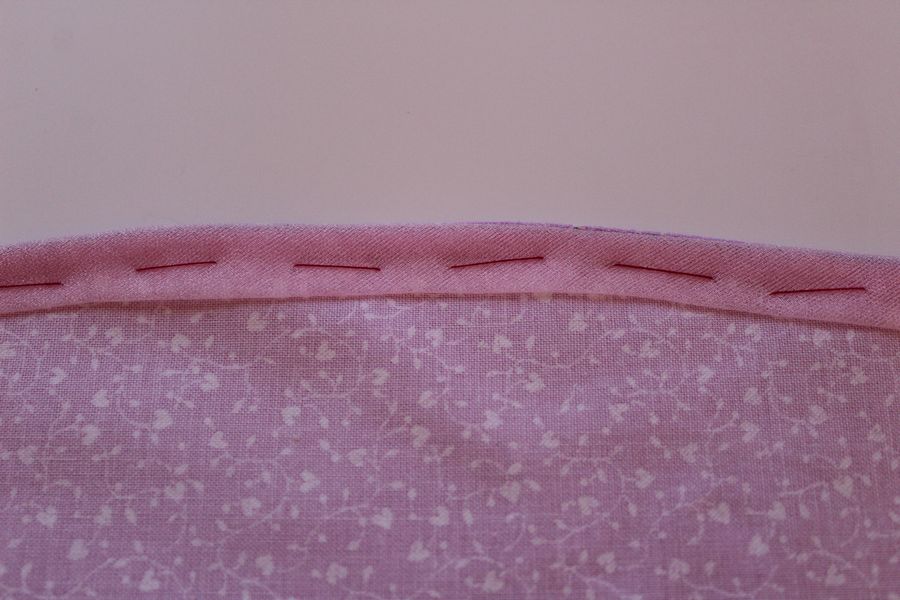
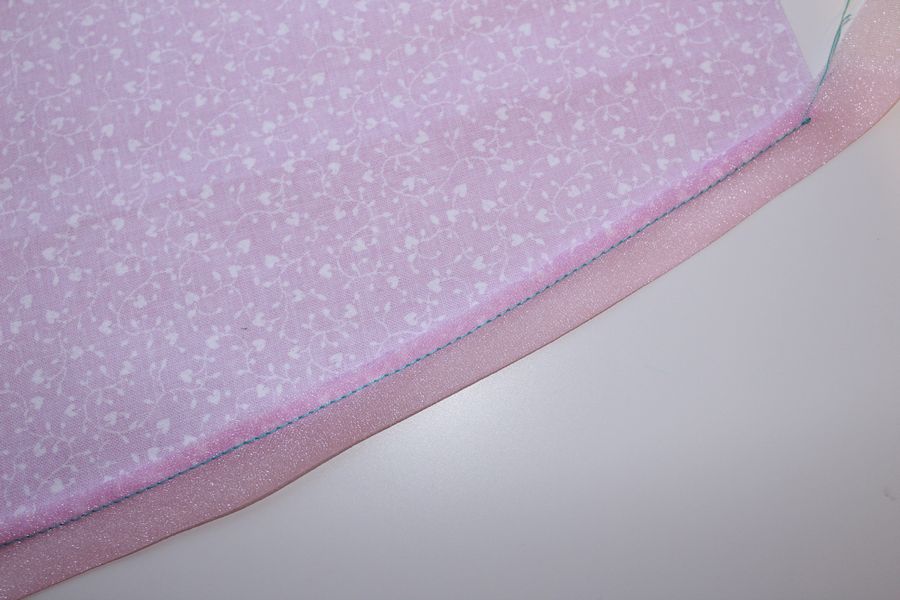
3. Or you can do this: unfold one side of the bias tape and press it so it stays flat but the crease is still visible. Pin the bias tape to the fabric’s right sides together and stitch along the creased fold line of the bias tape. Fold the tape over the edge of the fabric and stitch.


4. Forth – use double folded bias strips usually made from the same fabric as the garment (sometimes from a different fabric though). Cut the bias strip 3.5 -4 cm wide and fold them in half lengthways right side out. Press. You can shape your strip with your iron to match the hem’s contour. Pin or baste the strip along the hem edge and stitch so the fold lies 1 cm wide on the garment along the hemline. Trim seam allowances if necessary to 0.5 cm and press them toward the bias strip. Turn strips to the inside over the seam allowances and topstitch close to the seam.

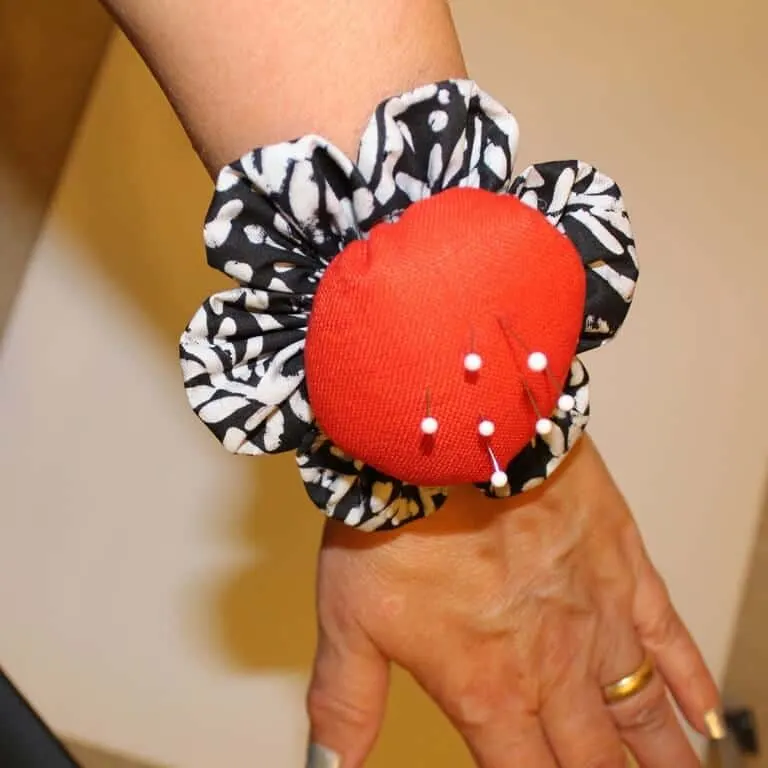
By the way, if you like to use a wrist pincushion (as I use in this video below) you can make one for yourself — check my tutorial here


5. Fifth – bias strips with glue (or iron-on fusible binding tape)
Vilene Bias Tape is a flexible iron-on, grain-reinforced bias binding for finishing all rounded and diagonal edges. The tape is 12 mm wide and is staystitched 4 mm from the edge with a chain stitch. Flat, flexible support for many types of fabrics. Slowly but firmly press with a dry iron, about 8 seconds per area. Iron Setting: Wool. I only found it in white and black colors.
Or you can buy Fuse N Bind Fusible Binding Tape. Straight sewing is all you need to bind your curved hem.
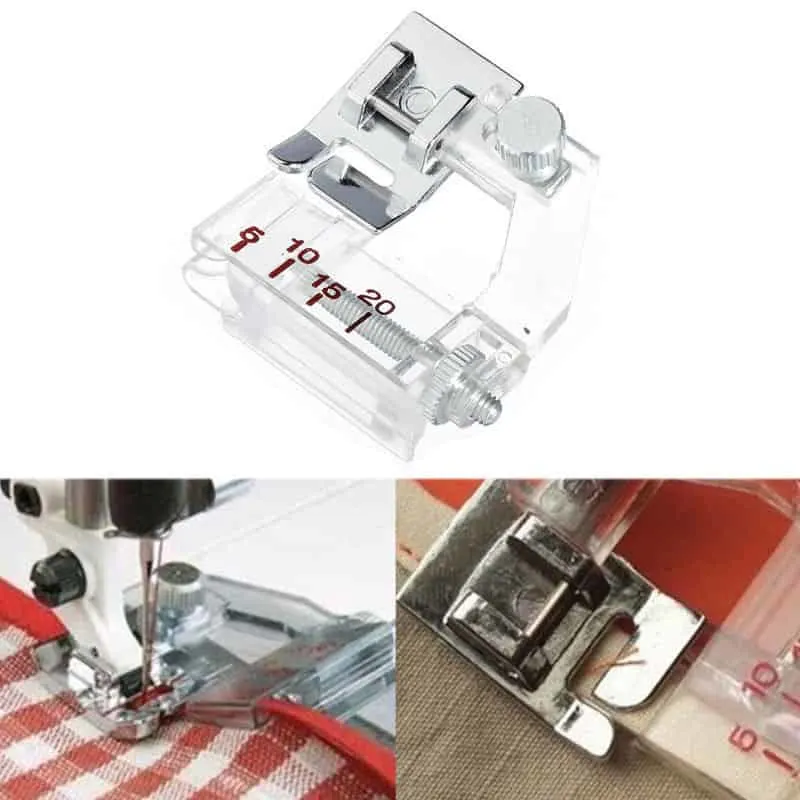
6. Sixth – use a special bias tape binding foot for your sewing machine.
Cut the end of the bias tape to a 45-degree angle. Insert the bias tape from the outside of the bracket, into the slot that matches its width, and pull it down under the foot. Place the edge to be bound into the groove on the left side of the bracket. Loosen the screw on the top, in the back of the foot and adjust the bracket as needed. Select a narrow zigzag, a straight stitch, or even a decorative stitch. Sew slowly, keeping the fabric to be bound, snugly in the groove as you sew. And make sure that the folded edges stay inside the guides. You can read a full tutorial from So sewing easy.com about the foot here: “How to use the binding foot“.


Using facing to sew a curved hem
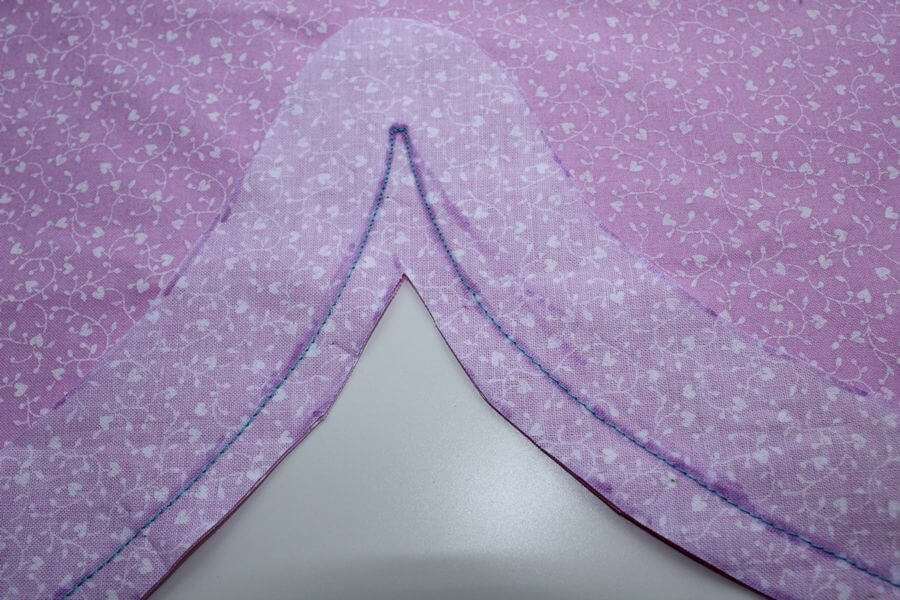
Very often we can use facing to sew a curved hem. It is the best option when we have the curved hem with an unusual shape or when we have really unruly or dense fabric or fabric with sequins, etc. This method is used also when there is insufficient hem allowance.
This means sewing two pieces of fabric together (one piece is the garment, and another one is a facing) and then turning them right side out so that the seam allowances are enclosed. Facing is a piece of fabric cut out in the shape of the edge it is to enclose (the same shape as the curved hem edge). Put the facing on the curved hem right sides together and stitch. Trim seam allowances with pinking shears close to the stitching. Sew facing to the garment by hand or by machine. Press the seam allowances toward the facing, then press the facing to the inside and secure its top edge with hand stitches.


Using different trims and embellishments for sewing a curved hem
What if, instead of seeing this hemming job as a routine , we use it to add creative elements to the design of the garment which may enhance its appearance? Now I will show you a number of ways that may do just that.
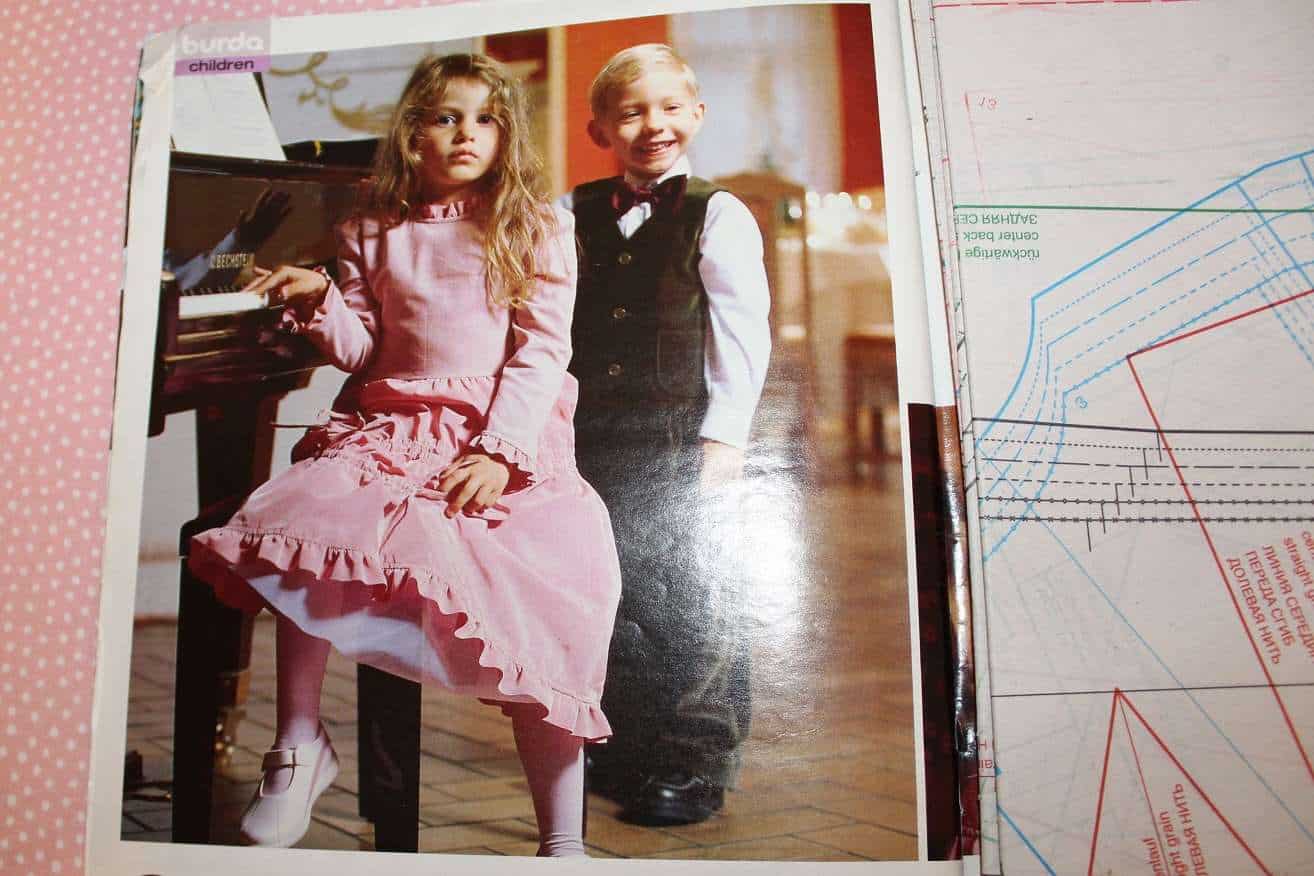
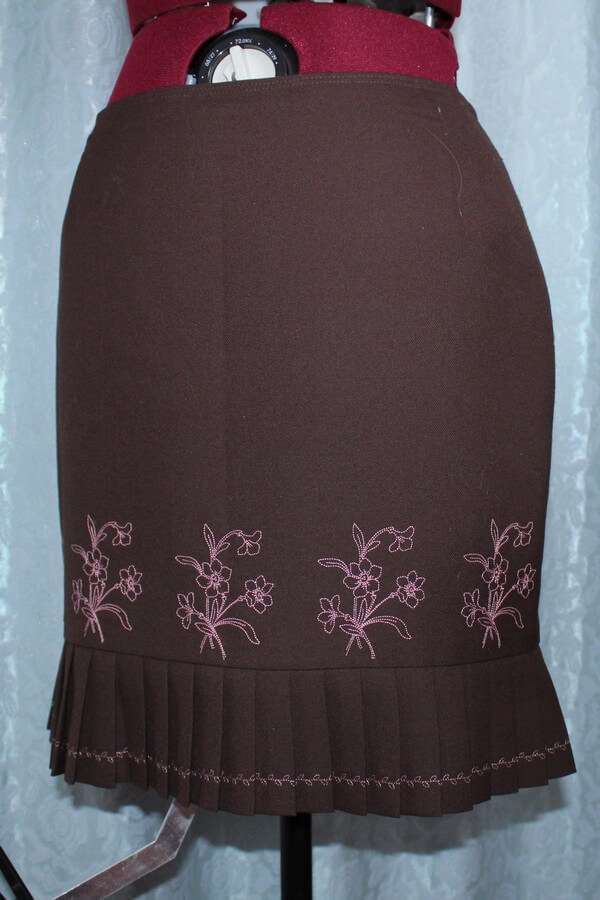
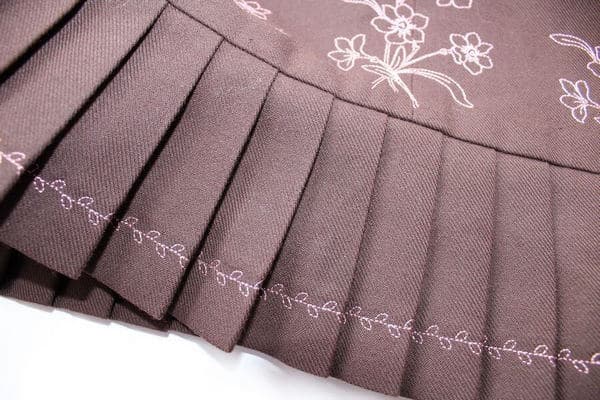
You can sew hem frills. It is especially nice to decorate kids clothes.
Cut it about 7 cm wide, stitch the ends together and fold frill in half lengthways. Baste and press. Gather with your sewing machine (the stitch length is 5 mm and the thread tension is 0). Stitch on to lower edge of the dress or skirt. Press seam allowances up and topstitch 5-7 mm wide along the joining seam. This is an image from Burda magazine.

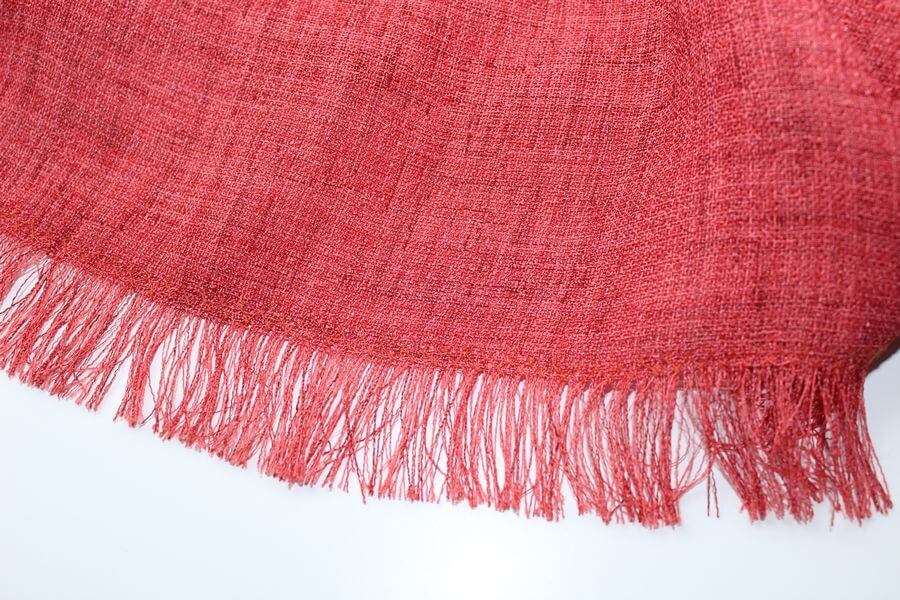
You can make frayed hems.
Fray the ends of your fabric by pulling the threads out. For this technique, we usually take loosely woven fabric that frays easily.


You can use decorative stitches on your sewing machine. Modern sewing machines have hundreds of these decorative stitches. So let’s use them to make beautiful hems!
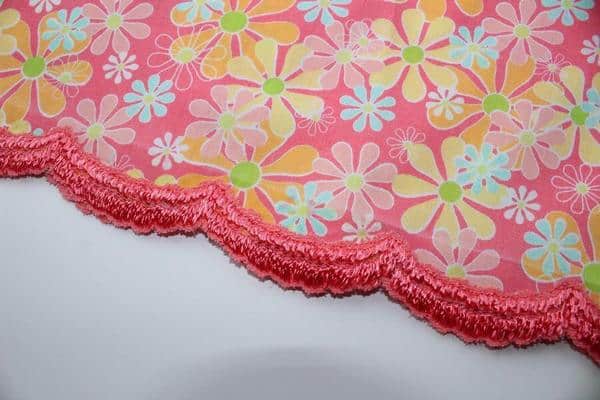
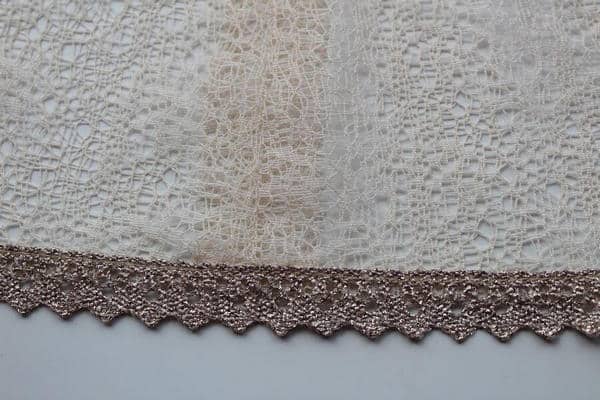
You can use trims and lace to finish your curved hem. There is practically an endless choice for choosing your trims. I usually fix them with a sewing glue first over the curved hem and then stitch them in place.


Unfinished hems
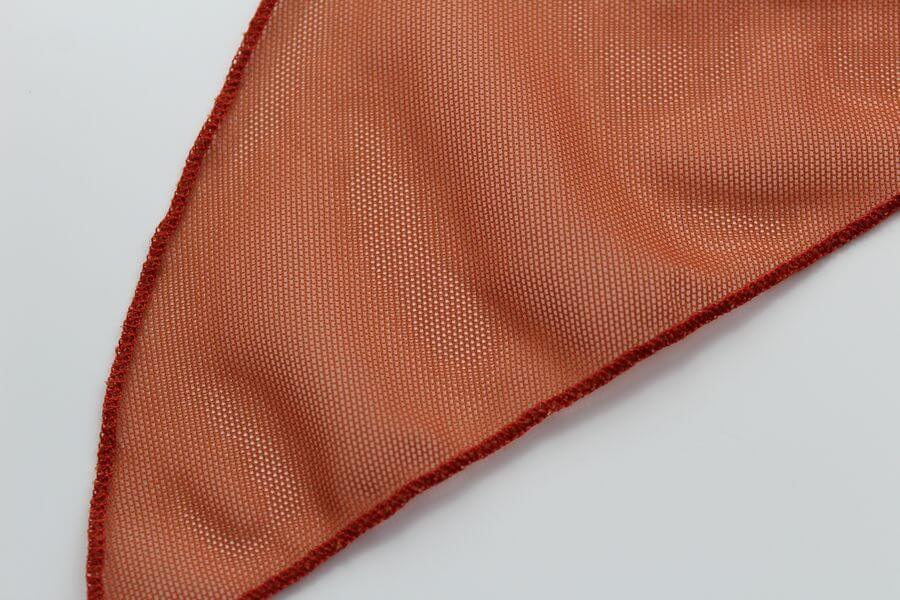
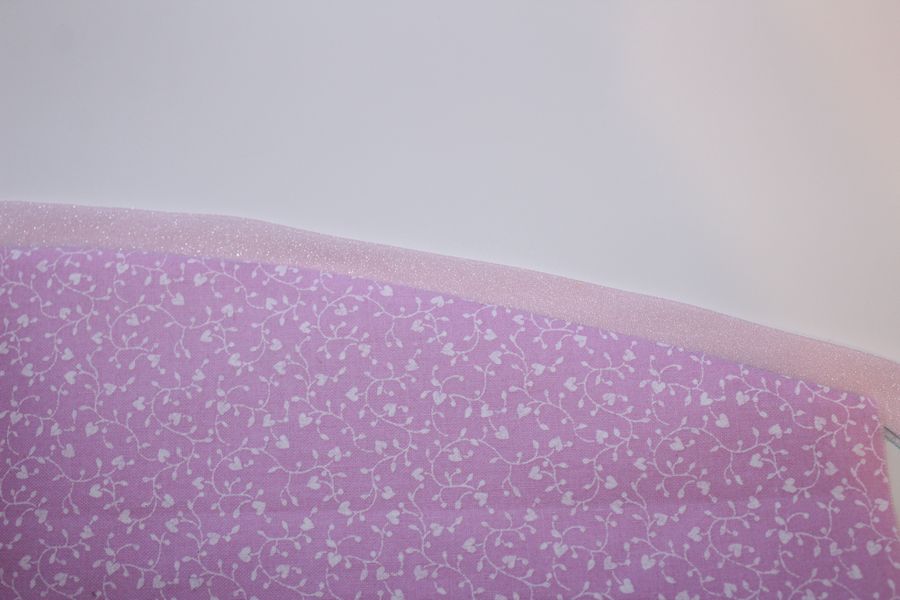
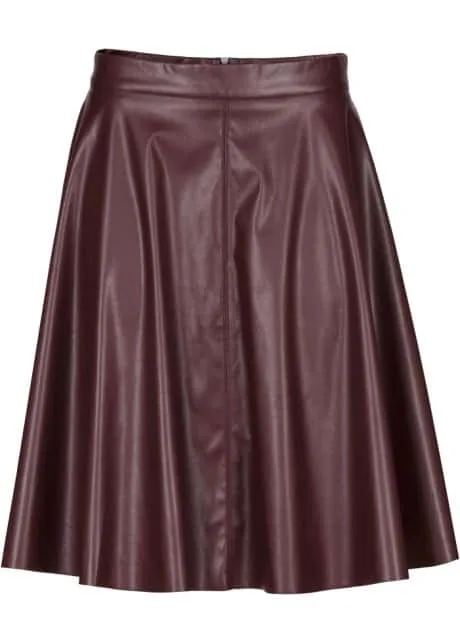
Sometimes we can leave the curved hem unfinished! It is suitable for some netting (mesh) fabric, velour, faux or natural leather. Below are some images with unfinished hems. For example, I made a beach cover from mesh fabric and I left the hem unfinished because the fabric doesn’t unravel. Or I made a tunic (check my tutorial “How to upcycle an old dress”) and put an unfinished bias strip to the curved hem. Faux and natural leather can be often left unfinished because the fabric doesn’t unravel.


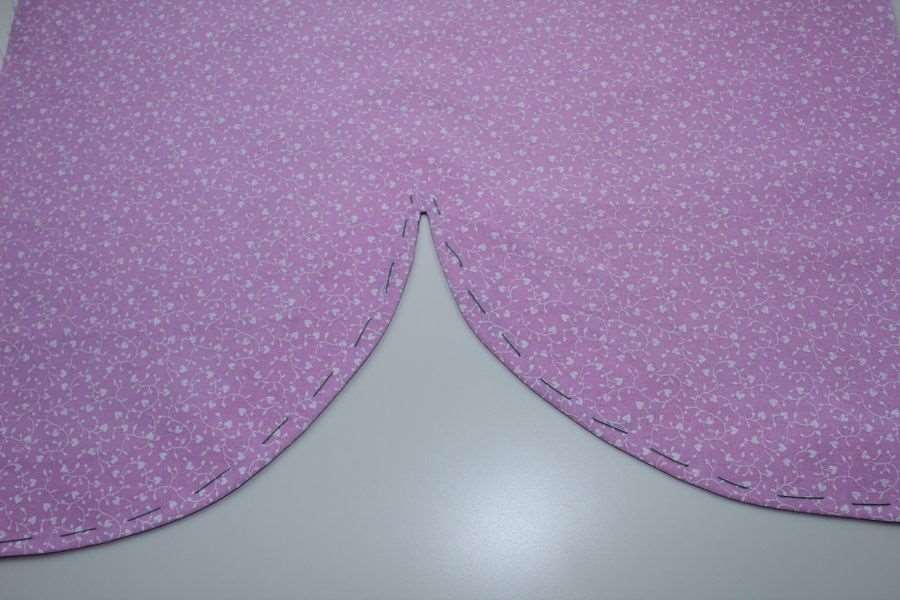
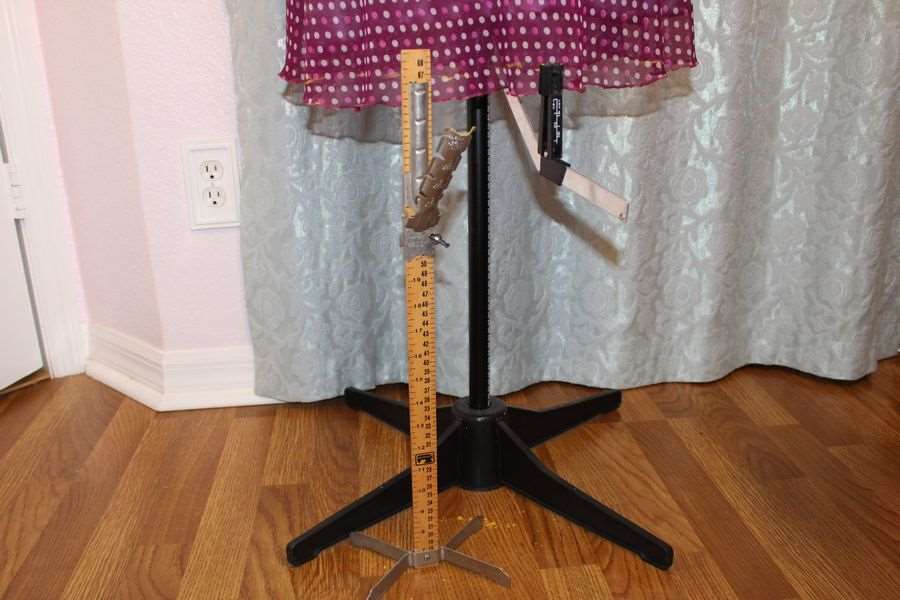
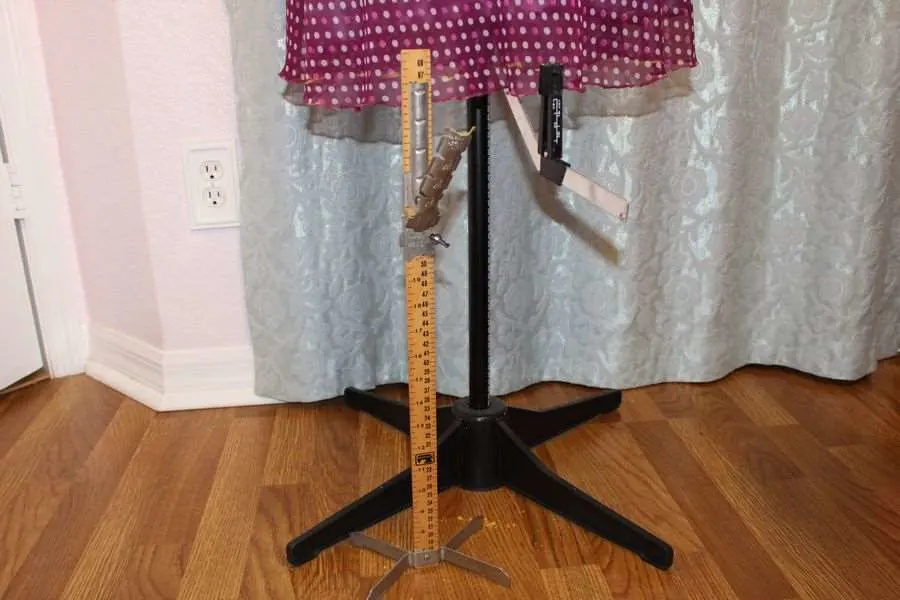
How to mark a hemline for an uneven dress
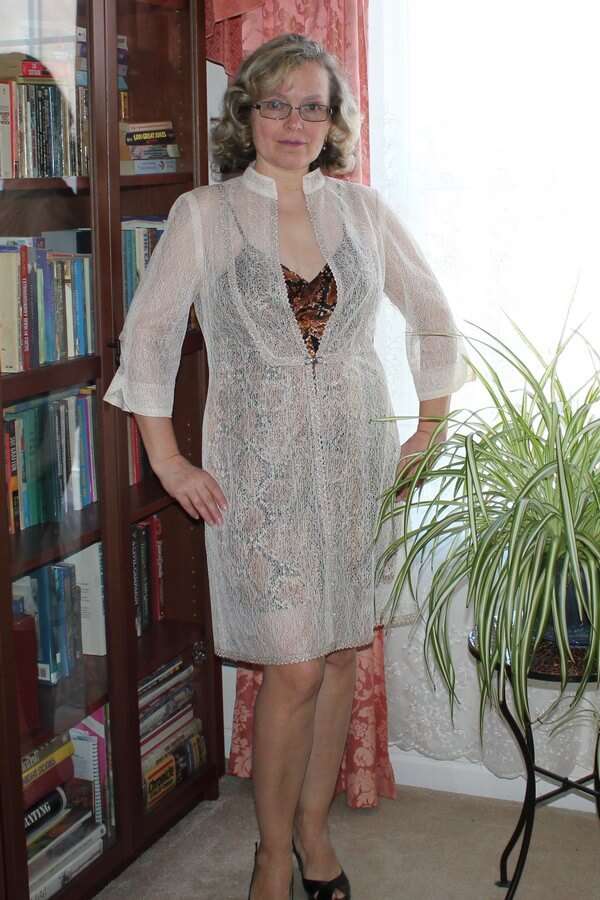
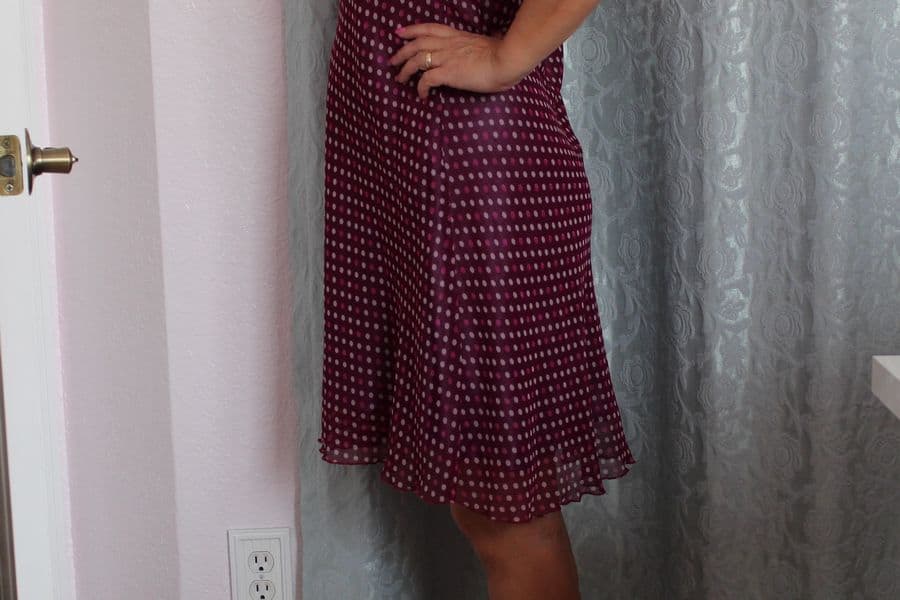
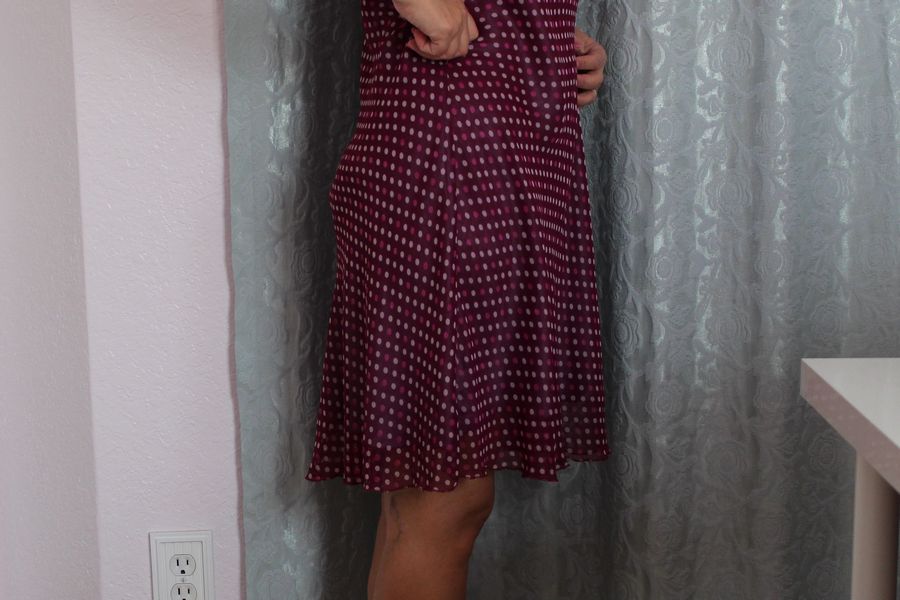
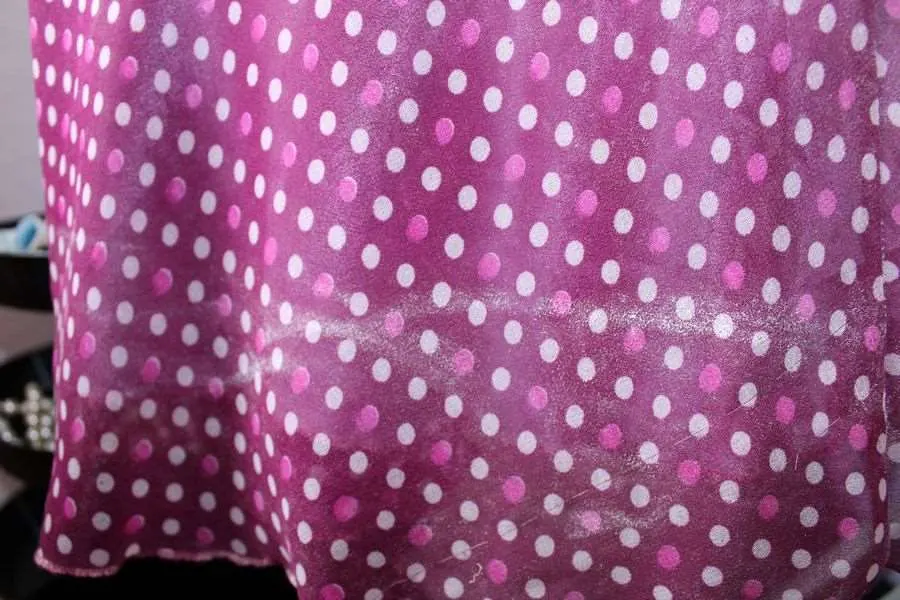
Sometimes you need to accurately mark curved hemlines. You can have a hard time hemming bias-cut skirts and dresses without some special tools. And I often hear questions about how to hem a circle skirt evenly. I made this dress from silk georgette and cut it on the bias. The dress was staying a few days on a mannequin and look what happened with the hem here. So I needed to mark a new hemline to finish the dress. Let’s see how we can make a properly curved hem in this case.
I tried to use one trick method that I found on Pinterest but it didn’t really work with my pattern and the silk fabric. This method is good mostly for straight skirts and heavier fabric (but hemming them is not a problem usually, it’s very easy to do without any tricks).


You can use a mannequin (a dress form) if you have one and it has a special little tool for marking hems. Or there are special rulers that have stands so you can just put them on the floor. Or you can use just a regular long ruler. Put a piece of masking tape to mark the necessary length so you can see it easily every time you put a mark on your garment.
The marks made with these tools on a real person are not always even, no matter how careful you are because a person is not a mannequin – we breathe and because of this, the garment moves a little. So the marks are not really very precise. But if you put many of them it will give you a rough idea of where the hem should be.


Alright now, let’s finish this article. There are a few other methods to sew a curved hem (like making rolled hems by hand sewing or using underlining and lining to sew hems, etc.). So choose one that suits you the best and be careful with hemming because mistakes can be costly (you will have to alter the length of your garment). This remind me to tell you a joke.
A girl asks her boyfriend:
- Do you like my new skirt?
- Skirt? To be honest I thought it is a belt.
In conclusion, if you make mistakes sewing a curved hem you may end up chopping off inches of your skirt or dress. Take comfort in knowing that you’re not the first this has happened to, and you certainly won’t be the last. I tried to cover everything you need to know about sewing curved hems. Armed with all this guidance you can approach sewing curved hem with confidence and wear your newly finished garment with pride.
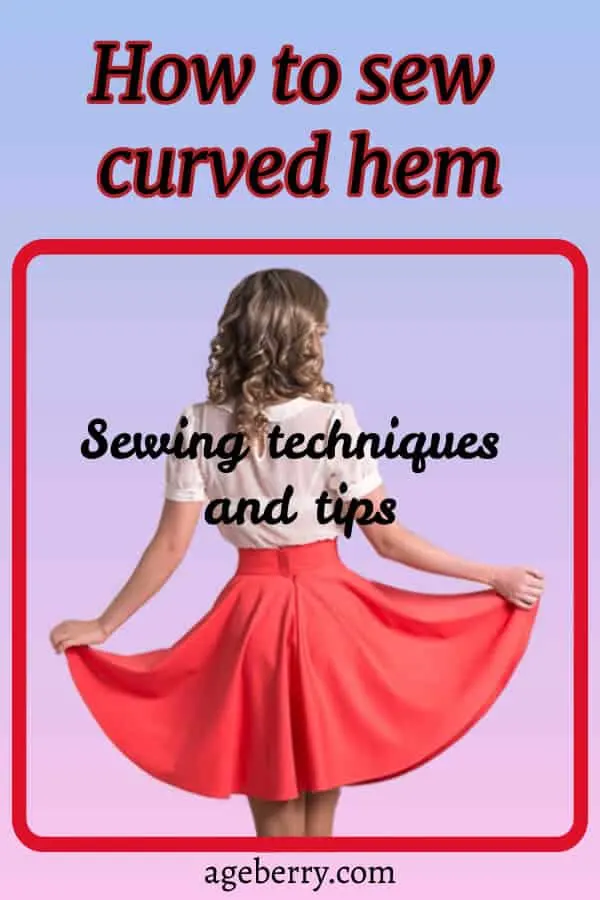
Did you like this guide? If you want to save it for future reference and to use it later when you are ready to sew, pin the image below or the first image of this article to your sewing board on Pinterest and follow me on Pinterest for more tips, tutorials, and inspiration.

latest posts
- Think You Know Zippers? This Installation Guide Might Surprise You
- Why Does Your Seam Ripper Have a Red Ball? Discover Its Purpose!
- Topstitching Troubles? This Simple Trick Will Turn It Around Instantly!
- How to Sew Shirring: A Step-by-Step Guide to Elastic Thread Gathering
- Are Self-Threading Needles Really Useful?
- Amazon Spring Sale: Best Choices
- Elevate Your Prom Look: A Guide to 10 Neckline Choices (2024)
- No Pattern, No Problem: Turn Scraps into a Quilting Masterpiece
- Prom Perfection: A Guide to Choosing the Perfect Dress Color (2024)
mary
Wednesday 24th of July 2019
this tutorial was fabulous. Thank you
Olga Balasa
Wednesday 24th of July 2019
Thank you very much!
Norzalina
Thursday 13th of September 2018
Thank you so much for this useful guide, especially no. 1 and no. 8. I can't tell you how many times I've been frustrated with curved seams. This looks so easy to do. I will definitely apply them in my next project!
Olga Balasa
Thursday 13th of September 2018
Thank you for your kind words! I am happy to be useful with my guides. What will be your next project?
Mindi
Sunday 29th of April 2018
Thank you for this wonderful article on curved hems! I was looking for a nicer and more painless way to finish a casing for elastic on an ironing board cover and ran across your site. It is lovely and I appreciate all of the examples you show of the techniques on garments you have made for yourself.
Olga Balasa
Monday 30th of April 2018
Thank you for your kind words! I try to make my blog useful for people who like to sew. I also make my ironing board covers myself because they get dirty quite fast even if I try hard to keep them clean. And I use a wide ironing board, not a regular one. I hope you found the information you were looking for on this page. I didn't think to include in my article this special example of sewing curved edges.