
Embroidery is casually used to embellish garments. But embroidery can be an art in itself. Did you know that you can make beautiful things out of embroidered lace only? If not, read further and I will show you some interesting processes.


Note: Some of the links on this page are affiliate links. This means I will receive a commission if you order a product through one of my links. I only recommend products I believe in and use myself.
I like to use my embroidery machine because with it I can always turn something ordinary into extraordinary and create one-of-a-kind garments. But not only that – embroidery to me is pretty therapeutic and more than creating beautiful things.
I think there are billions of embroidery designs available now and they are all amazing but I like the most free-standing lace designs. In this tutorial, I want to show you how to make a lace hat with an embroidery machine.

Hats are always popular and fashionable and you can’t have too many hats, right? You may be surprised by how a hat can transform your look.


I purchased the design for the hat online from this store: https://www.advanced-embroidery-designs.com
It wasn’t cheap but to me, it was worth it: each part of the design has more than 20 000 stitches, and digitizing is done very well – no gaps appeared in the lace, and all different details connected to each other in the final item without problems. I got PDF instructions together with the design and they were complete and clear to follow.
The embroidery file to make the hat was a set of 5 different designs for the Large hoop (5″ x 7″ in or 130 x 180 mm). The finished size of the hat was for a lady with a hat size 22″- 22 3/4″ (56-58 cm).
The next step was preparing all the necessary materials: threads, stabilizer, needles, etc.


In the instructions they advised using cotton thread for the hat embroidery: “For this project, we recommend using cotton thread both in the bobbin and in the needle. Cotton gives bulk to the lace and makes it look hand-made. Embroidery polyester and rayon threads will make very fine weblike lace, which will not keep the shape of the hat and is not suitable for the project. You can use 40-, 50- or even 60-weight cotton. If you use 40-weight cotton thread for the needle, you can use 50- or 60-weight cotton in the bobbin.”
And this is exactly what I used – 40-weight cotton thread (it was written “quilting thread”) in the needle and in the bobbin. I am glad I followed their advice – the lace really looks hand-made and it’s pretty thick and not at all weblike.
I used two different color threads for this lace embroidery – pink and beige so I had to wind bobbins with 2 different colors.
But next time I think I will try good quality 40-weight rayon embroidery thread for free-standing lace embroidery because I got so much lint from the cotton thread – at some point, my embroidery machine just refused to stitch and I was almost ready to quit the project altogether.
This is not the only free standing lace embroidery project I tried. For another very interesting usage of this kind of design please see my articles Unexpected way of using free-standing lace embroidery and Machine embroidery tutorial: stunning Halloween embroidery project.
For those designs the recommendation was to use polyester thread, so I guess every designer has his/her own preference. Those designs turned out just fine too using polyester thread which kind of supports my decision to use next time a different thread even if not recommended by the manufacturer.
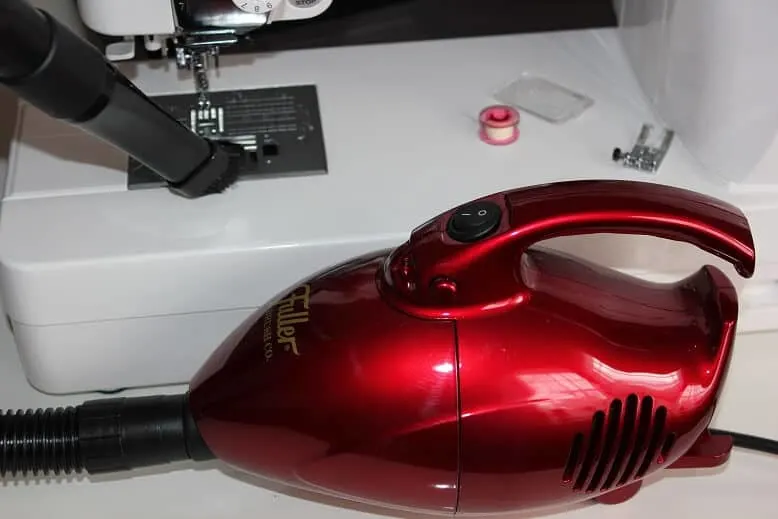
I had to clean the machine after stitching every detail – it really needed that and it took lots of time. I have a very good tool for this though – this small mini vacuum cleaner was perfect for the job.

But at some point, I didn’t notice a piece of lint that was stacked under my bobbin.
I was wondering why my embroidery machine started to make this (see image below) in the middle of the stitching. So I spent so much time trying to figure out what is wrong – check the thread, change the needle, check the bobbin, check the bobbin holder, check the tension, check, check, check.
Everything seemed ok. I just didn’t notice a small piece of lint collected under the bobbin in the corner of the bobbin holder. But as soon as I got rid of it the machine started to work properly and was pretty cooperative until I finished all embroidery.
Can you imagine that so small a piece of material can cause such a big issue?


The stabilizer for the free-standing lace project can make a big difference in the quality of finished lace. In the instruction, they say: “We recommend using water-soluble mesh, such as Vilene. Film-like water-soluble stabilizers, such as Solvy, are not suitable for Free Standing Lace Embroidery.”
Ok, no problem, I didn’t use Solvy. But just in case I used 2 layers of water-soluble non-woven dissolvable stabilizer and it did the job. And after it was dissolved I didn’t need to use any starch – my lace kept the shape pretty well.
Needles. They advised using 80/12 metallic needles “Our experience shows that cotton thread used with metallic needles gives less lint”. So I used exactly that and the reason for this is that metallic needles have a pretty big eye – bigger than regular needles. I still got lots of lint from the cotton thread, but I guess I would have had even more lint with regular needles.
Making the hat
I loaded up the embroidery design files on my machine and saved them in the memory, threaded the machine, hooped the stabilizer and attached it to the machine, and started stitching. I had to change threads from pink to beige and back in the needle and in the bobbin.

Now a few words about the USB drive I used to transfer embroidery files from my computer to the embroidery machine. It looks like a necklace and has 16GB of memory!


They advised in the instructions to make a test stitch-out of the design and wash away the stabilizer because this helps to select the threads, needles, stabilizers, and settings of the machine correctly.
That was a good idea, and I made the test stitching the smallest part (the brim part) of the hat. I checked the size of the design and it corresponded to the size given in the description on the design page. So I didn’t throw away the test – it became part of the project.
I had to stitch 12 different pieces ( 6 for the brim, 2 for the top, and 4 for the sides) and it took almost an hour for each piece. But it didn’t really bother me that it was long – the embroidery machine was doing all the job and I was at my computer browsing.
The only issue was a thunderstorm ( we have them in Southern Florida in the summer ) that made the power fluctuate at some point and this convinced me that my next piece of equipment will be a UPS Battery Backup & Surge Protector for my sewing needs, since my machine is rated under 100W I am looking at purchasing a relatively inexpensive unit, something like this.


The real work started after the embroidery was done.
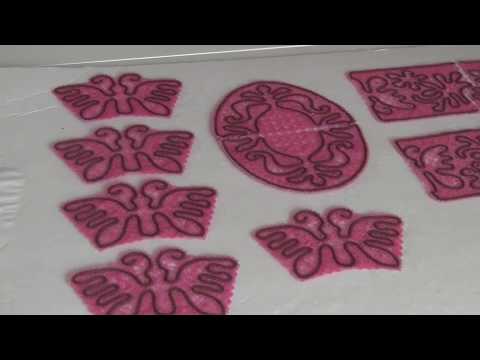
First of all, I had to dissolve the water-soluble stabilizer so the designs look like real lace and leave them to air dry. It was easy and fun to see how the stabilizer melts right away.
While the lace was still wet I had to slightly stretch it to prevent shrinkage and give it a proper flat shape so I pressed the lace between two flat craft foam sheets that I bought in a dollar store.
They are about 20x30x3/8 ( inches ) or 50x75x0.5 ( cm ) and are made out of a thin foam layer, relatively stiff, between two layers of thin carton. This kind of board absorbs the water well and helps with the drying process, I only had to press the lace for about one hour until it was dry enough to not curl anymore.

And after that, I had to sew all the pieces together to make the hat. That was the most time-consuming job in this lace embroidery project and required extreme attention to detail because the pieces of lace, once sewn together, must look like one piece without gaps or visible borders in design.
The task was made even more difficult because after the stabilizer was washed away and the pieces dried out they became stiff and I had trouble inserting the needle exactly where it needed to be ( remember, attention to details ! ).
So I decided to make the connecting parts of the embroidery pieces wet again and the sewing became more manageable because the needle was going easier into the embroidery. This, of course, has added the complication of drying, more about this later.

I sewed all the corresponding pieces by hand. In the instructions, they say that I had to use the same color thread I used for making the embroidery. But I noticed that after the stabilizer was removed and the embroidered pieces got dry they changed the shade of pink to a little bit more deep pink. So I had to find a different thread to sew pieces together because this thread was not treated with the stabilizer.
While sewing I had to connect all the small loops on the lace. But the number of loops was not the same on corresponding parts (which they acknowledge in the instructions) so I had to make sure the pieces are connected evenly, without pleats, and without visible gaps.
After all the sewing was done the hat was almost ready. I only had to let it dry completely and give it a proper shape which would be easier to do if I had a hat form. But I don’t have one so I used a real straw hat (which has a close shape but is not exactly the same). This step is quite important since at this point in time any crease will show in the finished hat.


I like how this free-standing lace embroidery hat turned out (and so did my friends). It’s a pretty amazing experience to create my own lace hat. And what was in the beginning? Just two cones of thread. Magic! And the hat is chic, unique, and beautiful, and protects my hair, eyes, and skin from the sun’s ultraviolet rays. I had to work for it, of course, but it never works when you like what you are doing-especially if the result is so beautiful!


latest posts
- Think You Know Zippers? This Installation Guide Might Surprise You
- Why Does Your Seam Ripper Have a Red Ball? Discover Its Purpose!
- Topstitching Troubles? This Simple Trick Will Turn It Around Instantly!
- How to Sew Shirring: A Step-by-Step Guide to Elastic Thread Gathering
- Are Self-Threading Needles Really Useful?
- Amazon Spring Sale: Best Choices
- Elevate Your Prom Look: A Guide to 10 Neckline Choices (2024)
- No Pattern, No Problem: Turn Scraps into a Quilting Masterpiece
- Prom Perfection: A Guide to Choosing the Perfect Dress Color (2024)