
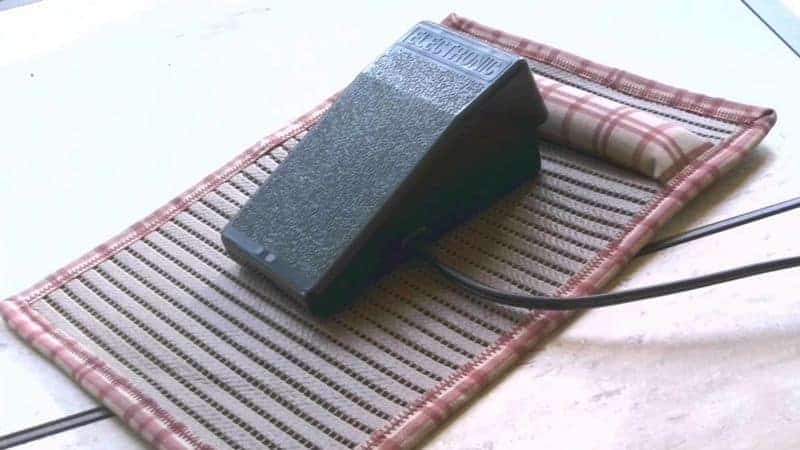
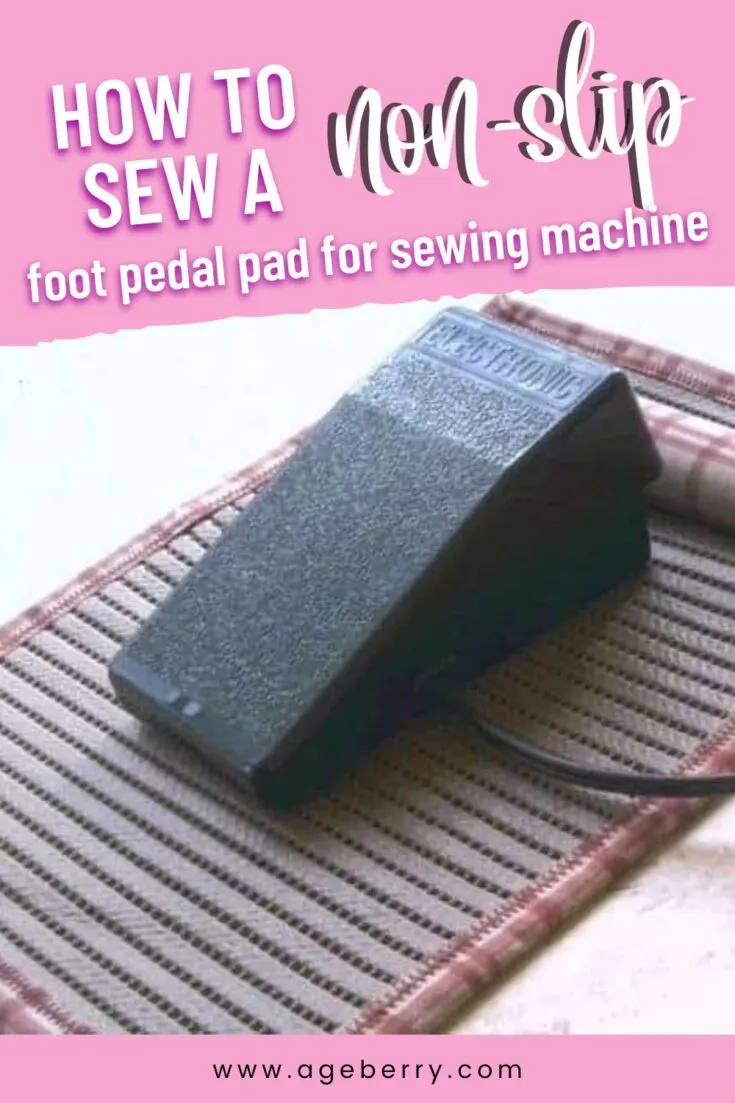
In this tutorial, I will show you how to make a non-slip foot pedal pad.
Did you have problems with your foot pedal dancing around under your sewing machine table while you are sewing? I bet you did.
I love to sew but I don’t enjoy hunting for my foot pedal every time I am ready to start a seam.

Note: Some of the links on this page are affiliate links. This means I will receive a commission if you order a product through one of my links. I only recommend products I believe in and use myself.
There is a solution to this problem on Amazon – take a look at it.
But I thought I could make a non-slip pad myself (to make sewing even more enjoyable).
I made it from a non-slip shelf liner a while ago, and it worked great for my carpeted floor. But unfortunately, every thread and every cut piece of crap (sorry, scrap) that falls from my table attaches to it.
So I decided to make a new one and to show you how you can make one too. The good thing about it is that you can make it from the fabric of your choice and use any color you want and make it not only functional but also attractive to give your sewing area a great look.
Materials necessary for the foot pedal pad
Non-slip shelf liner (I decided to go with brown color)
Small piece of fabric for binding (I used outdoor fabric which is stain resistant because after all it stays on the floor and I don’t want it to get dirty right away)
Strong thread
Glue gun (or just glue)
Sewing machine
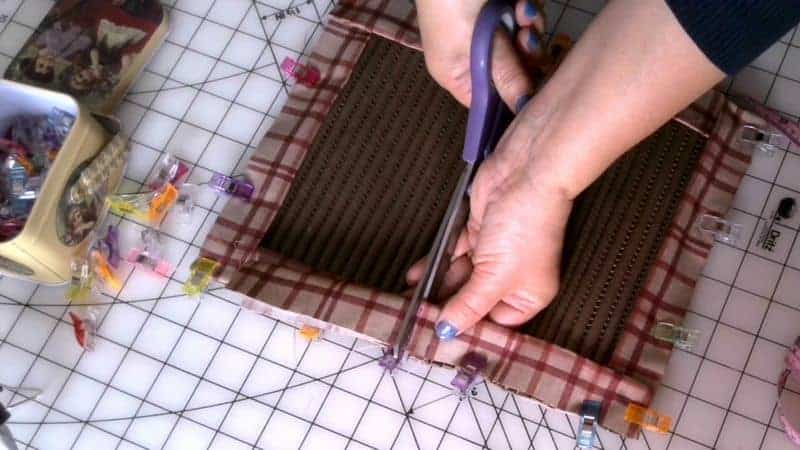
STEP 1 Cutting all the pieces (4 of them)
First I cut the shelf liner – a piece 9 x 12 inches. One of my sergers has a wide foot pedal so this size works well for me. This non-slip shelf liner I have is pretty thick so I used only 1 layer for my pad. If you have a very thin shelf liner you can use double layers.


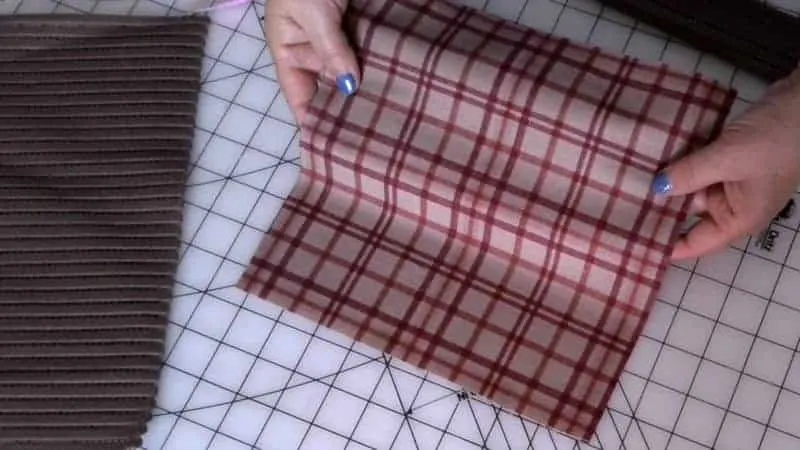
Cut a piece of fabric (for some kind of a stopper) 9.5 x 9.5 inches. I used darker color outdoor fabric which is stain resistant.

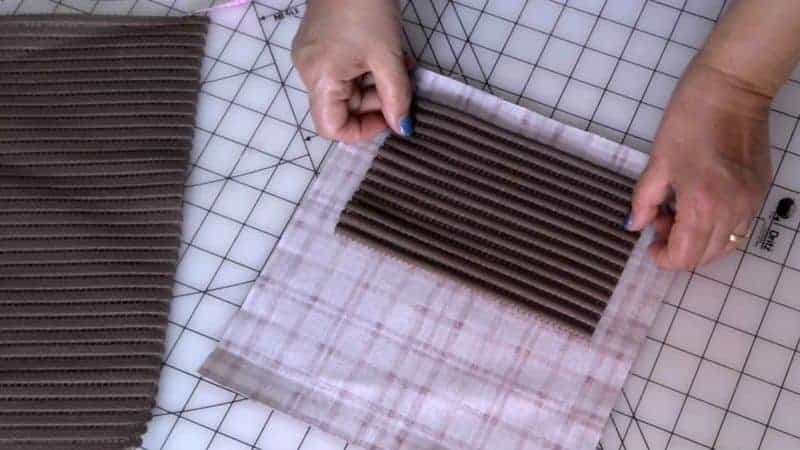
Cut a small piece from the shelf liner again – 7 x 4.5 inches.
Cut fabric for binding – mine was 2.5 wide and 46 inches long. I didn’t cut it on the bias, it’s not necessary for the square shape of the pad.
STEP 2 Prepare your sewing machine
Use good quality strong thread in matching color
✅ Related tutorial: Sewing thread types and uses
Change the needle – a dull needle is not good for stitching over a few layers of fabric and thick rubber. Use universal needle size 90/14.
Make the stitch length bigger (3 – 3.3 mm)
✅ Related tutorial: What is the stitch length and how to adjust it for different fabrics
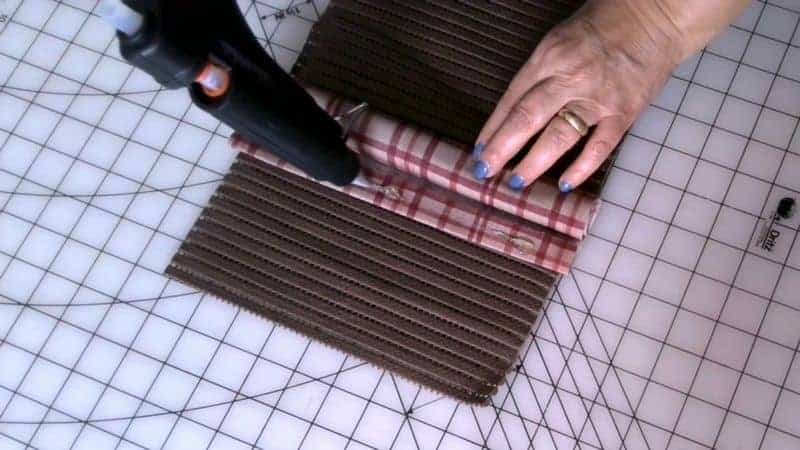
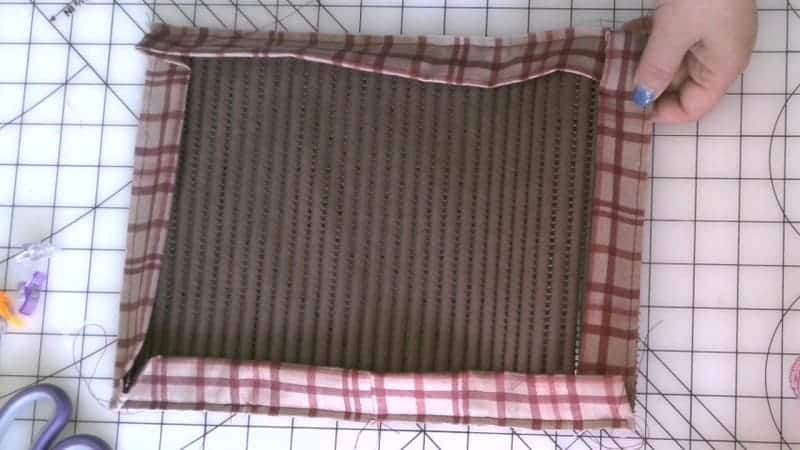
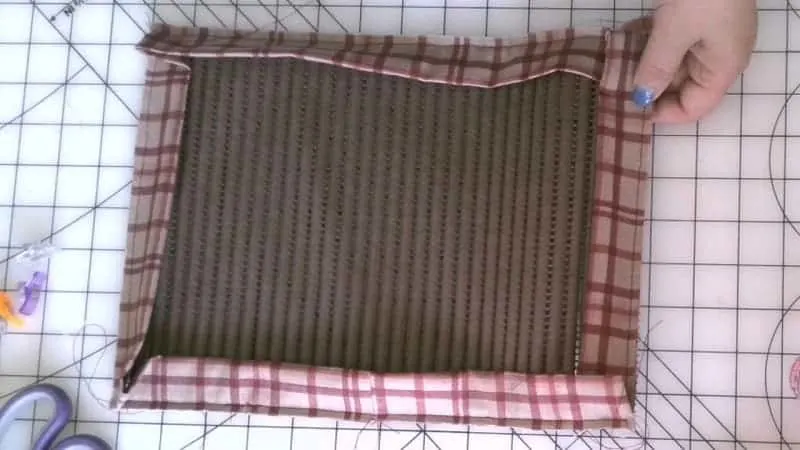
STEP 3 Making a stopper and attaching it to the shelf liner
This part is not really essential but the pad works better with it.
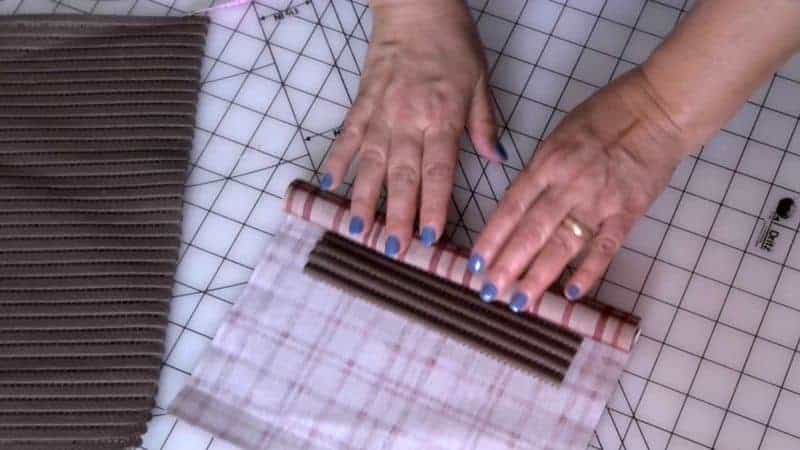
Take the piece of fabric we cut in step 1, place a small piece of the shelf liner on it and roll them together to make a cylinder. Glue the long edge to make it nice.
Place the cylinder on the shelf liner and stitch it to the pad – don’t use glue on the sides because we will sew over these edges when attaching the binding.


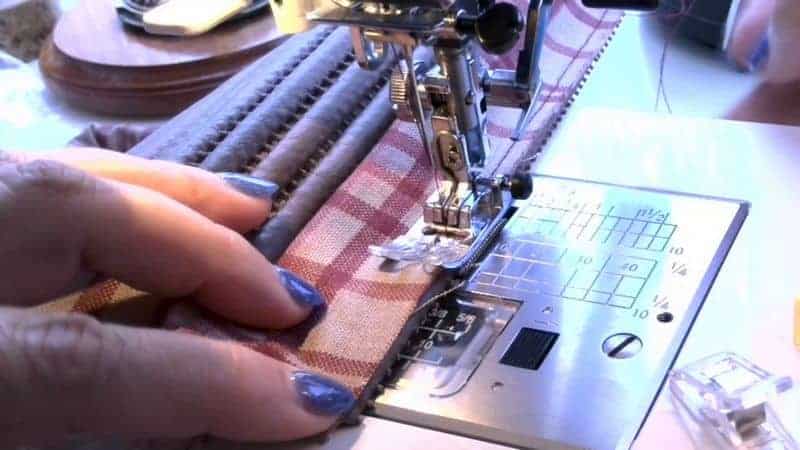
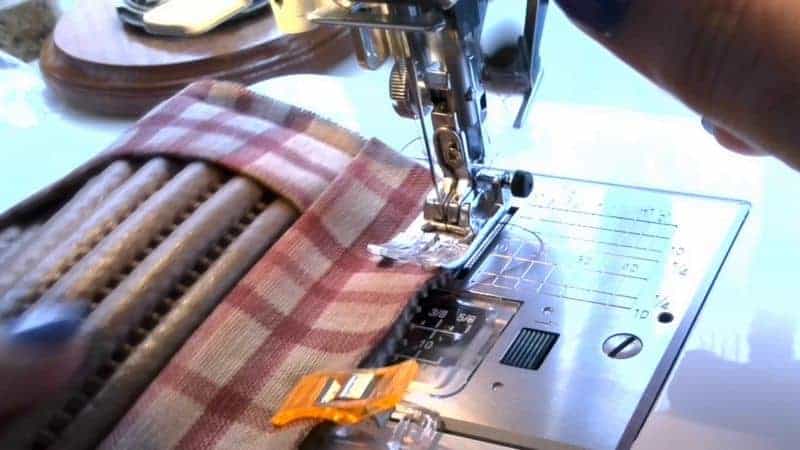
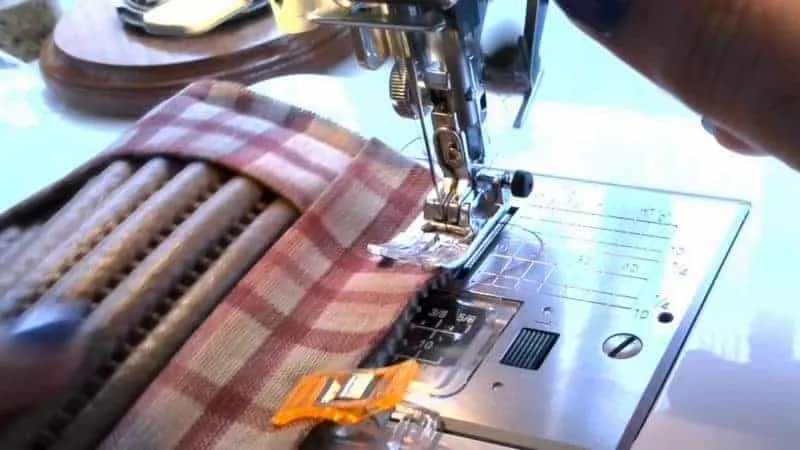
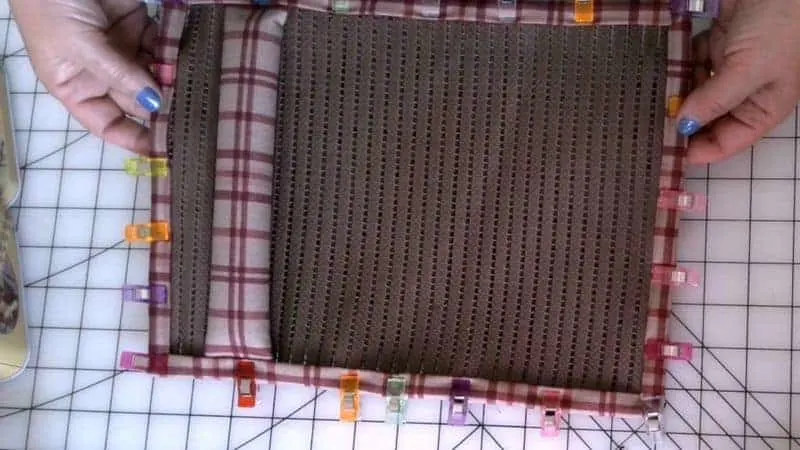
STEP 4 Attach the binding folded in half lengthwise
Here we are going to use the same technique we use for binding a quilt or a placemat.
I use Wonder Clips to secure the binding in place – pins are not useful here.
Start placing the binding somewhere in the middle of the bigger side. Place the folded binding strip on the pad with matching raw edges. The raw edges of the binding are placed against the edges of the shelf liner.

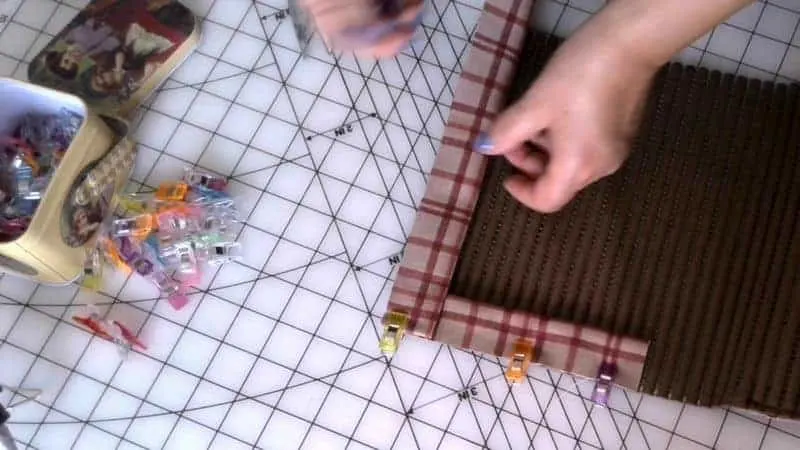
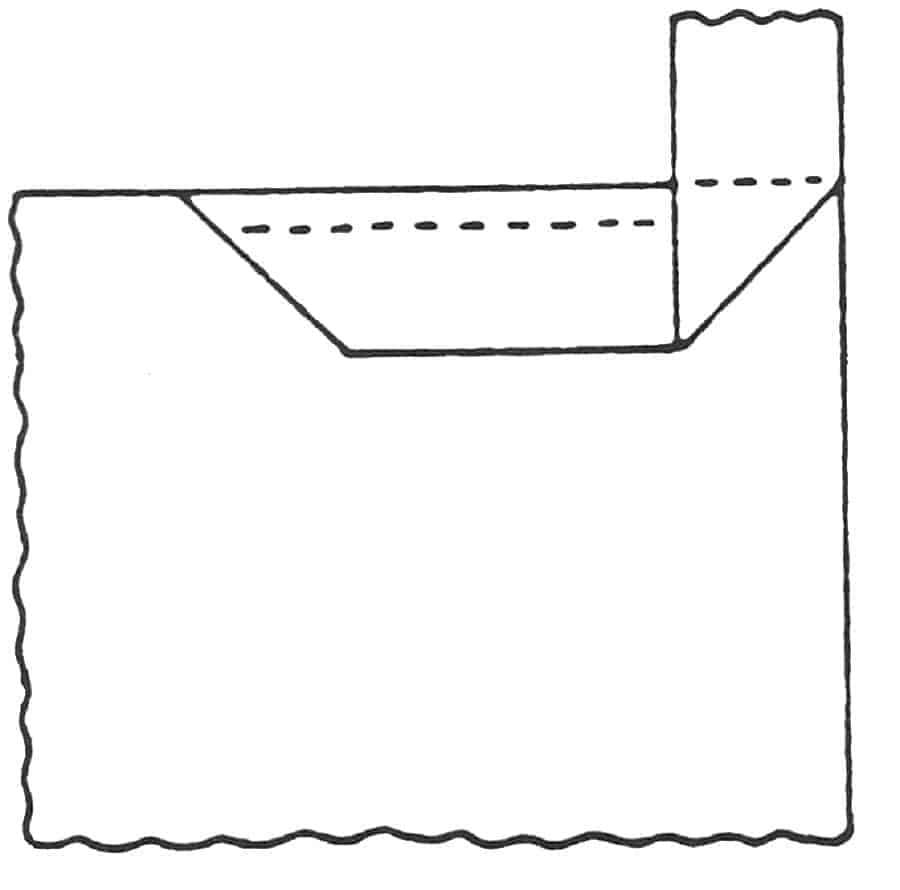
At the corner fold the binding strip up diagonally to form 45 degree angle at the crease as shown in the image below (45-degree angle).
The binding strip should be exactly perpendicular to the pad side you just clipped and the raw edge of the binding strip is exactly parallel to the other side of the pad. For sewing straight, this sewing machine foot might be helpful.
✅ Related tutorial: How to sew straight
Fold the strip down, so that fold is even with the top edge and the raw edges are lined up with the edges of the pad again.
Keep the binding strip taut a little so that when you sew you are not going to have excess fabric under your needle.
Seam allowances are ¼ inch.


✅ Related tutorial: How to bind a quilt with perfect mitered corners
STEP 5 Join ends of the binding
Overlap the edges of the binding strip and stitch them together.


Step 6 Stitch the binding
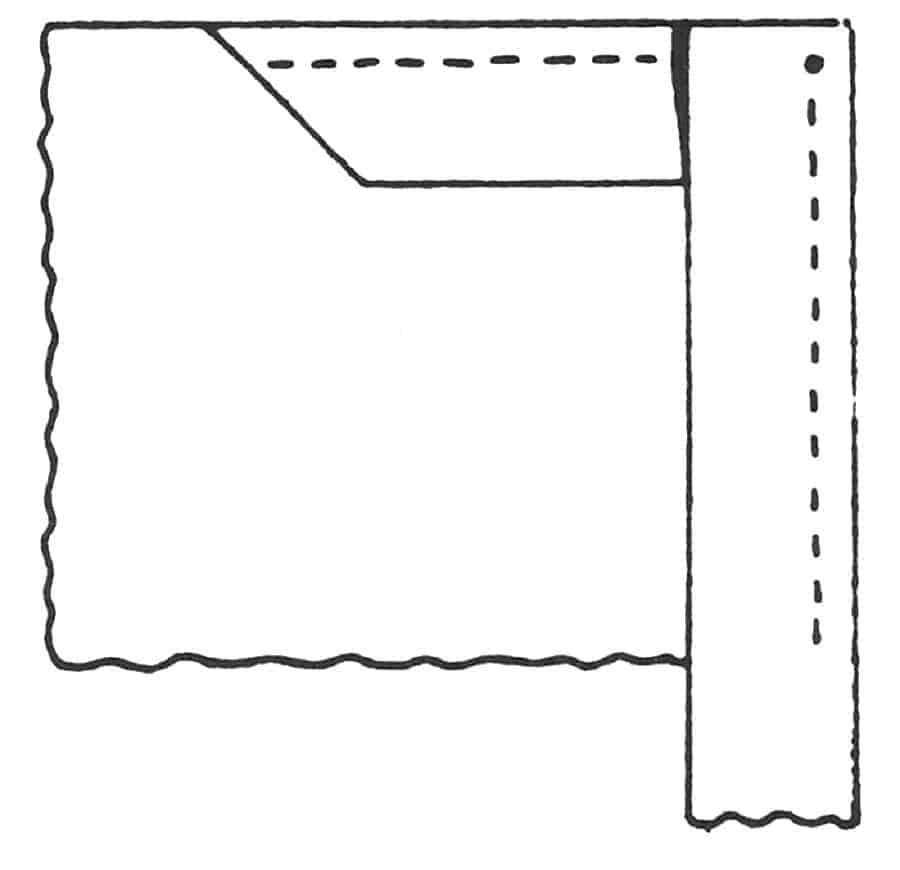
If you want to have nice mitered corners follow this procedure:
Stop sewing before you reach the corner. So, when to stop? The distance to the edge is equal to the width of the seam allowances. In my case, the seam allowances are ¼ inch, so I should stop ¼ in from the edge. If you are not sure where to stop make a mark on the quilt. It’s better to stop before the ¼ in point (even if you stop a few millimeters before) than to sew over it. If you sew past this point your corners will never look right.
Remove the project from under the presser foot.
Start stitching again from the very edge of the pad.
Continue around the entire pad, repeating this procedure at each corner.

Step 7 Finishing the non-slip foot pedal pad
That’s what the binding looks like after stitching. I need to cut the thread tails.
Flip the binding over and form the corners.
You just need to fold them properly – and this is so easy to do.
I like to use Wonder Clips to hold the binding in place.
Work your way all around and stitch the binding in place.
I used a wide zig-zag stitch to do it.


Did you find this tutorial helpful? If so, save this pin (see below) on your sewing board so you can come to this tutorial later when you are ready to sew the non-slip foot pedal pad, and follow me on Pinterest for more tips, tutorials, and inspiration!

Ready to take the next step in your sewing journey? Check out more step-by-step tutorials from my blog and don’t forget to share!


latest posts
- Think You Know Zippers? This Installation Guide Might Surprise You
- Why Does Your Seam Ripper Have a Red Ball? Discover Its Purpose!
- Topstitching Troubles? This Simple Trick Will Turn It Around Instantly!
- How to Sew Shirring: A Step-by-Step Guide to Elastic Thread Gathering
- Are Self-Threading Needles Really Useful?
- Amazon Spring Sale: Best Choices
- Elevate Your Prom Look: A Guide to 10 Neckline Choices (2024)
- No Pattern, No Problem: Turn Scraps into a Quilting Masterpiece
- Prom Perfection: A Guide to Choosing the Perfect Dress Color (2024)
Karen
Sunday 2nd of October 2022
Thank you for this. An excelent, easy to follow set of instructions. I feel confident enough now to make one for me and some more for friends... Karen L
Olga Balasa
Monday 3rd of October 2022
Thank you; if you make one and want to share, please contact me using the contact form at the bottom of the page.
Gloria Vella
Friday 2nd of October 2020
Hi I’m just wondering if you have a video tutorial to share Thanks
Olga Balasa
Friday 2nd of October 2020
Sorry, no video for this post. I did not think of making a video until after and by that time it was of course too late.
PAM TAYLOR
Saturday 8th of August 2020
Thanks for posting your ideas. I've been needing to make one of these but haven't been "sold" on the patterns I've seen until yours. I love how you rolled your shelf liner within a fabric strip in order to make the "stop" strip. Going down to my studio right now to make one!!
Olga Balasa
Sunday 9th of August 2020
Thank you! If you make one and allow me to show it, please send me an image.
Pat Gaumer
Wednesday 22nd of January 2020
It looks like you are putting the material side to the floor. It seems like this would be slippery. If the rubber side was to the floor there would be grip, then the rolled piece would be on the fabric side to stop pedal from moving forward. A good design & I will try.
Olga Balasa
Thursday 23rd of January 2020
No, there is no material side actually - I used fabric ONLY FOR BINDING around the edges. The rubber side is on the floor and also under my foot. I can't say it's 100% unmovable but it helps a lot.