
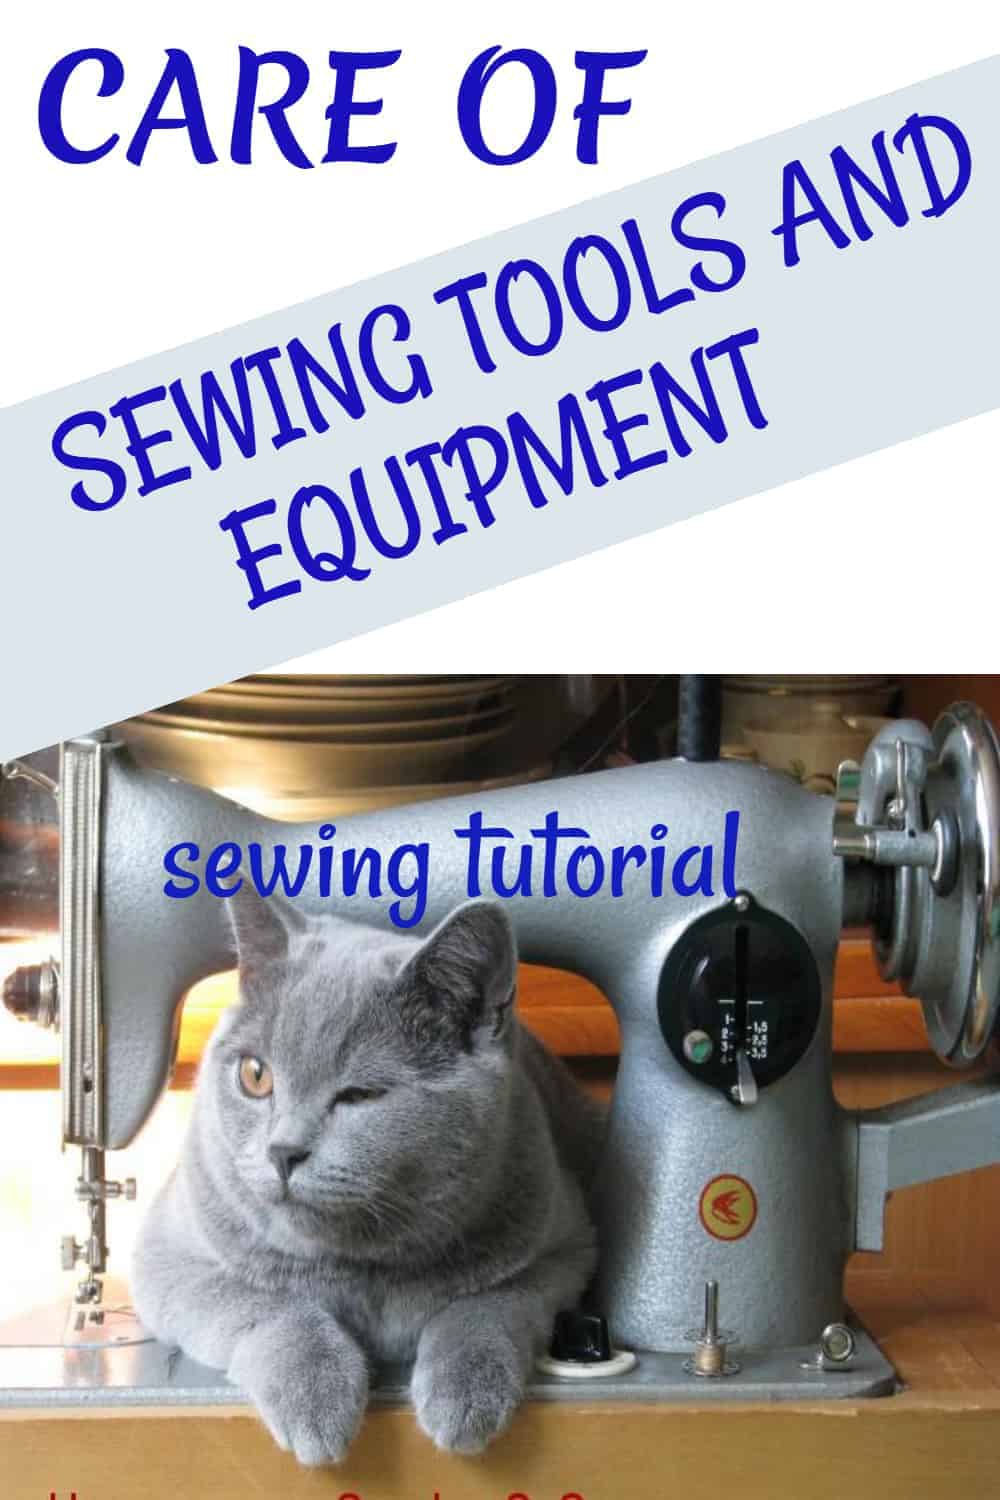
Taking good care of your sewing machine and other sewing tools will help them last longer and maximize your investment. Learn the right way to take care of sewing tools and equipment.
If you’re like me (and chances are good that you are, since you are passionate about sewing too), you want to have the best tools you can afford. In this tutorial, I am sharing tips, tricks, and recommendations on how to take care of sewing tools and equipment.
The Importance Of Keeping Sewing Tools And Equipment In Good Condition
Sewing, like many other activities, requires specific tools and accessories. What if your sewing machine was no longer usable? Perish the thought!
Every sewist has some level of investment in their sewing machine, embroidery machine, or other sewing tools. Do you want to turn around and spend that money (or more!) again to replace those items when you could have done something just a little differently to take care of them?
I prefer to do what I can to ensure I get many years of service out of every piece I purchase. There are a couple of big reasons for this approach:
- First and foremost, it can cost a fortune to replace them.
- Secondly, after a while, you grow fond of your equipment and know it well (its pluses and minuses; its strengths and weaknesses).
After all, once you’re comfortable with and trust your tools, projects seem easier to finish. Plus, you don’t need to deal with thoughts like “will the machine be able to do that?” in the middle of a project!
Whoever said “one ounce of prevention equals one pound of cure” was a wise person! Let’s talk about the good maintenance and upkeep of our sewing tools.
I doubt anyone actually enjoys doing maintenance. So, if I may, let me start with a piece of advice: after you make sure your significant other understands that the way to your heart is through your sewing room, ask them to help!

Note: Some of the links on this page are affiliate links. This means I will receive a commission if you order a product through one of my links. I only recommend products I believe in and use myself.
All jokes aside, what tools do we use when sewing? Actually, quite a few. Let’s break it down:
- Sewing machines and accessories
- Sergers
- Embroidery machines
- Hoops for embroidery
- Irons and ironing boards
- Cutting tools (rotary cutters, scissors)
- Needles and pins – all kinds
- Other small tools (seam rippers, rulers, curves, measurement devices, marking tools, etc.)
- Threads
What will happen if you do not take care of your sewing machine?
Ok, you bought the best tools that you could afford. For a month, everything is good, and you’re thrilled with how your final projects look. But, suddenly, things are no longer fine!
Needles begin to break, the thread begins to bunch (or break), the scissors don’t cut all the way to the very tip, or a hundred other things…
Why does this happen when just last month, everything worked like a well-oiled engine? Aha! “Oiled!” Did you maintain your machine? Did you protect your scissors?
Let’s look at some maintenance tips now because proper care of sewing tools and equipment is very important.
Tips To Keep Your Sewing Tools And Equipment Longer
To get the most value out of your sewing equipment and accessories, you need to know the proper care of sewing tools and equipment. I’ll break it down by category so you can find the information you need faster.
How To Care For A Sewing Machine: Essential Maintenance And Repair
By far, the tools that require the most maintenance are sewing machines, sergers, and embroidery machines.
All these have fast-moving parts and come in direct contact with fabric and thread, which are major sources of dust and fibers. Taking care of sewing tools and equipment like sewing machines is a requirement if you hope to use them for a long time!
Dust isn’t the only thing that can find its way inside your machines: a friend told me that he found a snake in one machine and a nest of ladybugs in another! Apparently, humans aren’t the only creatures that enjoy sewing!
But in all seriousness, how do you take care of a sewing machine? There are many ways of caring for your machine – here are the most important things to remember:
Use A Surge Protector
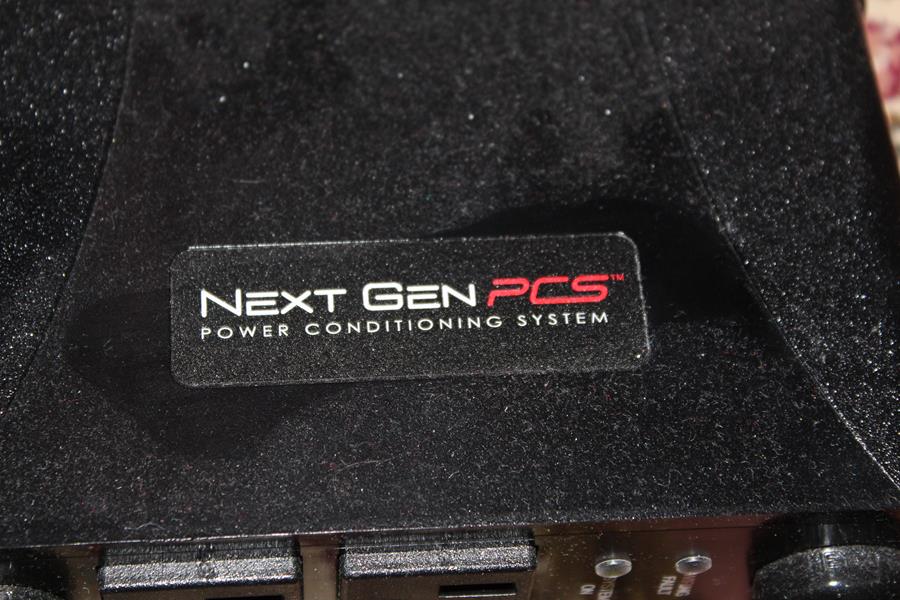
Let’s start with a very important tip that many people don’t often say: plug the machine into a surge protector instead of directly into a wall outlet.
This will protect it from power surges that can randomly happen, especially during a storm. I am using an ESP Next Gen Surge Protector, which has excellent ratings. My machine is worth it!
If you live in an area prone to storms, this is an absolute must-have.
I am using a second surge protector for my embroidery machine, and I am considering getting a UPS power supply for it because there have been times when the power went out in the middle of embroidering.
We have frequent thunderstorms where I live in Florida, and lightning strikes frequently happen close by. Why risk damaging or ruining a machine that costs many thousands of dollars? (Modern embroidery machines are that expensive!)

 120 Volt, 15 Amp")
 120 Volt, 20 Amp with NEMA 5-20 Connectors")
Here’s what the manufacturer recommends:
- Industrial-grade surge and noise protection: protect sensitive electronics from lightning strikes, surges, transients, noise, over-voltage, under-voltage, and wiring faults
- 120 volt / 15 amp with (3) 5-15R outlets, (RJ-45) network protection, (RJ-11) phone line protection, NEMA 5-15P input plug
- Monitor, manage and diagnose power issues. Includes FREE software to display power-quality information on your computer screen. An optional interface cable (part #XG-PCS-IC-1), available separately, is required to view or download data to your PC
- Special filter circuits screen electrical noise to prevent disruption, data loss, and phantom performance problems
- Automatically disconnects from the electrical supply in the event of dangerous situations like extended over and under voltage conditions.
Unplug The Machine
When you won’t be using the machine for long periods of time, go ahead and unplug it.
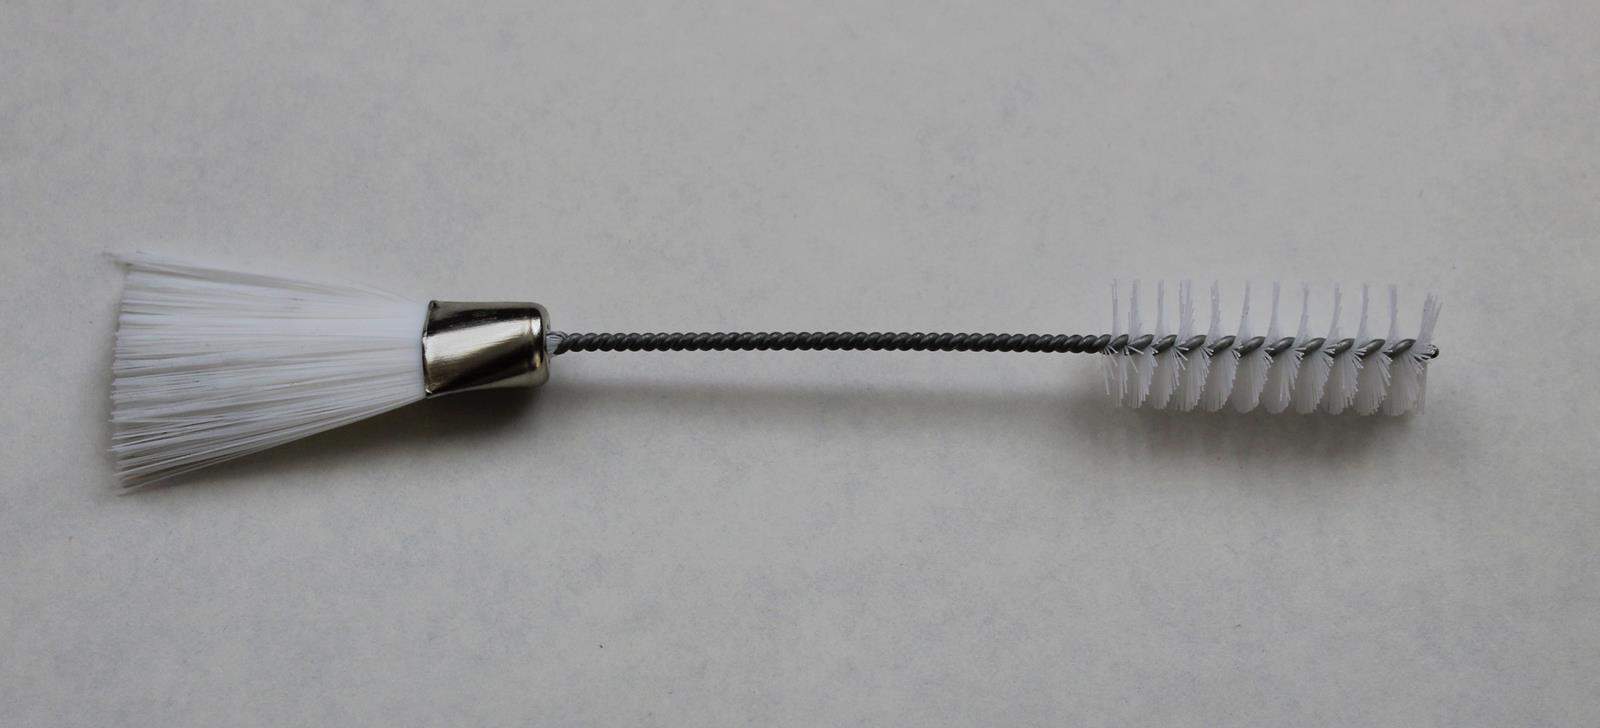
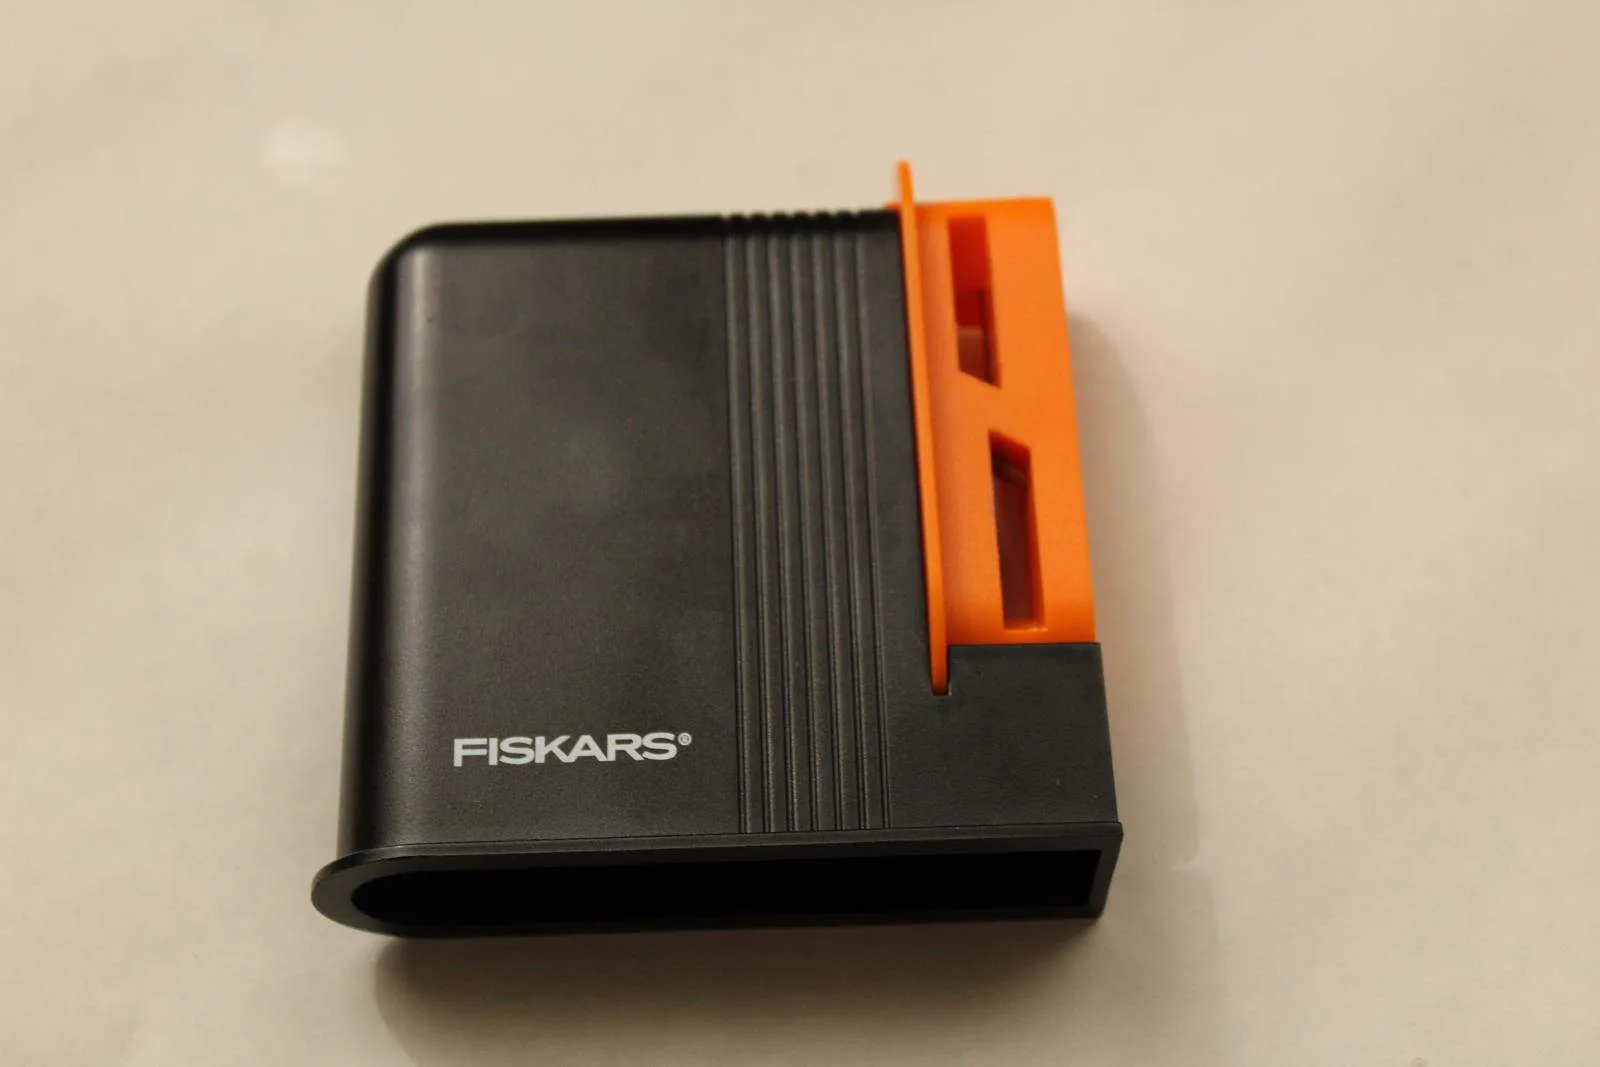
Clean The Bobbin Case
Do this frequently, using the cleaning brush that the manufacturer provided with your machine. If you didn’t receive one when you purchased the machine, get one that looks like the one below.
A cleaning brush is a must-have because even the smallest debris in the bobbin case can affect the quality of seams.
Clean The Machine Regularly
After a sewing session, dust or vacuum the machine, bobbin case, the surrounding area, and everything you can reach directly or by opening compartments without disassembling the machine.
✅ Related tutorial: Choosing a Mini Vacuum for Sewing Machine
Do not wash the machine – only dust it because introducing moisture can ruin it.
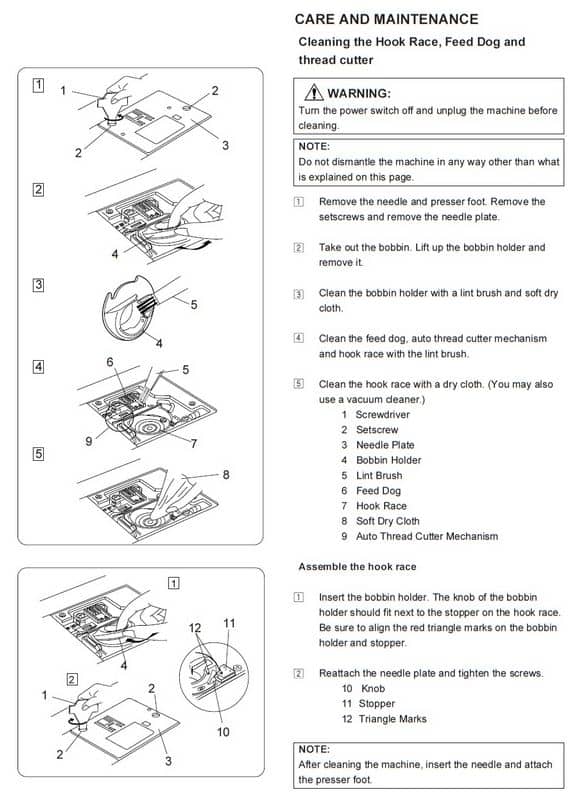
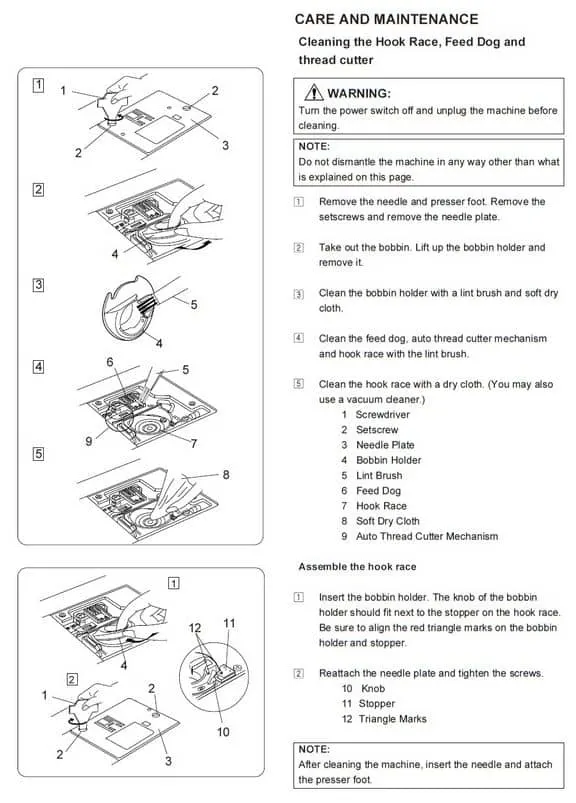
The manufacturer might publish a list of places that should be cleaned regularly. The list for my machine (Janome MemoryCraft 6600p) is in this image.
This image below is how my serger looks after working for a couple of hours on fabric for curtains. This fabric was thick and left a lot of dust after cutting, but dust accumulation is a very common occurrence for a sewing machine.

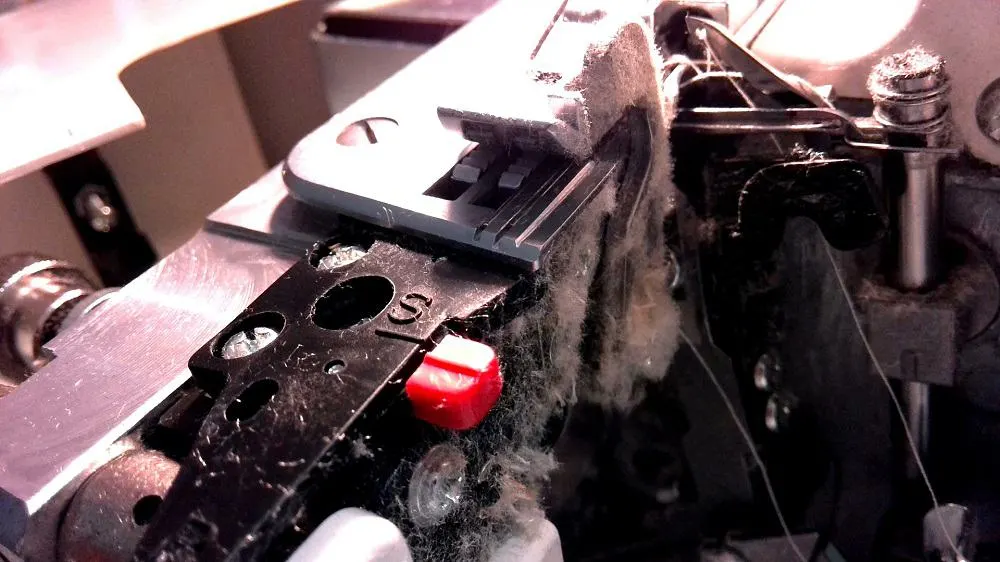
Do NOT use a canned air spray because it will only PUSH the dust INTO the machine. If you do use a canned air spray, NEVER use an air freshener or deodorant!
And be careful to point the air jet away from the inside of the machine. Otherwise, you will blow all the dust inside! A vacuum cleaner and a brush are more effective and won’t cause additional problems with your sewing machine.
✅ Related tutorial: Serger vs. sewing machine
Cover Your Machine
When you aren’t using your machine, go ahead and protect it with a machine cover. The cover can be a beautiful addition, and you can even make it yourself if you check out this sewing machine cover tutorial.

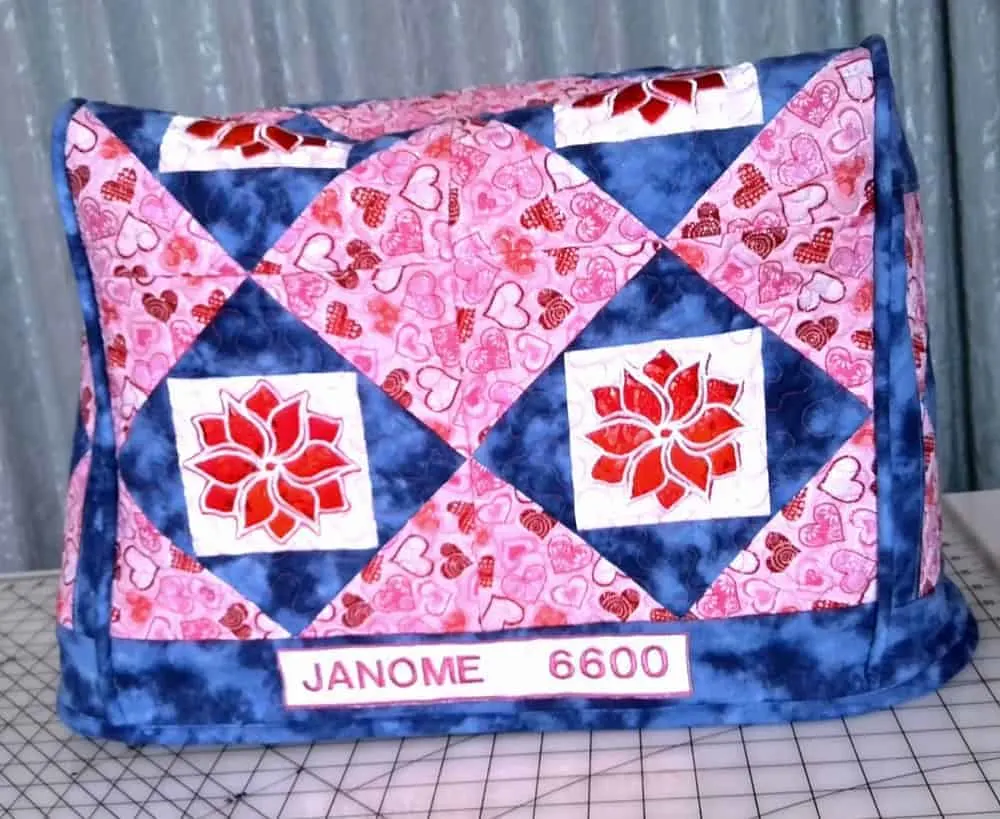
A simple machine cover will protect it from dust, the sun (it causes the white plastic to yellow over time), and accidental hits.
Be Careful Where You Store Your Machine
Do NOT store it in a garage on a lower shelf because it may be humid, and bugs may even find their way in. Instead, store it in a dry place.
I always leave the machine I use frequently on a special desk I have for it, but I store my serger (which I use less frequently) in the closet in my sewing room. In Florida, humidity is more problematic than temperature, so I don’t store any of my machines in the garage.
Oil The Machine When Necessary
Modern computerized machines don’t usually need oiling. However, if the manufacturer recommends doing it, oil the machine.
Do NOT oil it if the manufacturer does not explicitly say so because oil attracts dust and may also stain the fabric. If you do add oil, only use a high-quality oil like Hoppe’s No. 9 Lubricating Oil or Liberty Oil.
Make sure you read the instructions before you use oil. Also, after oiling the machine, run a couple of stitches to make sure the oil is spread evenly and doesn’t stain the fabric of your next project.
✅ Related tutorial: Sewing Machine Oil | Top 10 Questions Answered
Thread
It’s extremely important to only use high-quality thread. A thread that frays easily will leave residue inside the machine, especially modern machines that sew at high speeds.
Want to improve your sewing skills?
Get my detailed guide on SEWING MACHINE TENSION ADJUSTMENTS free!
Subscribe to my weekly newsletter with sewing tips and tutorials, free sewing patterns, printable PDFs, and other useful content and you’ll find the eBook in your inbox.
Subscriber exclusive offer.
Don’t miss the free HELPFUL eBook!
Related post: Sewing thread types and uses
Even if the thread doesn’t break (lower quality thread DOES break), do you really want to endanger your $2000 machine by using a $2 thread? Just one trip to the dealer to fix it will cost you enough to buy at least 50 spools of good thread!
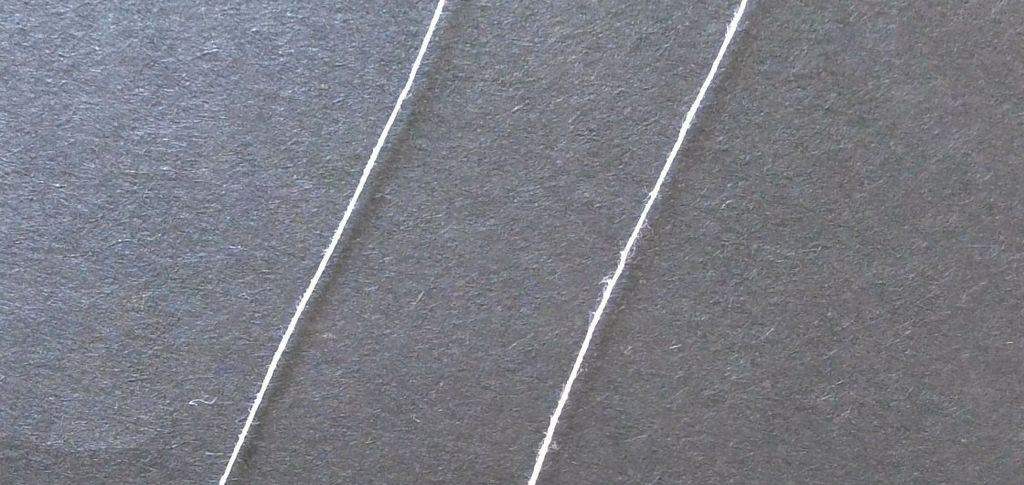
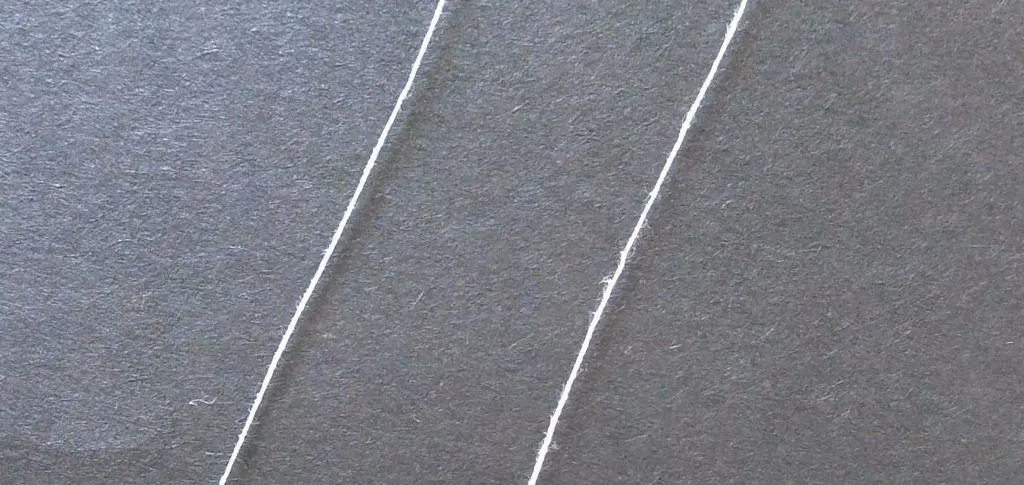
Below is a (magnified) comparison between a good thread (left) and a low-quality thread. You can clearly see the good-quality thread is compact and will shed less, while the low-quality one looks woolly under magnification.
Guess what? All that protruding fibers will come loose inside your machine!
I’m a big fan of Amann threads from the SABA brand. Unfortunately, the only place I have seen Amann thread for sale is a store in New York, which I only visit every couple of years. If you find it for sale in the USA, please let me know!
Other threads I recommend are Mettler Threads, then Gutermann, and Coats & Clark.
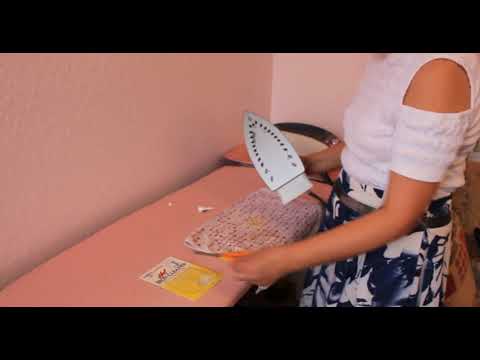
Iron And Ironing Board Care
There is little to do here, right? Wrong! No matter if the iron is a classic version or a modern one that generates steam, it has its own issues and maintenance needs.
✅ Related tutorial: Iron buying guide
The sole (metal plate) of any iron may become dirty with residue. If you touch some stabilizer, a piece of plastic, or even a garment made out of synthetic fibers with a very hot iron, they will leave residue on the metal plate of the iron. When that happens, the iron will need cleaning.
I have found that the Faultless Hot Iron Cleaner works very well. Check out this short video showing how I clean an iron.
Steam-producing irons need to have the holes cleaned out regularly.
If you use regular tap water, minerals that are dissolved in the water will form a whiteish film inside your iron over time. A similar thing happens with your coffee maker (and probably anything that produces steam from tap water).
There is an ongoing discussion about using distilled water in a steam iron. Some say it’s a must, while others say it will cause a leak because it will attack your iron internals more aggressively than tap water due to its higher capacity to dissolve things.
Although I’m not an expert, I use distilled water in my iron because:
- It does not create the residue I mentioned.
- The probability of staining the fabric is lower because it doesn’t have impurities.
I have had my ironing station for five years and use probably 1 gallon of distilled water every month. I say that to highlight that using distilled water probably won’t cost you any more than it would use extra tap water, but it could save you the cost of new iron.
Needles
Always use sharp, high-quality needles. A bad needle may bend or break, which is, best case scenario, an annoyance.
Needles will become blunt over time, even if they are of excellent quality. After a while, you’ll notice:
- Stitches may become irregular
- Fabric may pucker
- The needle may leave bigger holes in the fabric
- Your machine may start making a different sound than before
If you have a feeling the needle is getting old and dull, it probably is. Go ahead and save yourself some hassle by changing it.
Related post: The Ultimate Guide to Stretch Sewing Machine Needles
Always use needles of the proper size for the project and fabric.
Embroidery Hoops
Hoops are a very important part of your embroidery set up, so they must be stored in such a way to avoid warping or bending.
Storage isn’t usually a problem for small hoops, but large hoops can be a challenge. I use both magnetic and standard hoops up to size 9 ½”x14” (24x36cm). I find that hanging them on the wall is both easy to do and space-efficient.
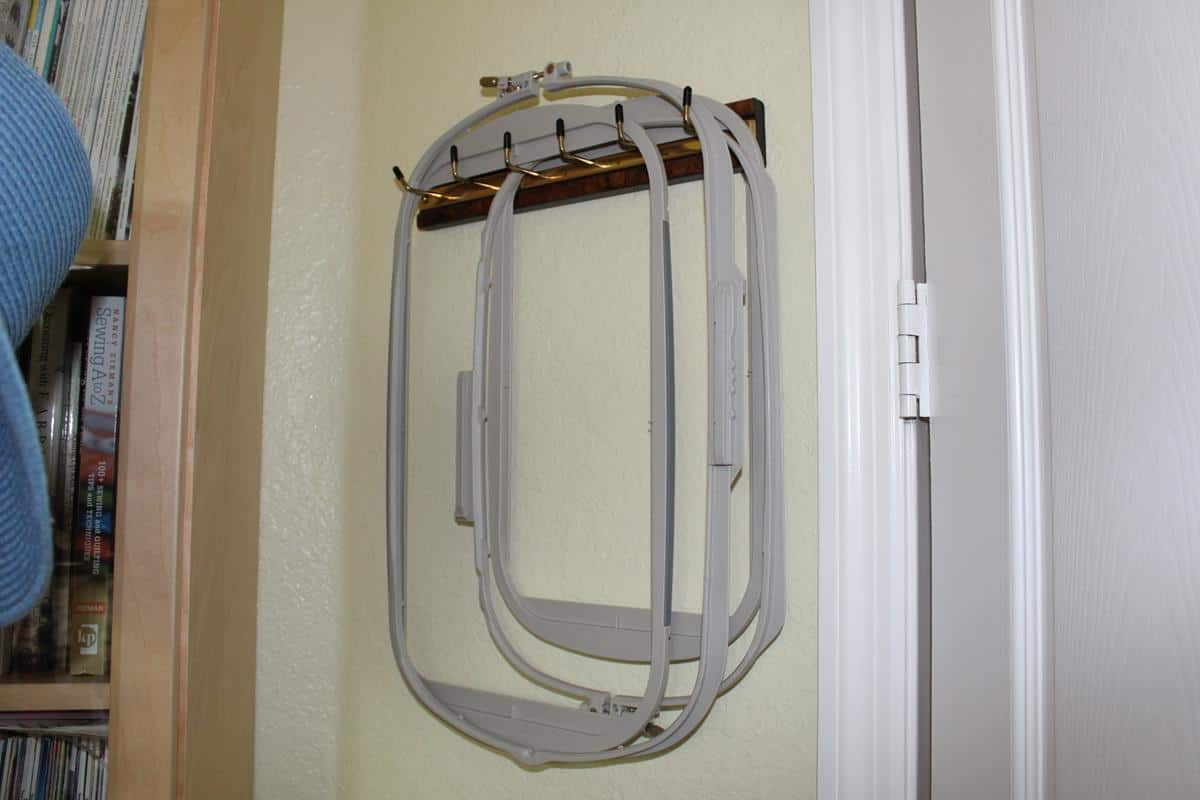
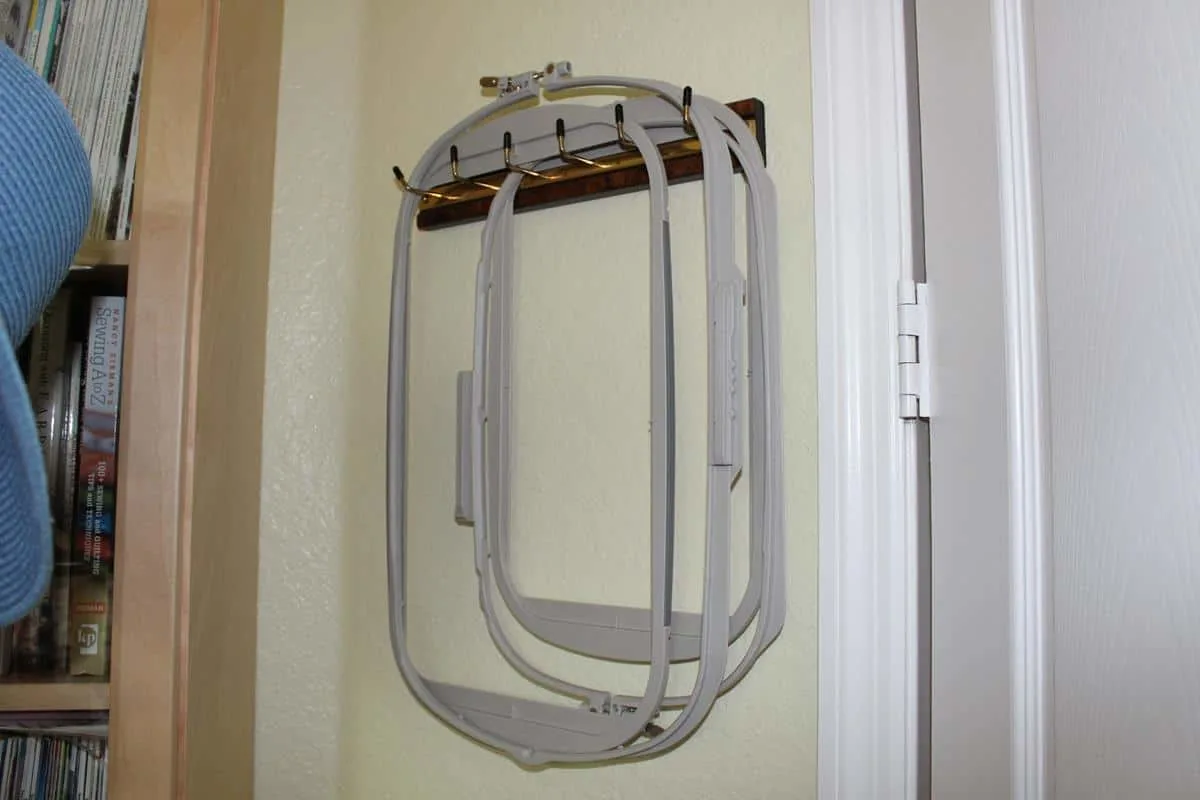
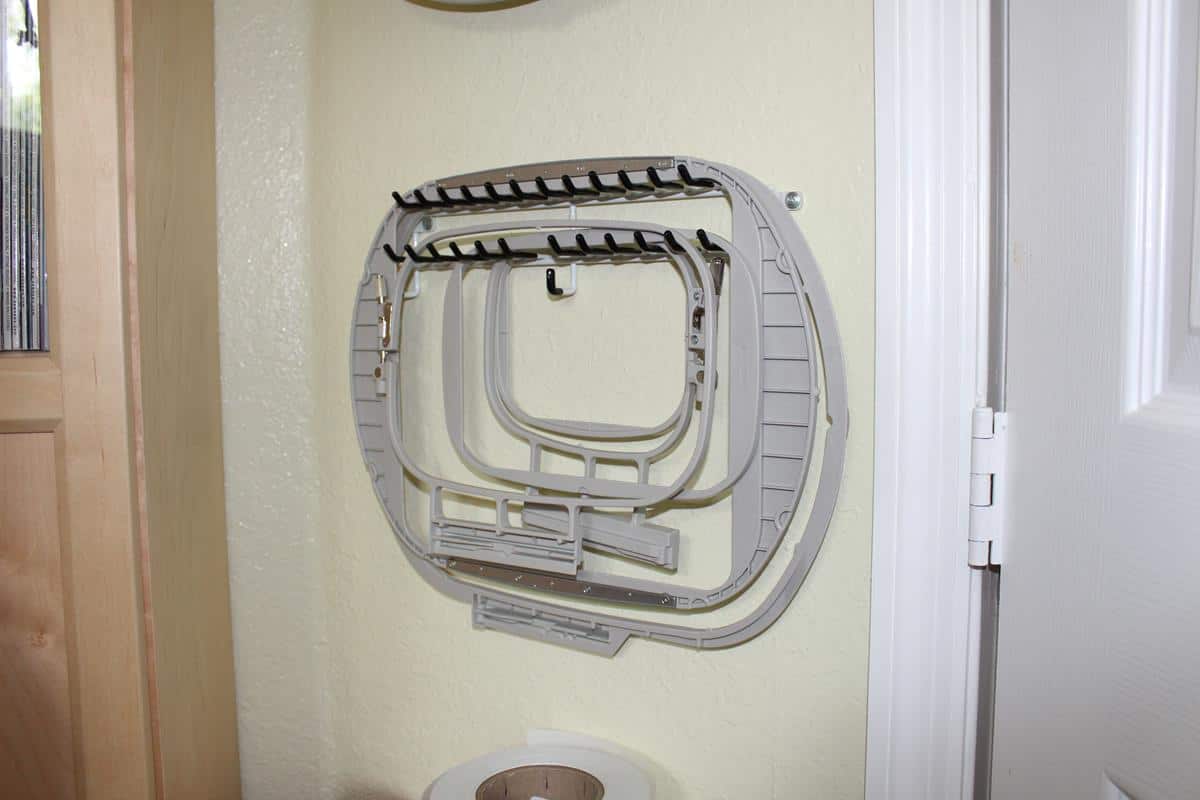
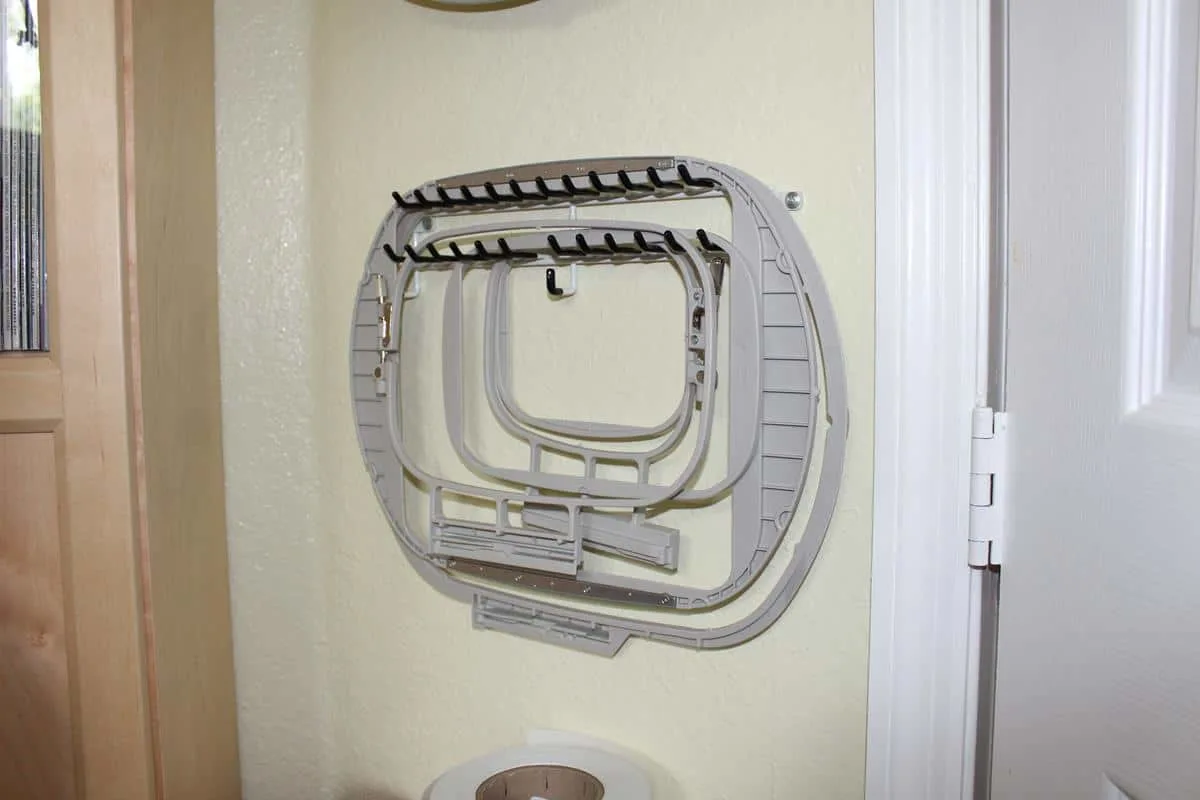
If you are seriously into embroidery, especially if you create in-the-hoop projects, I can’t recommend the magnetic hoop enough. It’s quite expensive, but I found that the ease of use and convenience make up for the price, if you can afford it.
✅ Related tutorial: Brother Luminaire tutorials: How to applique with an embroidery machine
Scissors
Scissors are a tool that, according to Wikipedia, are at least 3000 years old. They may seem like they’re so basic that they don’t need a mention in an article about the care of sewing tools and materials. However, this essential tool in your sewing toolbox needs a little maintenance too!
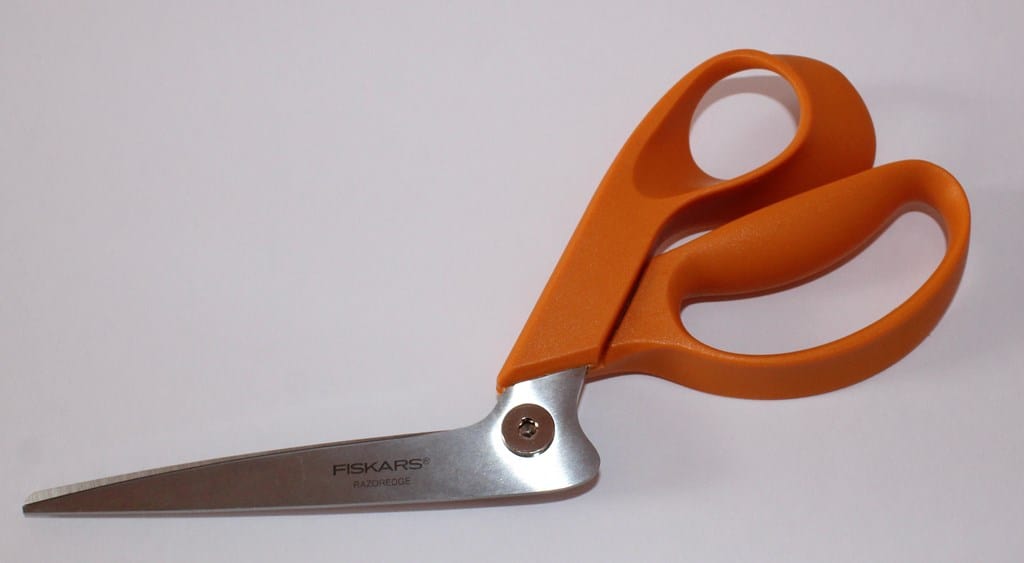
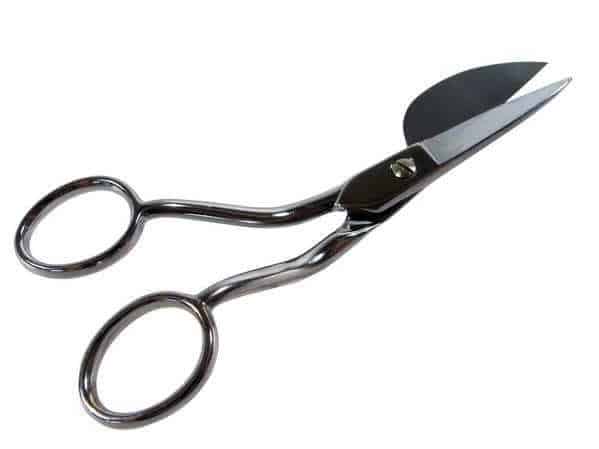
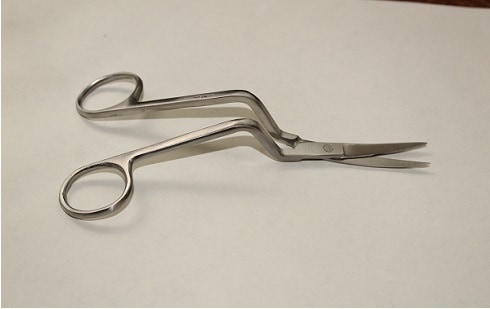
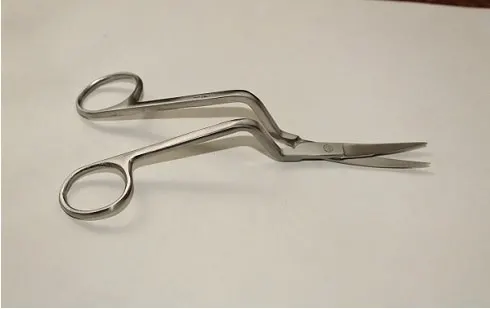
Buy good quality scissors. They will not be cheap, but they won’t cost an arm and a leg either. Personally, I like (and use) Fiskars scissors, but there are many quality brands available. Note: you will need many sizes, from small to large, as well as some specialized scissors, like the example below.
Keeping Your Scissors Sharp For Precise Cutting
- Avoid getting your scissors wet. The fine cutting edge of the scissors is easily affected by rust, so don’t even let them get moist, if possible. One mistake I made (and learned from) was laying scissors on the damp ironing board. Two days later, I discovered that they were affected by the moisture.
- ONLY cut fabric or thread with your sewing scissors. Do you need to cut paper, like a pattern, for example? Get a cheap pair of scissors for that – don’t use your sewing scissors. Also, be especially careful to avoid pins and zippers when cutting. A pin will very likely damage the scissors’ edge, which can then damage anything you cut with them going forward.
- Avoid hitting or dropping the scissors, as they can be damaged.
- Never lend your scissors to anyone. They might not realize how precious they are to you! I had a tough time teaching my husband never to borrow my scissors. (To be fair, they are almost always in plain view in my sewing tool basket). In the end, I started keeping a pair of cheap scissors around, which I do not use, but since they’re readily available, they are his first target when he needs a pair of scissors.
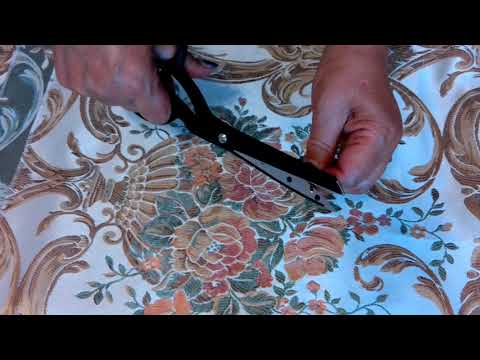
Tips For Sharpening Your Scissors
I have learned a neat trick for sharpening the scissors: use an old sewing machine needle. The video below shows how to do this. Do not expect stellar results because a very blunt pair of scissors will need much more than this. However, a pair of scissors that have just begun to lose its edge might be revived this way – and it’s free!
Note: please make sure you don’t cut yourself here. The scissors may not be sharp enough to cut cloth, but a human hand is no match for even the bluntest knife!
There are many other methods and devices that can be used to sharpen scissors. There are also plenty of professional sharpening services that can sharpen all kinds of objects.
Storing And Organizing Small Accessories
The maintenance necessary for small tools is probably minimal. For example, when a needle is no longer sharp, or a tape measure has faded markings (or is frayed), you will probably just discard it.
I think the best advice for storing small tools is that organized compartments can be effectively used to keep some small sewing tools when not in use. They keep your small items safe and easy to find.

I also have a basket where I keep the smaller things I use regularly. If you were to take a look in there on any given day, you would likely find:
- Scissors
- Seam ripper
- One or two measuring tapes
- Case for bobbins
- Pincushions
- Marking pens
- And more
Related post: Sewing room ideas for small spaces
I have a huge collection of threads in a variety of sizes, from small cones and bobbins to large cones. They need to stay somewhere away from humidity, dust, and light. But they also need to be visible and accessible without moving heaven and earth to reach them.
I currently keep them in various drawers, as you can see in the images below.
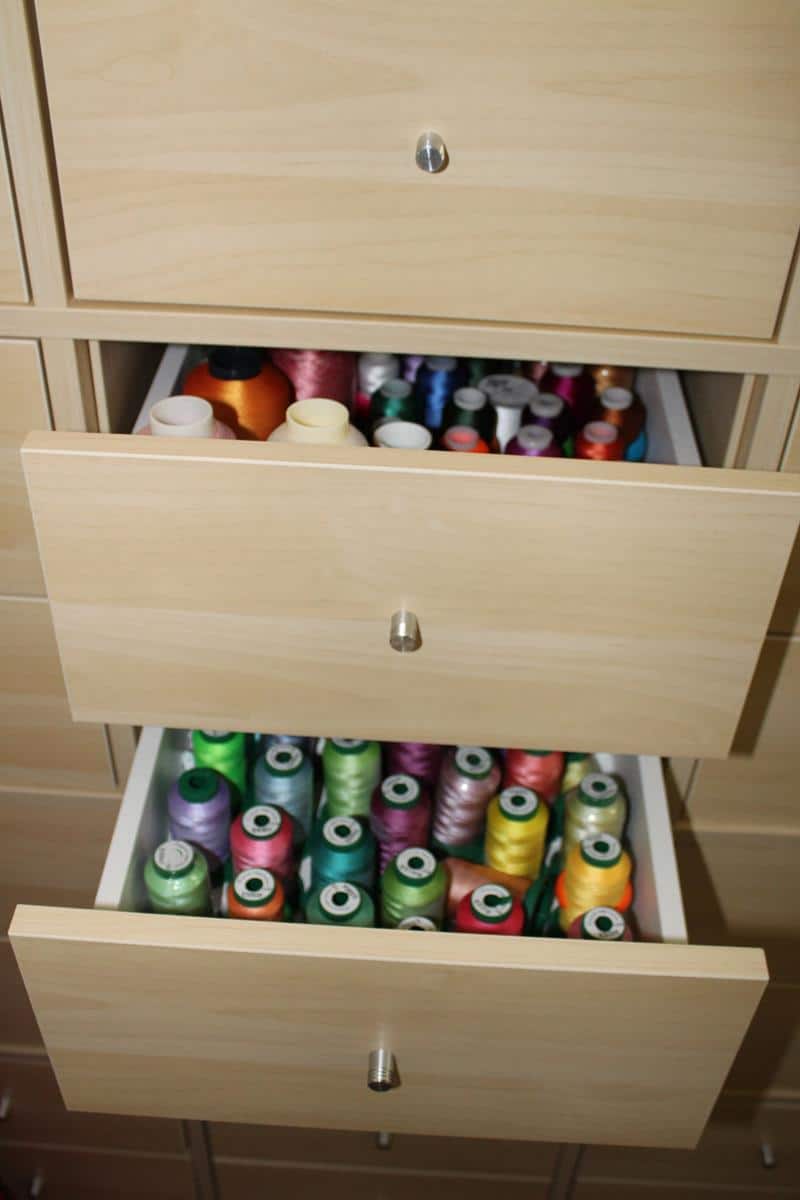
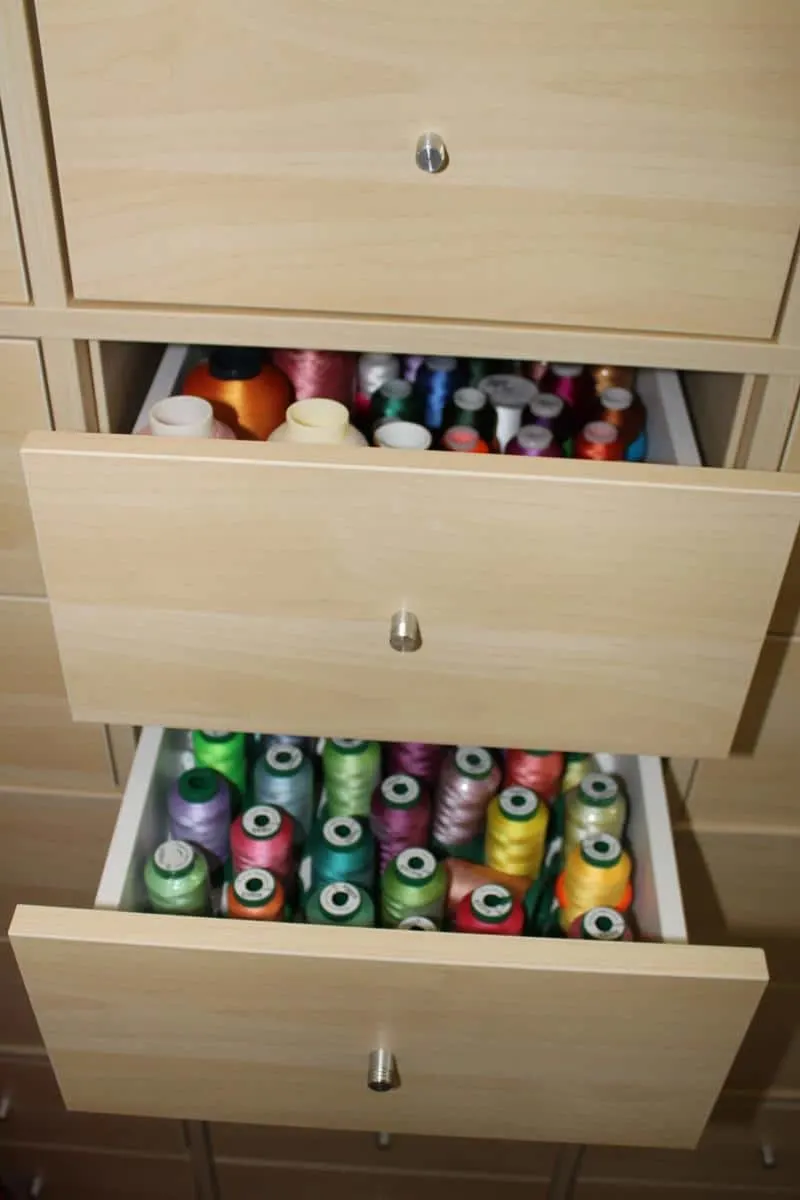
I used to keep them in flat boxes with transparent covers. The problem was that the boxes needed to be stacked, so only the topmost one was readily accessible. After some problem-solving and experimenting, I recommend using drawers.
Check out my post, Ikea sewing room hacks, which shows how I organized a sewing room without breaking the bank if you want more info.
Storing Pins And Needles
Use one or more pincushions as a tool to keep pins and needles in place. I keep the new ones in their original container – I highly recommend not taking them out before you need to use them.
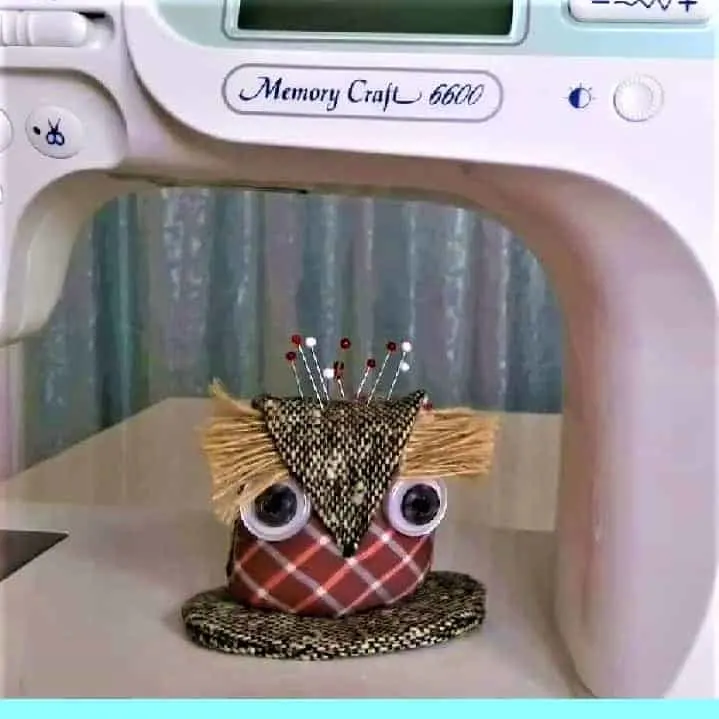
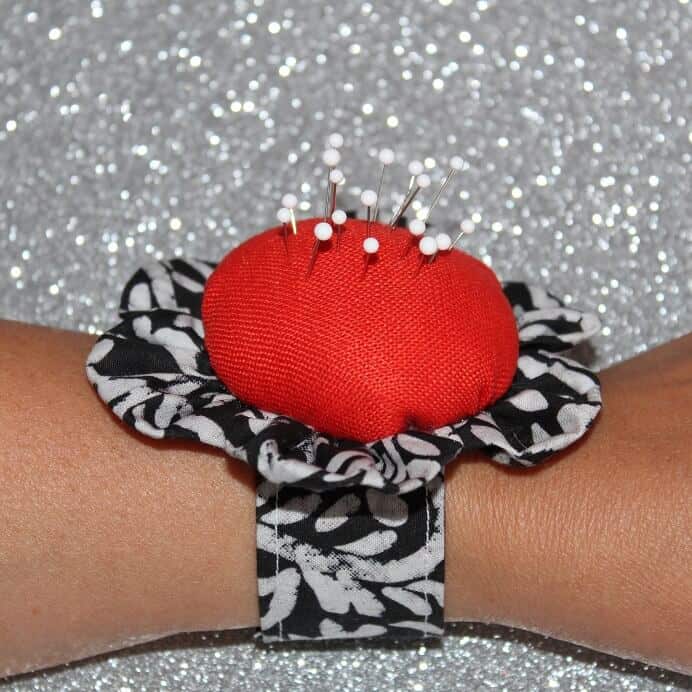
Since I consider the pincushion an essential tool, I wrote some articles about this. You can never have enough pincushions, and it doesn’t hurt to make them beautiful! Check out how to make a wrist pincushion and how to make an owl pincushion to learn more.

✅ Related tutorial: Types of sewing pins and their uses: all you need to know about straight pins for sewing
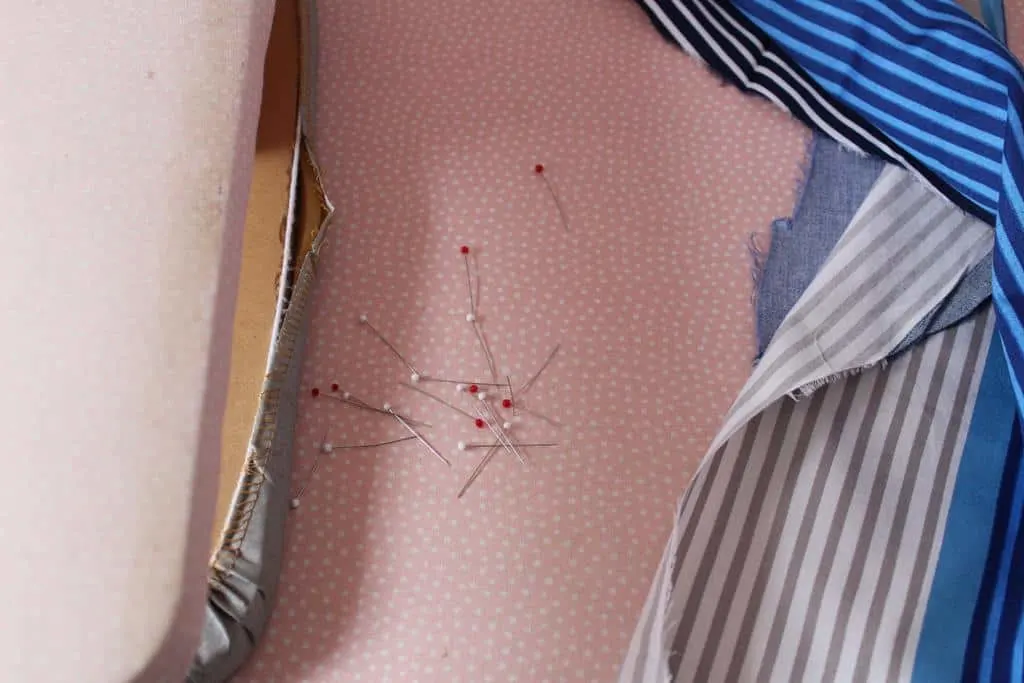
Here is an example of how pins and needles should NOT be stored!

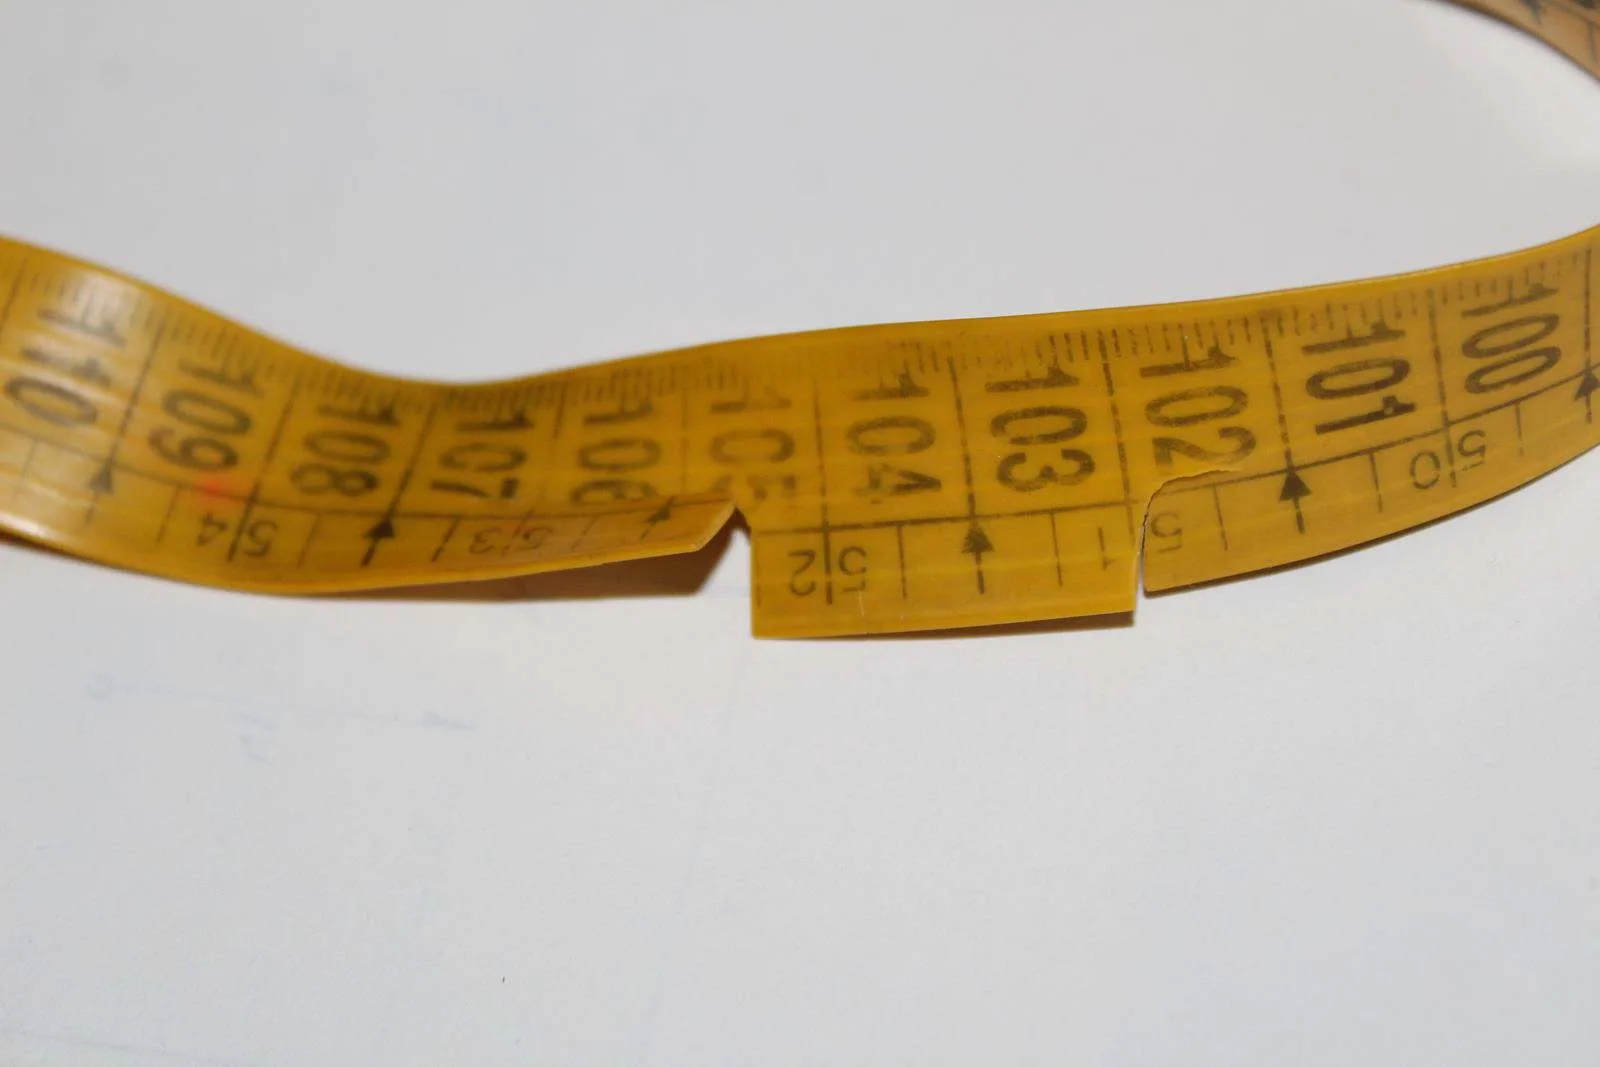
Keep your measuring tapes rolled up to avoid getting them tangled. This practice will also prevent accidentally cutting them. I dare you to tell me you have never cut a measuring tape! Finally, keeping a measuring tape rolled up will also prevent the tape from fading or getting dirty.
In the images below, you can see what happened to one of my older tapes – cuts, fading, and dirt are all there!

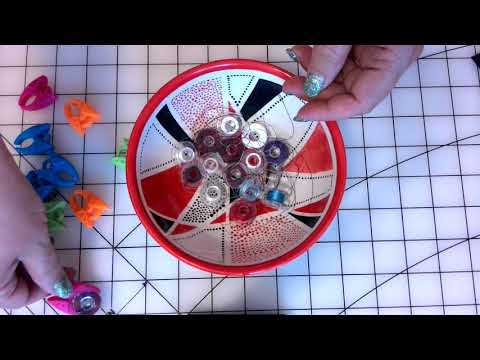
Bobbins
As a sewist, you typically have a large number of bobbins with threads of different colors. So, a bobbin case or holder is a must-have. If you don’t already have several of them, I highly suggest investing in one – it’s cheap and really useful!
However, I recently bought bobbin holder clamps that I am showing in the video clip below. They are amazing! Now I can easily prevent bobbin threads from unwinding & tangling with each other.
Care Of Sewing Tools And Equipment FAQs
Here are some questions that I see readers frequently ask about how to care for their sewing machine and other sewing tools.
How often should a sewing machine be serviced?
It depends on how much sewing you do and the kind of fabric and thread you use.
Regular (non-professional) cleaning should be performed after every sewing session. I recommend professional dealer maintenance once a year if you use the machine frequently. And if you notice changes in how the machine sounds or behaves, schedule an appointment with a professional immediately.
How often should I oil my sewing machine?
Oil it according to the manufacturer’s specifications and only if the manufacturer suggests doing it. Consult the “maintenance” section in the machine manual.
Obviously, if you hear a squeak or a noise that’s out of place, that would be a good indication it may need oil. If the manufacturer doesn’t require the user to oil the machine, don’t do it yourself. Take it to the dealer instead.
How much does it cost to service a sewing machine?
It depends on several factors, including:
- The type of machine
- Whether you bought it at the place where it’s serviced
- The exact location where you are
- Age of the machine
In the USA, you can expect to pay anywhere between $75 and $125, if the machine doesn’t need any actual repair. Try to ask for free service – a good dealer may offer it (or discounts at least) because they want to entice you to come back.
Why should you keep a sewing machine cover?
Yes! The cover does several things to extend the life of your sewing machine. It:
- Prevents dust from entering the machine
- Protects the plastic panels so they don’t turn yellow from the sun
- Prevents damage to the machine from accidental hits
- Protects you from getting your hand scratched by the sharp parts of the machine
Besides, a nice cover can be a pretty addition if you store the machine in plain view.
How do I know if the sewing machine needle is dull?
There are several giveaways that a needle has dulled. A dull needle will:
- Make larger holes in the material
- Cause unequal stitches where the thread is not pulled tight all over
- Potentially cause bunching of the thread
- Sound differently than a sharp needle (ex: it will make a small sharp sound when penetrating the material)
How often should you change the needle on your sewing machine?
Personally, I always start a new project with a new needle. Then I generally don’t need to change the needle until the end of the project.
If you are looking for a number to guide you, I would estimate that a needle will last about 8 hours of continuous sewing. That’s just a general number, though.
The correct answer is that it depends on the amount of sewing, the type of material, the machine, and the pattern. Some machines are slower, and some are faster, so the same amount of time sewing on two machines may mean different things.
Change the needle when you feel the machine working differently than in the beginning or when you have the impression that the needle is dull.
What should you use to clean a sewing machine?
Use a brush (usually it comes with the machine) to clean the bobbin case frequently. Use a vacuum cleaner to remove the dust and fuzz that accumulates. Don’t ever use water or wet napkins.
I hope this guide on the care of sewing tools and equipment helps you treat your sewing machine and other items with the proper care to extend their life as long as possible!
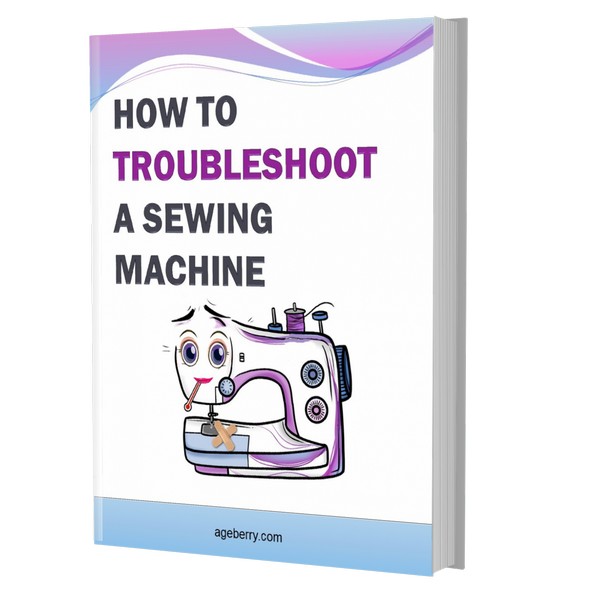
Is your sewing machine acting up? I created the ultimate troubleshooting guide to help you out and compiled a detailed list of solutions to common sewing machine problems. Many of these problems can be solved with some basic troubleshooting or maintenance. Is your thread getting tangled or breaking? I’ll walk you through the steps to fix it. Are you struggling with tension settings, broken needles, or jammed threads? I have tips for that too. Don’t let sewing mishaps get in the way of your creative flow. Check my guide and show your sewing machine who is the boss – Troubleshooting Common Sewing Machine Problems (+ Solutions)
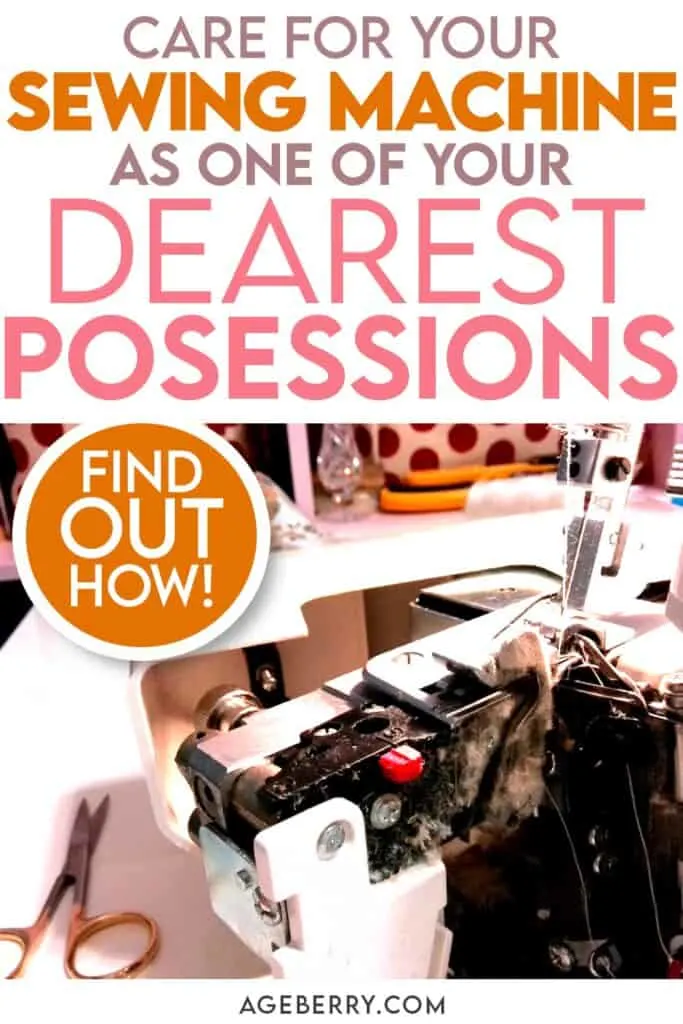
Did you find this tutorial helpful? If so, save this pin (see below) on your sewing board so you can come to this tutorial later when you need it, and follow me on Pinterest for more tips, tutorials, and inspiration!
Useful Info – Sewing Machine Troubleshooting
If you own a sewing machine long enough, you’re going to have to figure out how to troubleshoot your sewing machine at some point or another. While some sewing machine problems are preventable, others are inevitable. Learn how to troubleshoot your sewing machine with my printable PDF eBook. Whether you use a traditional sewing machine or a modern computerized one, work through this ebook before thinking about a replacement or going to a service center.

latest posts
- Think You Know Zippers? This Installation Guide Might Surprise You
- Why Does Your Seam Ripper Have a Red Ball? Discover Its Purpose!
- Topstitching Troubles? This Simple Trick Will Turn It Around Instantly!
- How to Sew Shirring: A Step-by-Step Guide to Elastic Thread Gathering
- Are Self-Threading Needles Really Useful?
- Amazon Spring Sale: Best Choices
- Elevate Your Prom Look: A Guide to 10 Neckline Choices (2024)
- No Pattern, No Problem: Turn Scraps into a Quilting Masterpiece
- Prom Perfection: A Guide to Choosing the Perfect Dress Color (2024)
