
In this tutorial, I will show you how to use a blind hem foot and sew a blind hem stitch with a home sewing machine. A blind hem means an invisible hem.
Is there a quick and easy way to make a professionally looking invisible hem on the clothes you sew? Of course, there is – special “blind stitch” presser feet have been developed. There are a few types of them as you can see in the image below.

Note: Some of the links on this page are affiliate links. This means I will receive a commission if you order a product through one of my links. I only recommend products I believe in and use myself.
These presser feet allow you to make almost invisible hems: they create barely noticeable tiny stitches on the front of the item that cover only a few threads from the fabric structure.
There were times when the invisible hem could only be done by hand. But this is currently not the case. A special foot allows you to make an invisible hem with many types of fabric. And if you use an invisible thread as the upper thread, then the blind hem will be even more difficult to detect.
This kind of hem finishing is suitable for straight hems mostly and also for only slightly flared hems. If you would like to learn how to sew a curved hem check out my tutorial on sewing round hems.
Let me show you how to use these blind stitch presser feet.
I have to warn you that this would not work well immediately without practice so make a test sample first on scrap fabric.
For this, we’ll need
- Blind stitch presser foot
- Marker (pencil or chalk)
- Ruler
- Thread
- Pins
- Iron
First, I will show you how to hem woven medium-weight fabric (that is good for skirts, pants, and dresses) and stable medium-weight knits (that are not very stretchy). And after that, I will explain how to hem heavyweight fabric (like coat fabric for example).
This method doesn’t work for very lightweight fabric (like silk chiffon for example), if you need to hem lightweight fabric check out this tutorial “Narrow hem tutorial: how to make a narrow hem using Ban Roll”
It doesn’t work for very stretchy fabric also.
The quality of the blind stitch largely depends on the properties of a particular fabric: the thicker the fabric, the easier it is to sew a blind stitch.
Also, use strong good-quality threads so you’ll never have a hem come out because of a broken thread.
STEP 1. Mark the fabric for sewing the blind hem
The first step is to mark the area of the hem. Use chalk to mark the fabric. I am going to use a disappearing ink pen for you to see better but I don’t recommend ironing over these pen marks because the iron can set them permanently.
The main thing is to fold the fabric for stitching properly, and from the beginning, it seems like a puzzle. So read carefully and check the images.
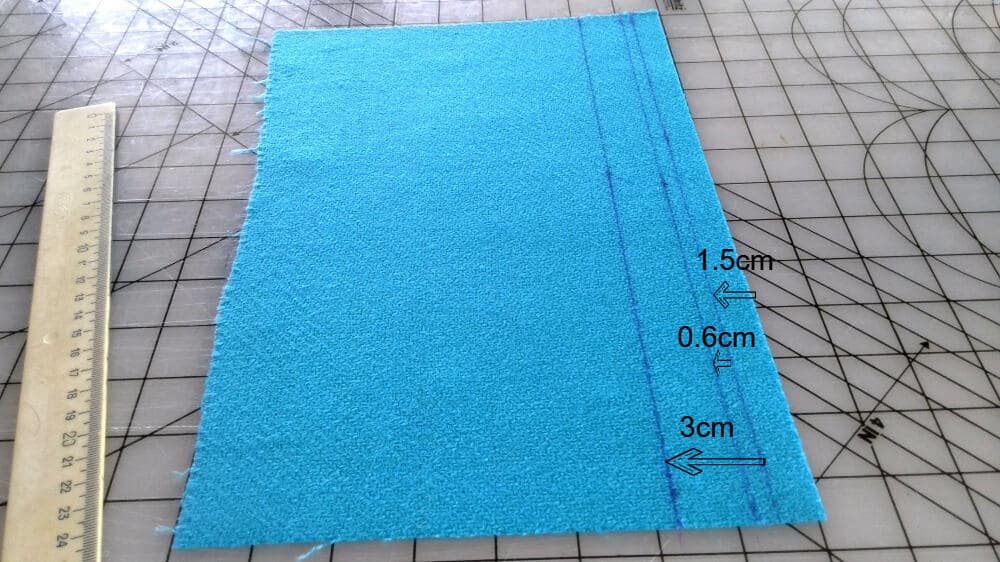
Measure 1.5 cm (⅝ in) from the edge and draw a line.
Draw 2 more lines: one is above the first at the distance of 6 mm (¼ in) and the other is above the first 3 cm (about 1 1/4 in). This last line indicates the desired edge of the hem (where your hem will end when sewn).

STEP 2. Fold the fabric preparing it for blindstitching
Fold the fabric along the first line and press (we need to smooth the fold with an iron).
Fold the fabric along the upper line and pin the fold (but don’t press with an iron yet).

STEP 3. Baste the hem
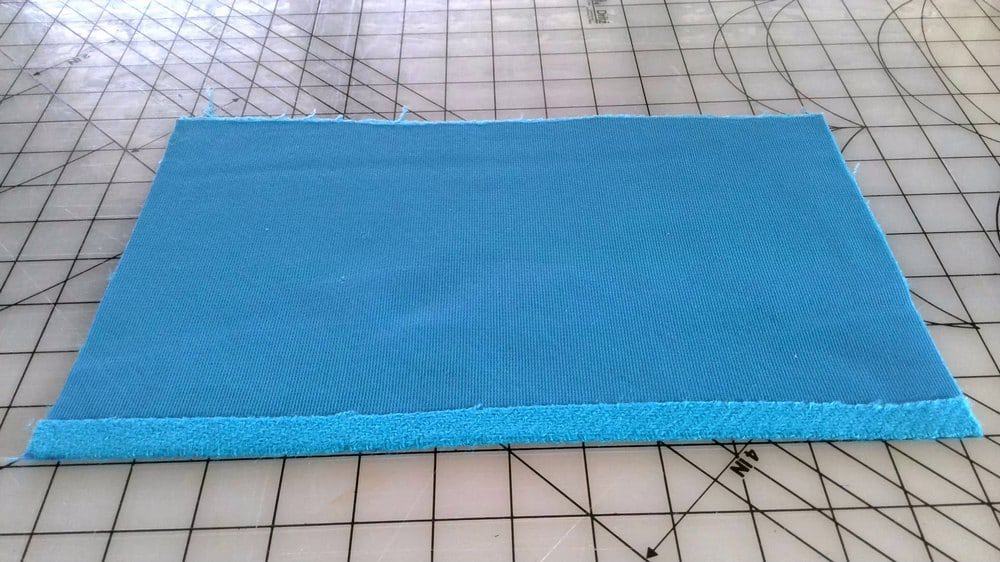
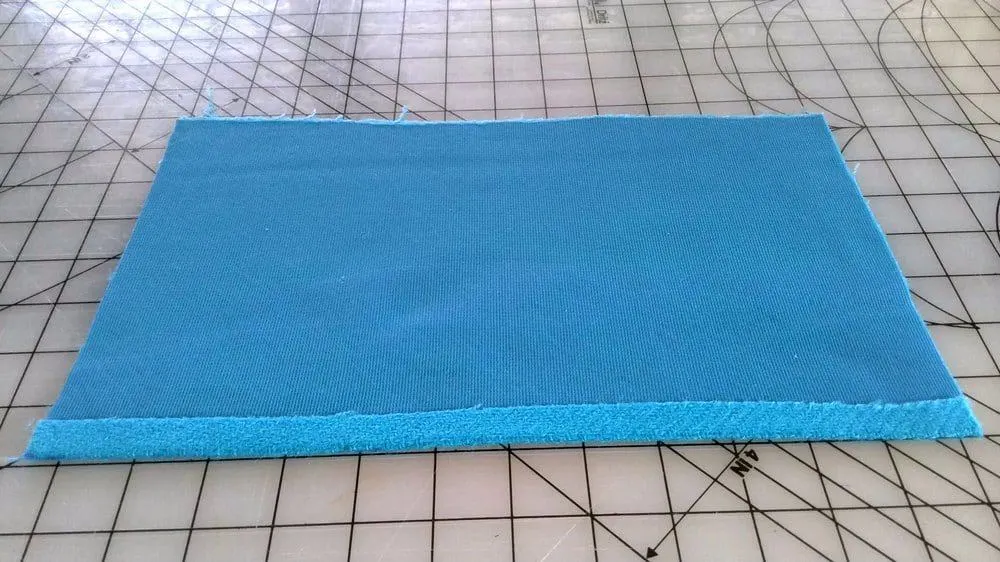
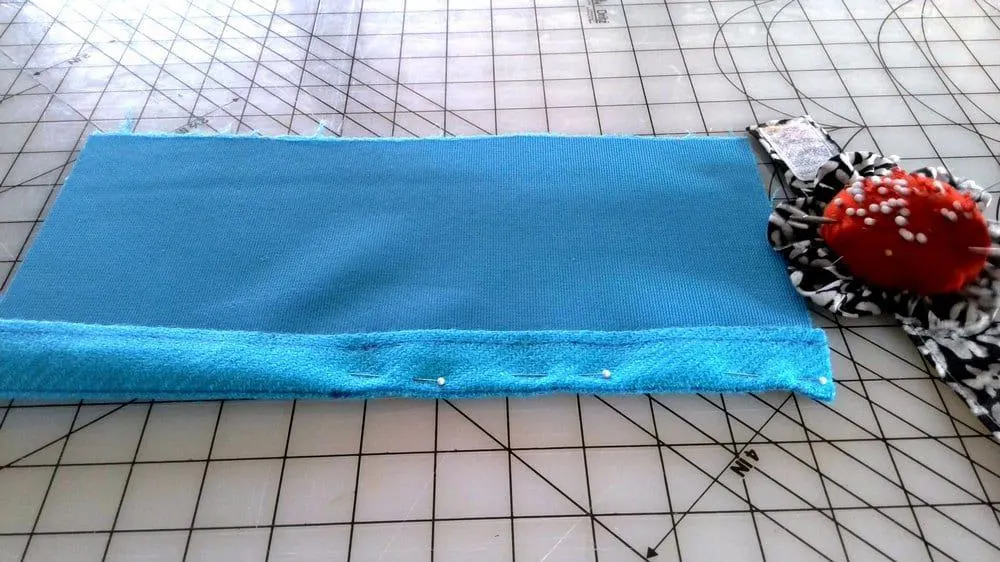
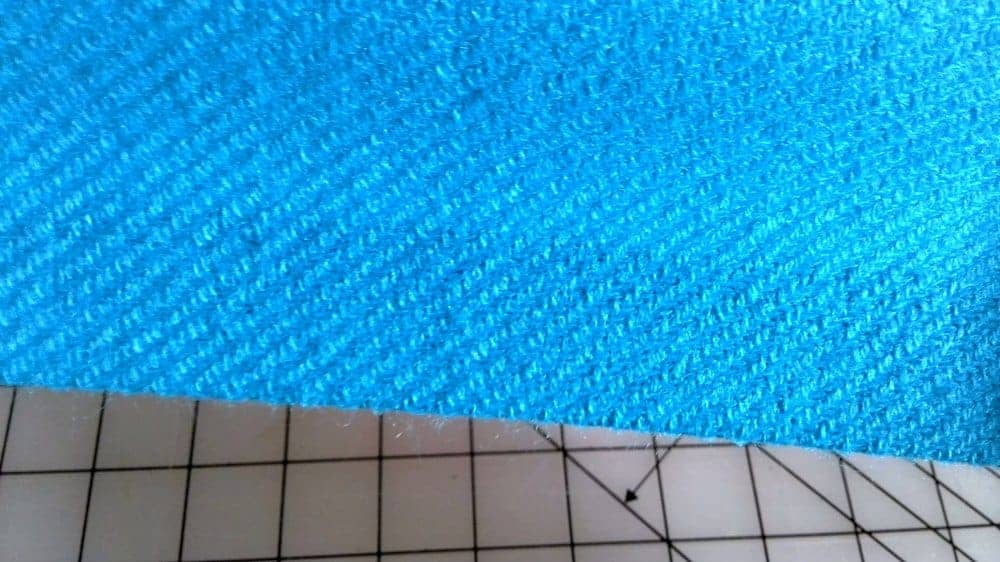
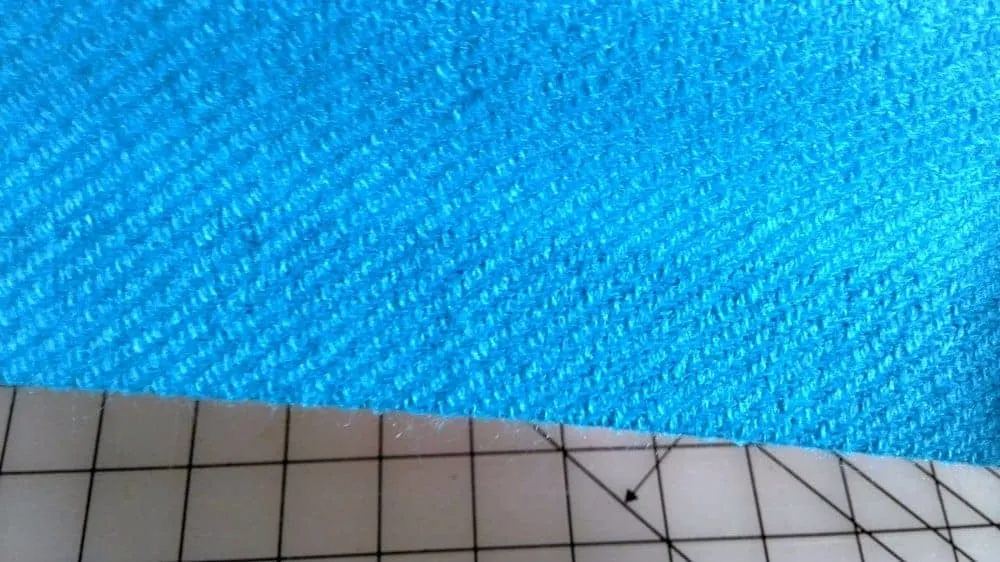
Baste the fabric along the middle line and fold the fabric along the basting (it works as a guideline) so the wrong side is facing up as you see in the video below. You can see that the hem’s edge is sticking out.


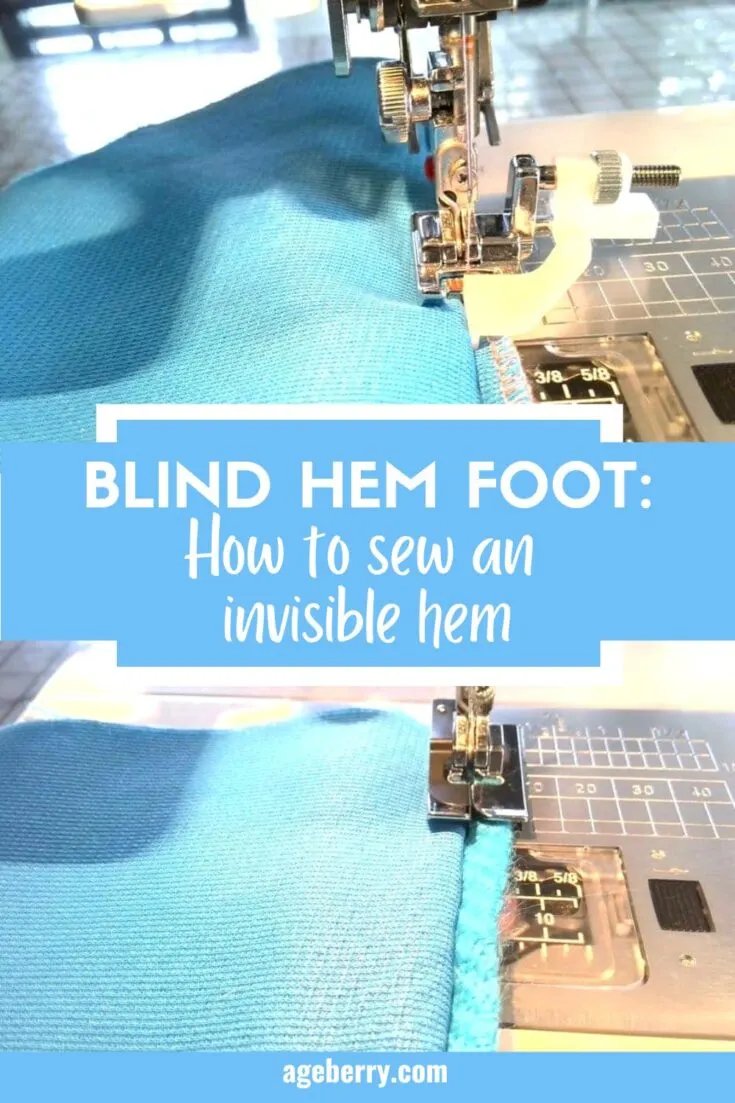
STEP 4 Insert a blind hem foot and make the blind stitch
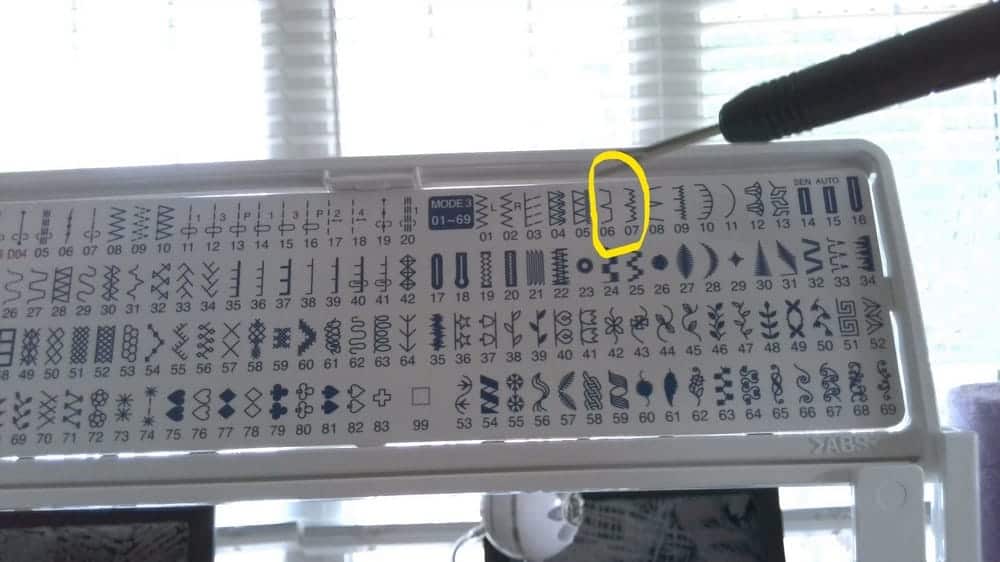
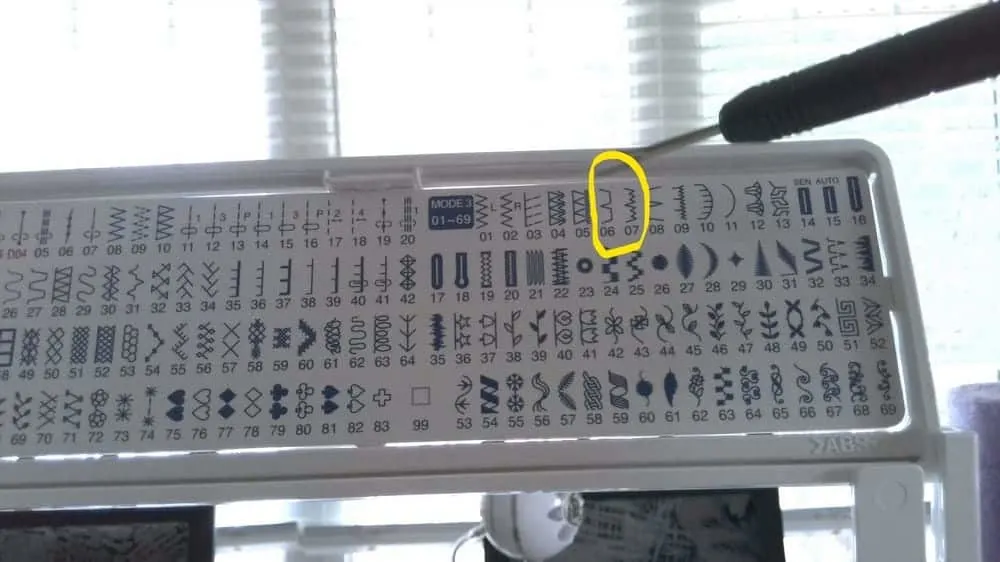
Insert a blind stitch foot and set a blind hem stitch. They are only 2 types of stitches for the blind hem: one is with straight stitches (for woven fabric) and the other is with zigzag stitches (for stable knits). You can see that the blind stitch is a combination of straight/small zigzag stitches alternating with a wide zigzag stitch every 4 stitches.
If you would like to buy this Blind Stitch presser foot check out this link.
Place the prepared fabric with the edge of the folded hem against the guide of the foot and lower the foot. The vertical guide of the foot should go straight along the fold. Adjust the stitch width if necessary so the needle in the most left position slightly catches the fold of the hem.

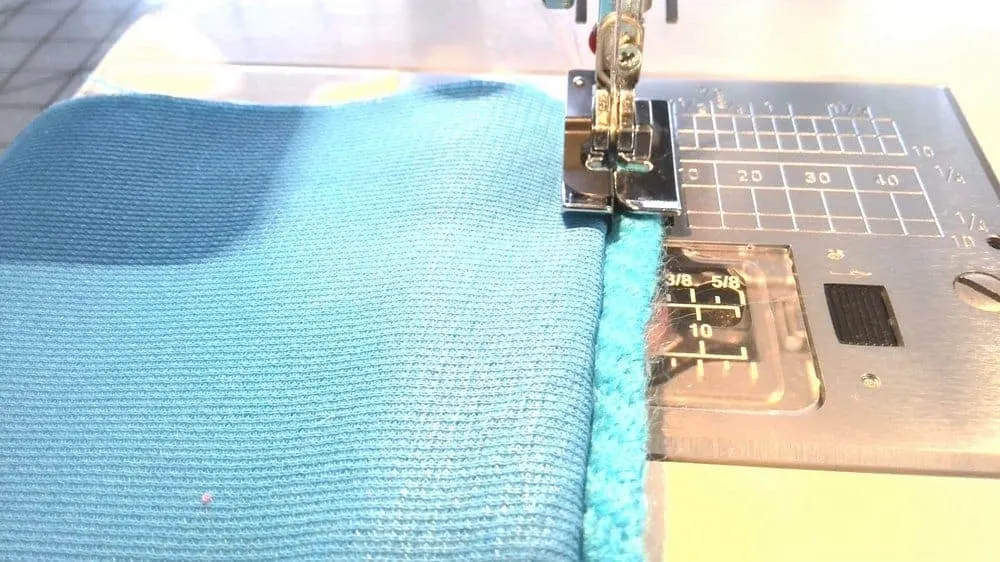
Sew slowly, making sure that the fold fits evenly against the presser foot guide.
Straight stitches should run along the edge of the hem, and when the needle is moving to the left, the needle should grab literally one thread at the fold of the fabric for the hem to look nice.
STEP 5 Finish the blind hem
Remove the basting stitches and press the hem.
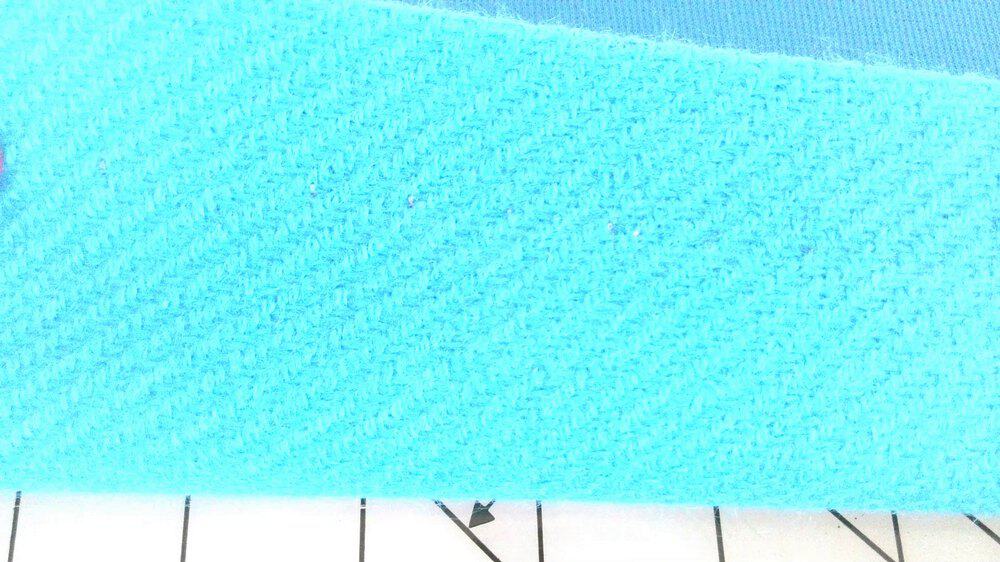
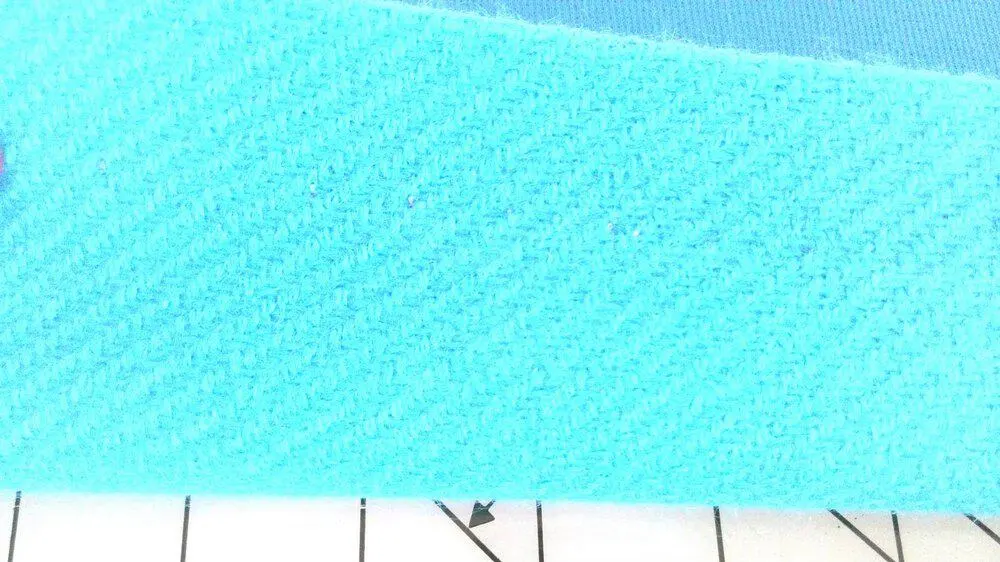
Ok, here is the result. As you can see, the stitching line on the front is completely invisible, even if I tried to use thread in contrasting colors. This hem finish is very durable and I doubt it would ever come undone if you used good-quality threads.


Blind hem foot troubleshooting
Practice on scrap (but it should be the same fabric as your project for which you want to make an invisible hem).
If the stitches are visible on the front side – the needle didn’t catch one thread of fabric, but much more because the needle went too far to the left. Reposition the fabric or decrease the stitch width so the needle doesn’t go too much to the left.
If the hem is not fixed at all, the needle in the left position didn’t go to the fabric at all. Try to hold the fabric fold right next to the presser foot guide or increase the stitch width so the needle goes to the left more.
In order for the stitching threads to be invisible, it’s necessary to sew the stitches with thin threads matching color with the color of the fabric.
Sometimes it may happen that your machine skipped a few stitches. In this case, you will have to rip the stitches and make the seam again.
Press the resulting invisible hem with a steam iron, because often a small crease may form at the right side of the item.
If you prefer to watch the tutorial GO TO MY YOUTUBE CHANNEL TO SEE THE VIDEO
How to blind hem thick fabric
Now let me show you how to blind hem thick fabric (like coat fabric for example). But I am going to use the same sample fabric because for medium-weight fabric both methods are good.
I am going to use a different type of blind stitch foot. This one:
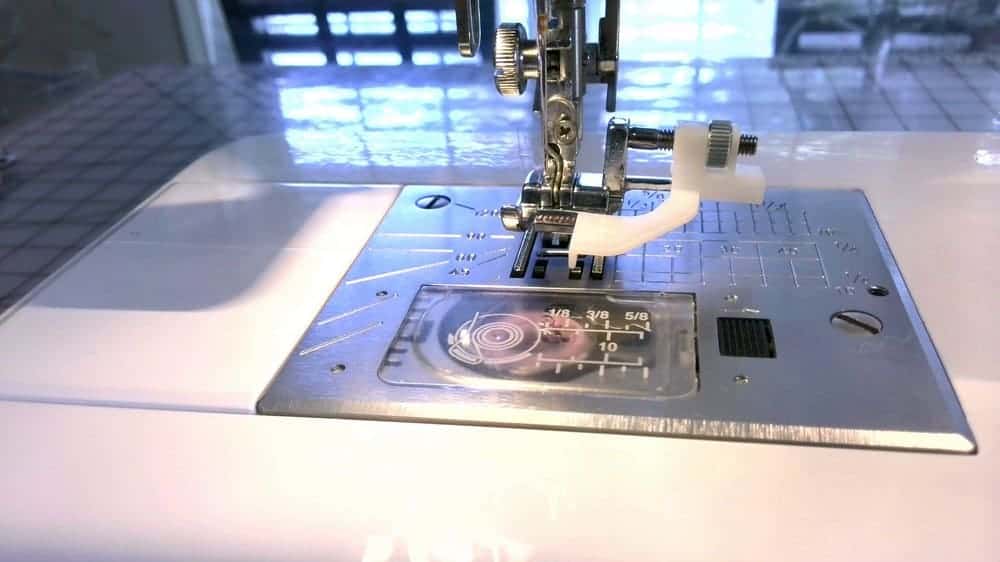

I like to use this presser foot for SEWING STRAIGHT LINES, but it’s essentially a blind stitch foot used to make invisible hems.
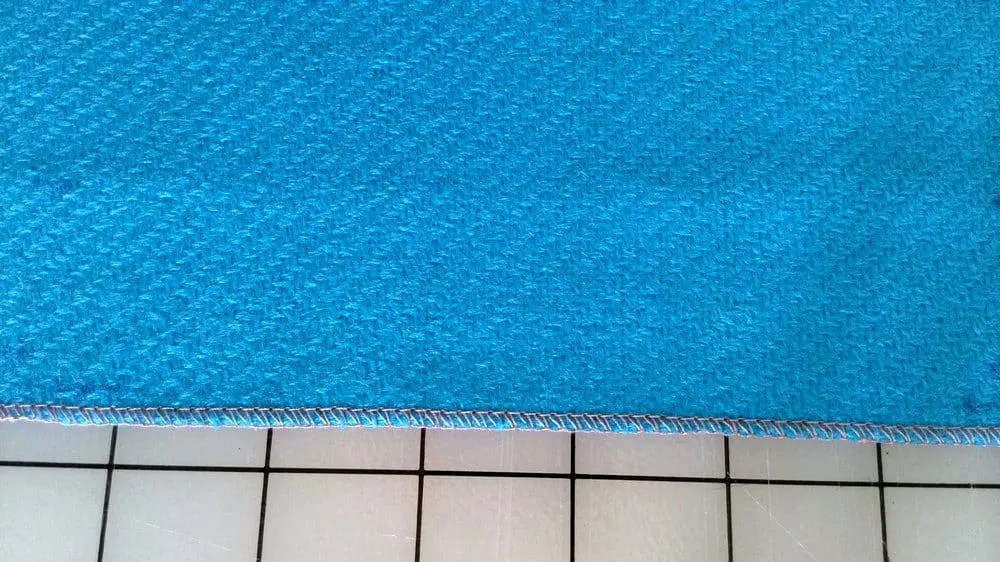
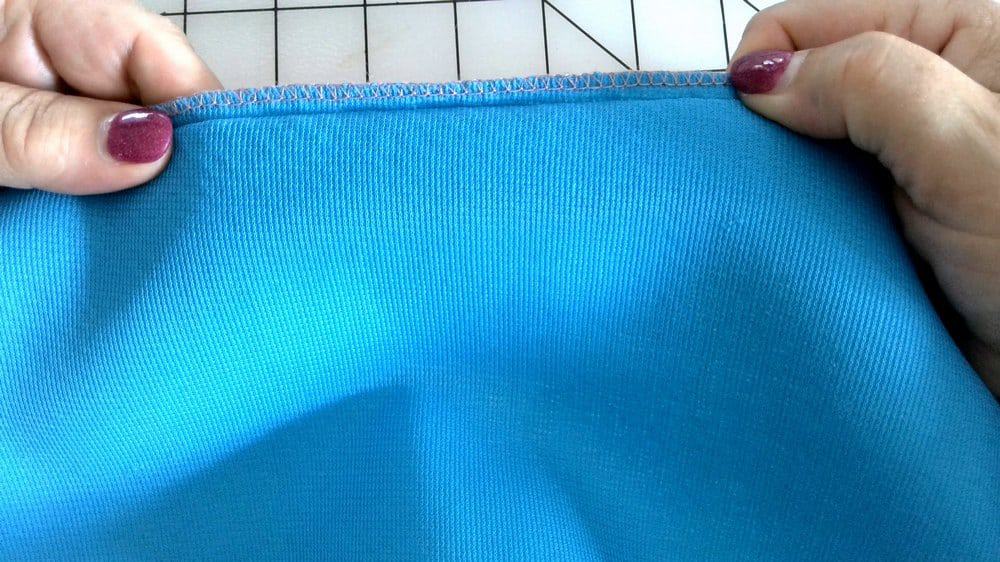
1) The first step is to finish the raw edge of the hem with a serger. Or you can do it with special stitches and presser feet on a regular sewing machine (if you don’t have a serger check out my tutorial on overcasting stitches with a home sewing machine).
Related post: Serger vs. sewing machine

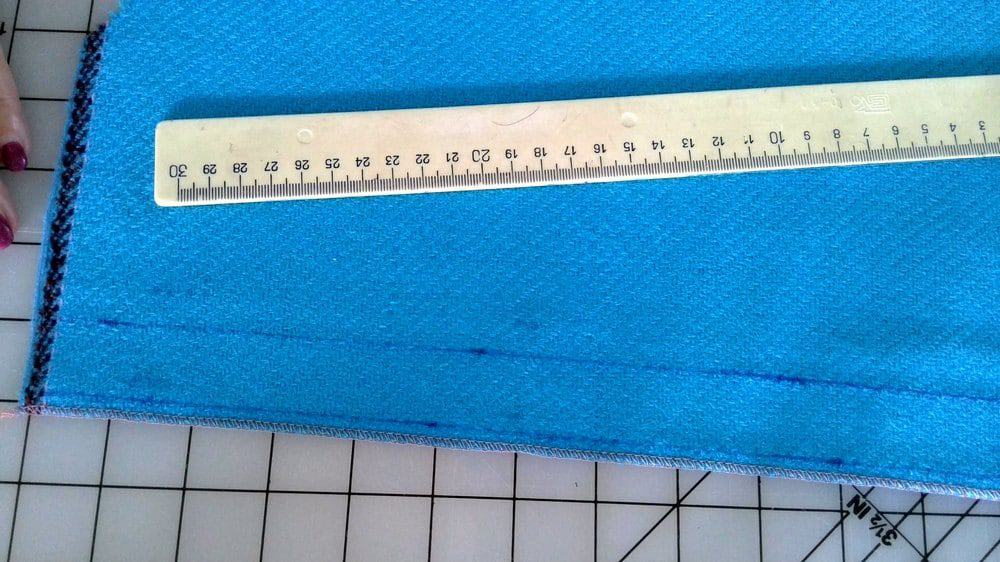
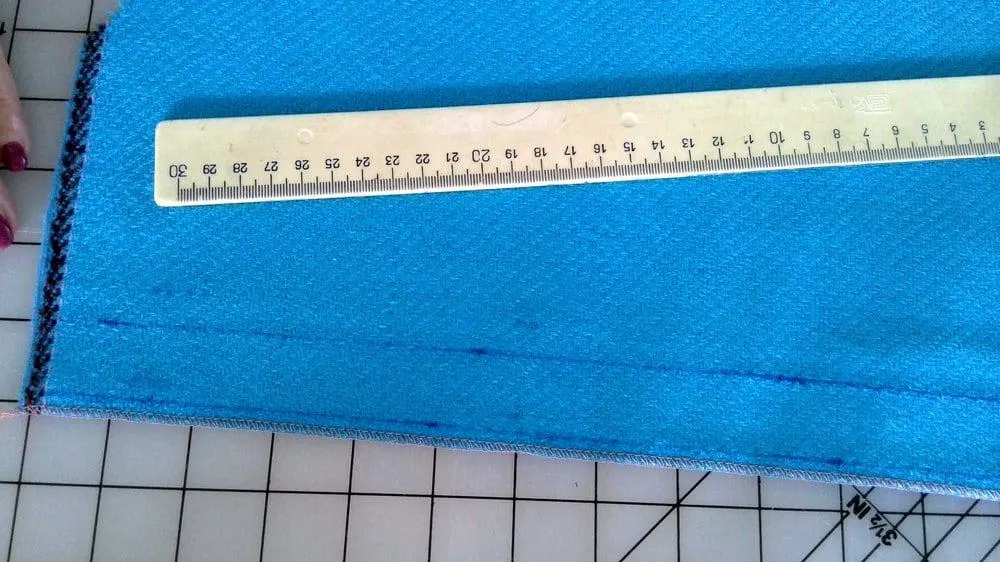
2) The next step is to mark the area of the hem. Use chalk to mark the fabric. I am going to use a disappearing ink pen for you to see better but I don’t recommend ironing over these pen marks because the iron can set them permanently.
Measure 6 mm (¼ in) from the finished fabric edge and draw a line.
Draw another line above the first 3 cm (about 1 1/4 in) from the finished edges (NOT from the second line). This last line indicates the desired edge of the hem (where your hem will end when sewn).
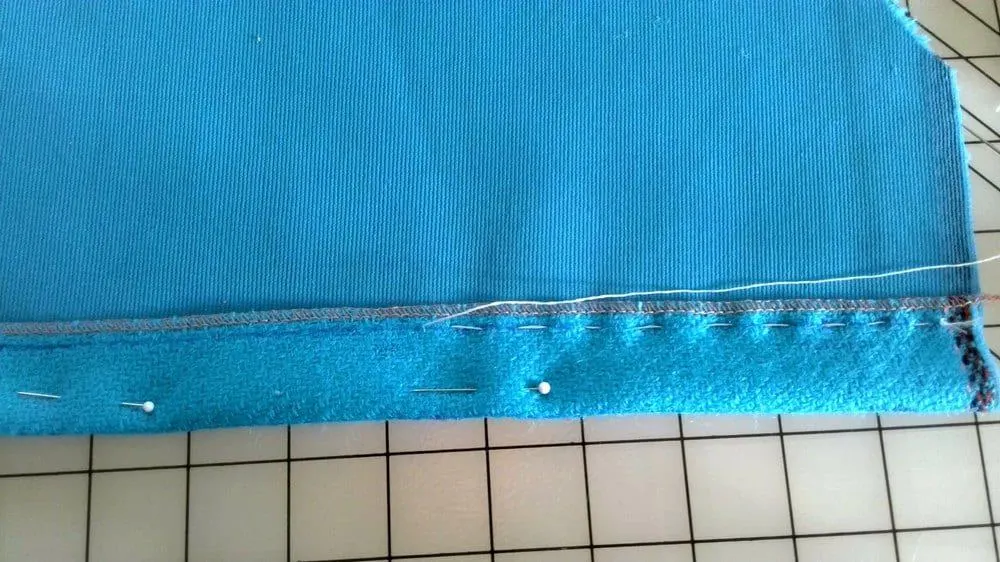
4) Fold the fabric along the second line and pin the fold (but don’t press with an iron yet).
Baste the fabric along the other line (which is 6 mm (¼ in) from the finished edge). Fold the fabric along the basting so the wrong side is facing up as you see in the image below. You can see that the hem’s edge is sticking out.


5) Insert a blind stitch foot and set a blind hem stitch.
Move the needle to the left position and lower the needle so that it slightly catches the fold of the fabric. Turn the presser foot guide screw and adjust it along the fold.
Place the prepared fabric with the edge of the folded hem against the guide of the foot and lower the foot. The white guide of the foot should go straight along the fold.
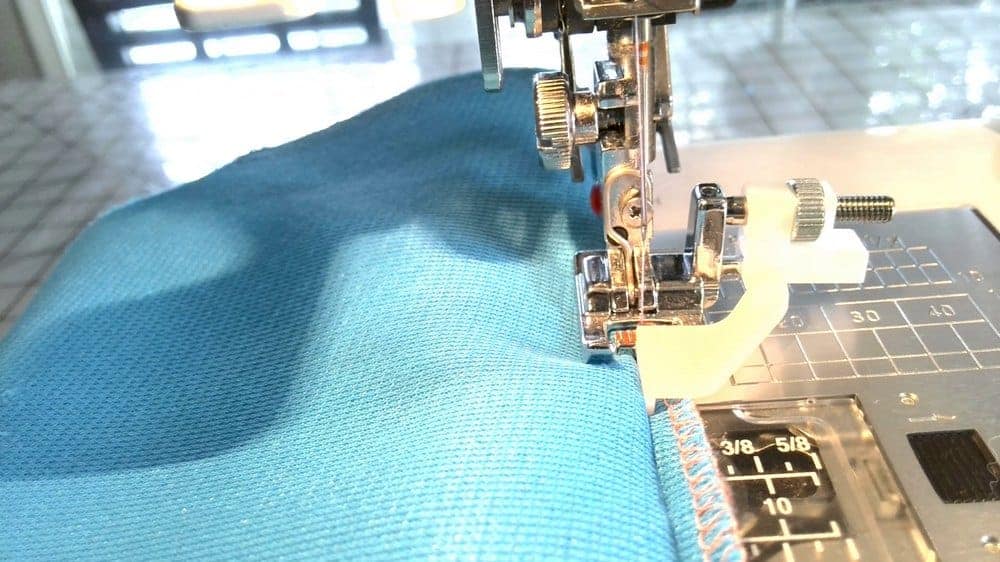

6) Sew slowly, making sure that the fold fits right along with the guide.
Straight stitches should run along the edge of the hem, and when the needle is moving to the left, the needle should grab literally one thread at the fold of the fabric for the hem to look nice.
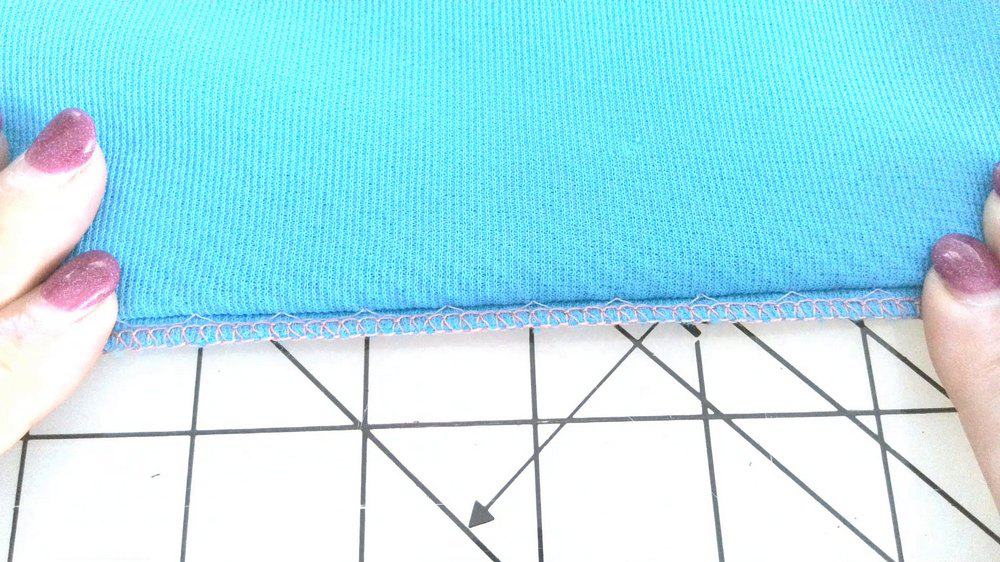

7) Remove the basting stitches and press the hem.
Ok, here is the result with this presser foot. As you can see, the stitching line on the front is again completely invisible.
Did you find this tutorial helpful? If so, save this pin (see below) on your sewing board so you can come to this tutorial later when you are ready to use a blind hem foot, and follow me on Pinterest for more tips, tutorials, and inspiration!

Ready to take the next step in your sewing journey? Check out more step-by-step tutorials from my blog and don’t forget to share!


latest posts
- Think You Know Zippers? This Installation Guide Might Surprise You
- Why Does Your Seam Ripper Have a Red Ball? Discover Its Purpose!
- Topstitching Troubles? This Simple Trick Will Turn It Around Instantly!
- How to Sew Shirring: A Step-by-Step Guide to Elastic Thread Gathering
- Are Self-Threading Needles Really Useful?
- Amazon Spring Sale: Best Choices
- Elevate Your Prom Look: A Guide to 10 Neckline Choices (2024)
- No Pattern, No Problem: Turn Scraps into a Quilting Masterpiece
- Prom Perfection: A Guide to Choosing the Perfect Dress Color (2024)
Phillis
Wednesday 9th of August 2023
Maybe a dumb question but do you mark the right or wrong side of the fabric?
Olga Balasa
Wednesday 9th of August 2023
Right side. There is no wrong question in my opinion and per4sonally I have no issue asking what I don't know.
Lyn
Saturday 31st of July 2021
Hi Olga
Thank you for all your tips and tricks I find them very useful.
Do you have any ideas for storing and labelling sewing machine feet, I seem to be making a collection? My memory isn’t as good as it was and I have to go back to tutorials to find out which foot is which!
I recently made a dress for my daughter and she has asked for the same pattern again but this one is going to be in plain black cotton. Do you have any tips with working with black material? I have pre-washed the material and cut it out. It has gathers under the bust and on the back bodice. I used your dental floss method to make the gathers which proved very easy but I don’t know if it will be so easy on black material.
In anticipation of your help!
Lyn
Olga Balasa
Tuesday 3rd of August 2021
Lyn, I thought about it and I suggest (even if I do not practice this myself) put the foot in a small transparent (ziploc) plastic bag with a label. I bought at some point a Madame Sew feet set and I thought that is going to resolve the issue; it did not. The feet that I used frequently had a tendency to stay on my desk in a tray. Yes, organization is not easy!
Susan Ramsay
Monday 5th of October 2020
When I get stitches that show, I simply clip them off. If there are many in a row, I will redo and try to catch just one or two threads of the fabric. The hem won't fall apart if I clip just one or two "v's". Or left stitches. I think a video of this would help if people have never tried it.
Olga Balasa
Monday 5th of October 2020
You are right there is little you can do but clip them off. However I always sew over by hand no matter how small is the area, I do not like to leave anything not secured even if there is no big danger of unraveling, after all there is no big force pulling of the seam there. A matter of preference, I guess. And it does not happen often.
Corrie
Saturday 22nd of February 2020
Thanks Olga this is very helpful am I right first fold is on the 1. 5 mark then do you fold the 3 cm piece inwards to the 6mm mark I am not sure sorry for the inconveniece. Have a great week.